
Easter Egg Dyeing Tips and Techniques
Will you be dyeing eggs this week as a festive Easter activity with the family? If so, here’s a super simple recipe for homemade Easter egg dye (no need to buy an egg dyeing kit at the store when you most likely have all the supplies you need at home!) and some creative tips to make the whole process fun and easy! Also, be sure to check out my Tips for Perfect Hard-Boiled Eggs!
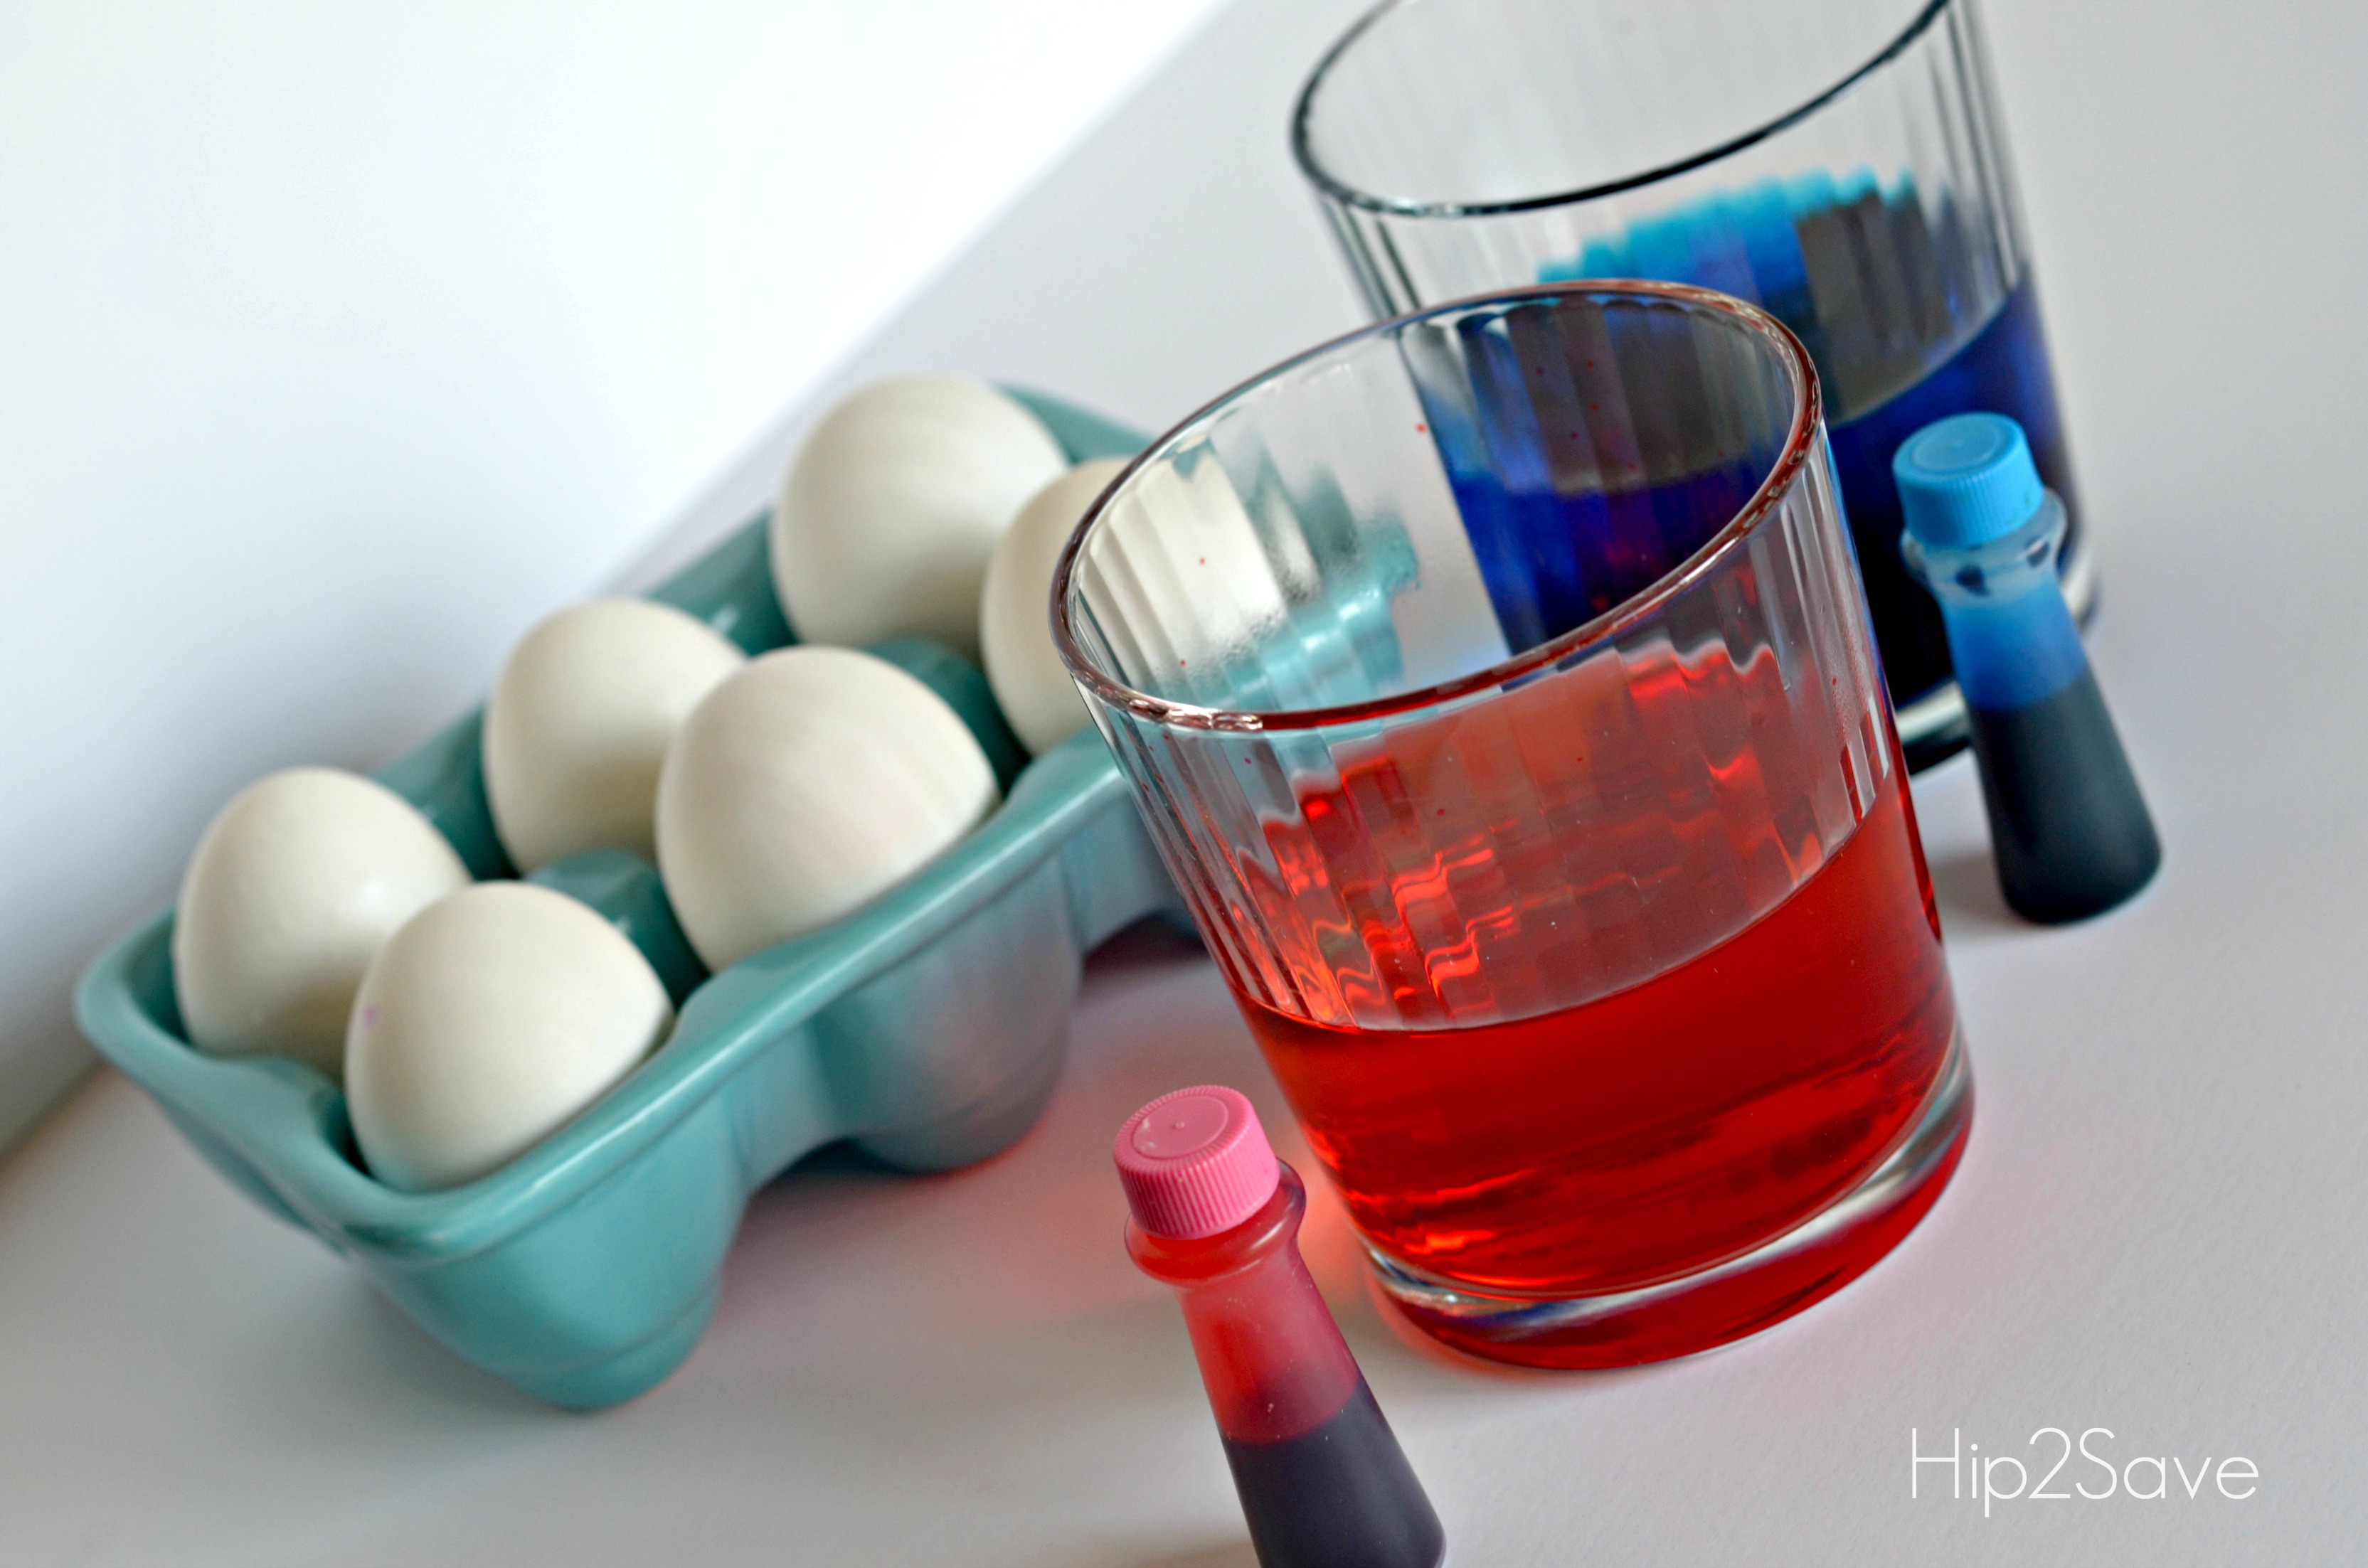
Combine in a small cup or bowl:
- 1 cup hot water
- 1 teaspoon vinegar
- about 20 drops food coloring
Leaving the hard-boiled egg in the dye for under 5 minutes will create lighter hues, while leaving the egg in for 5-10 minutes will create darker colors.
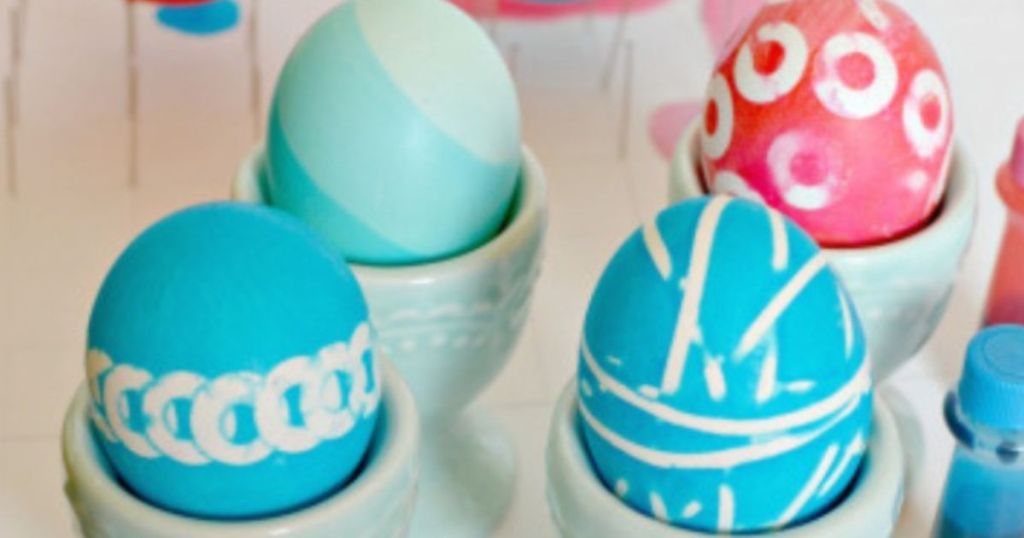
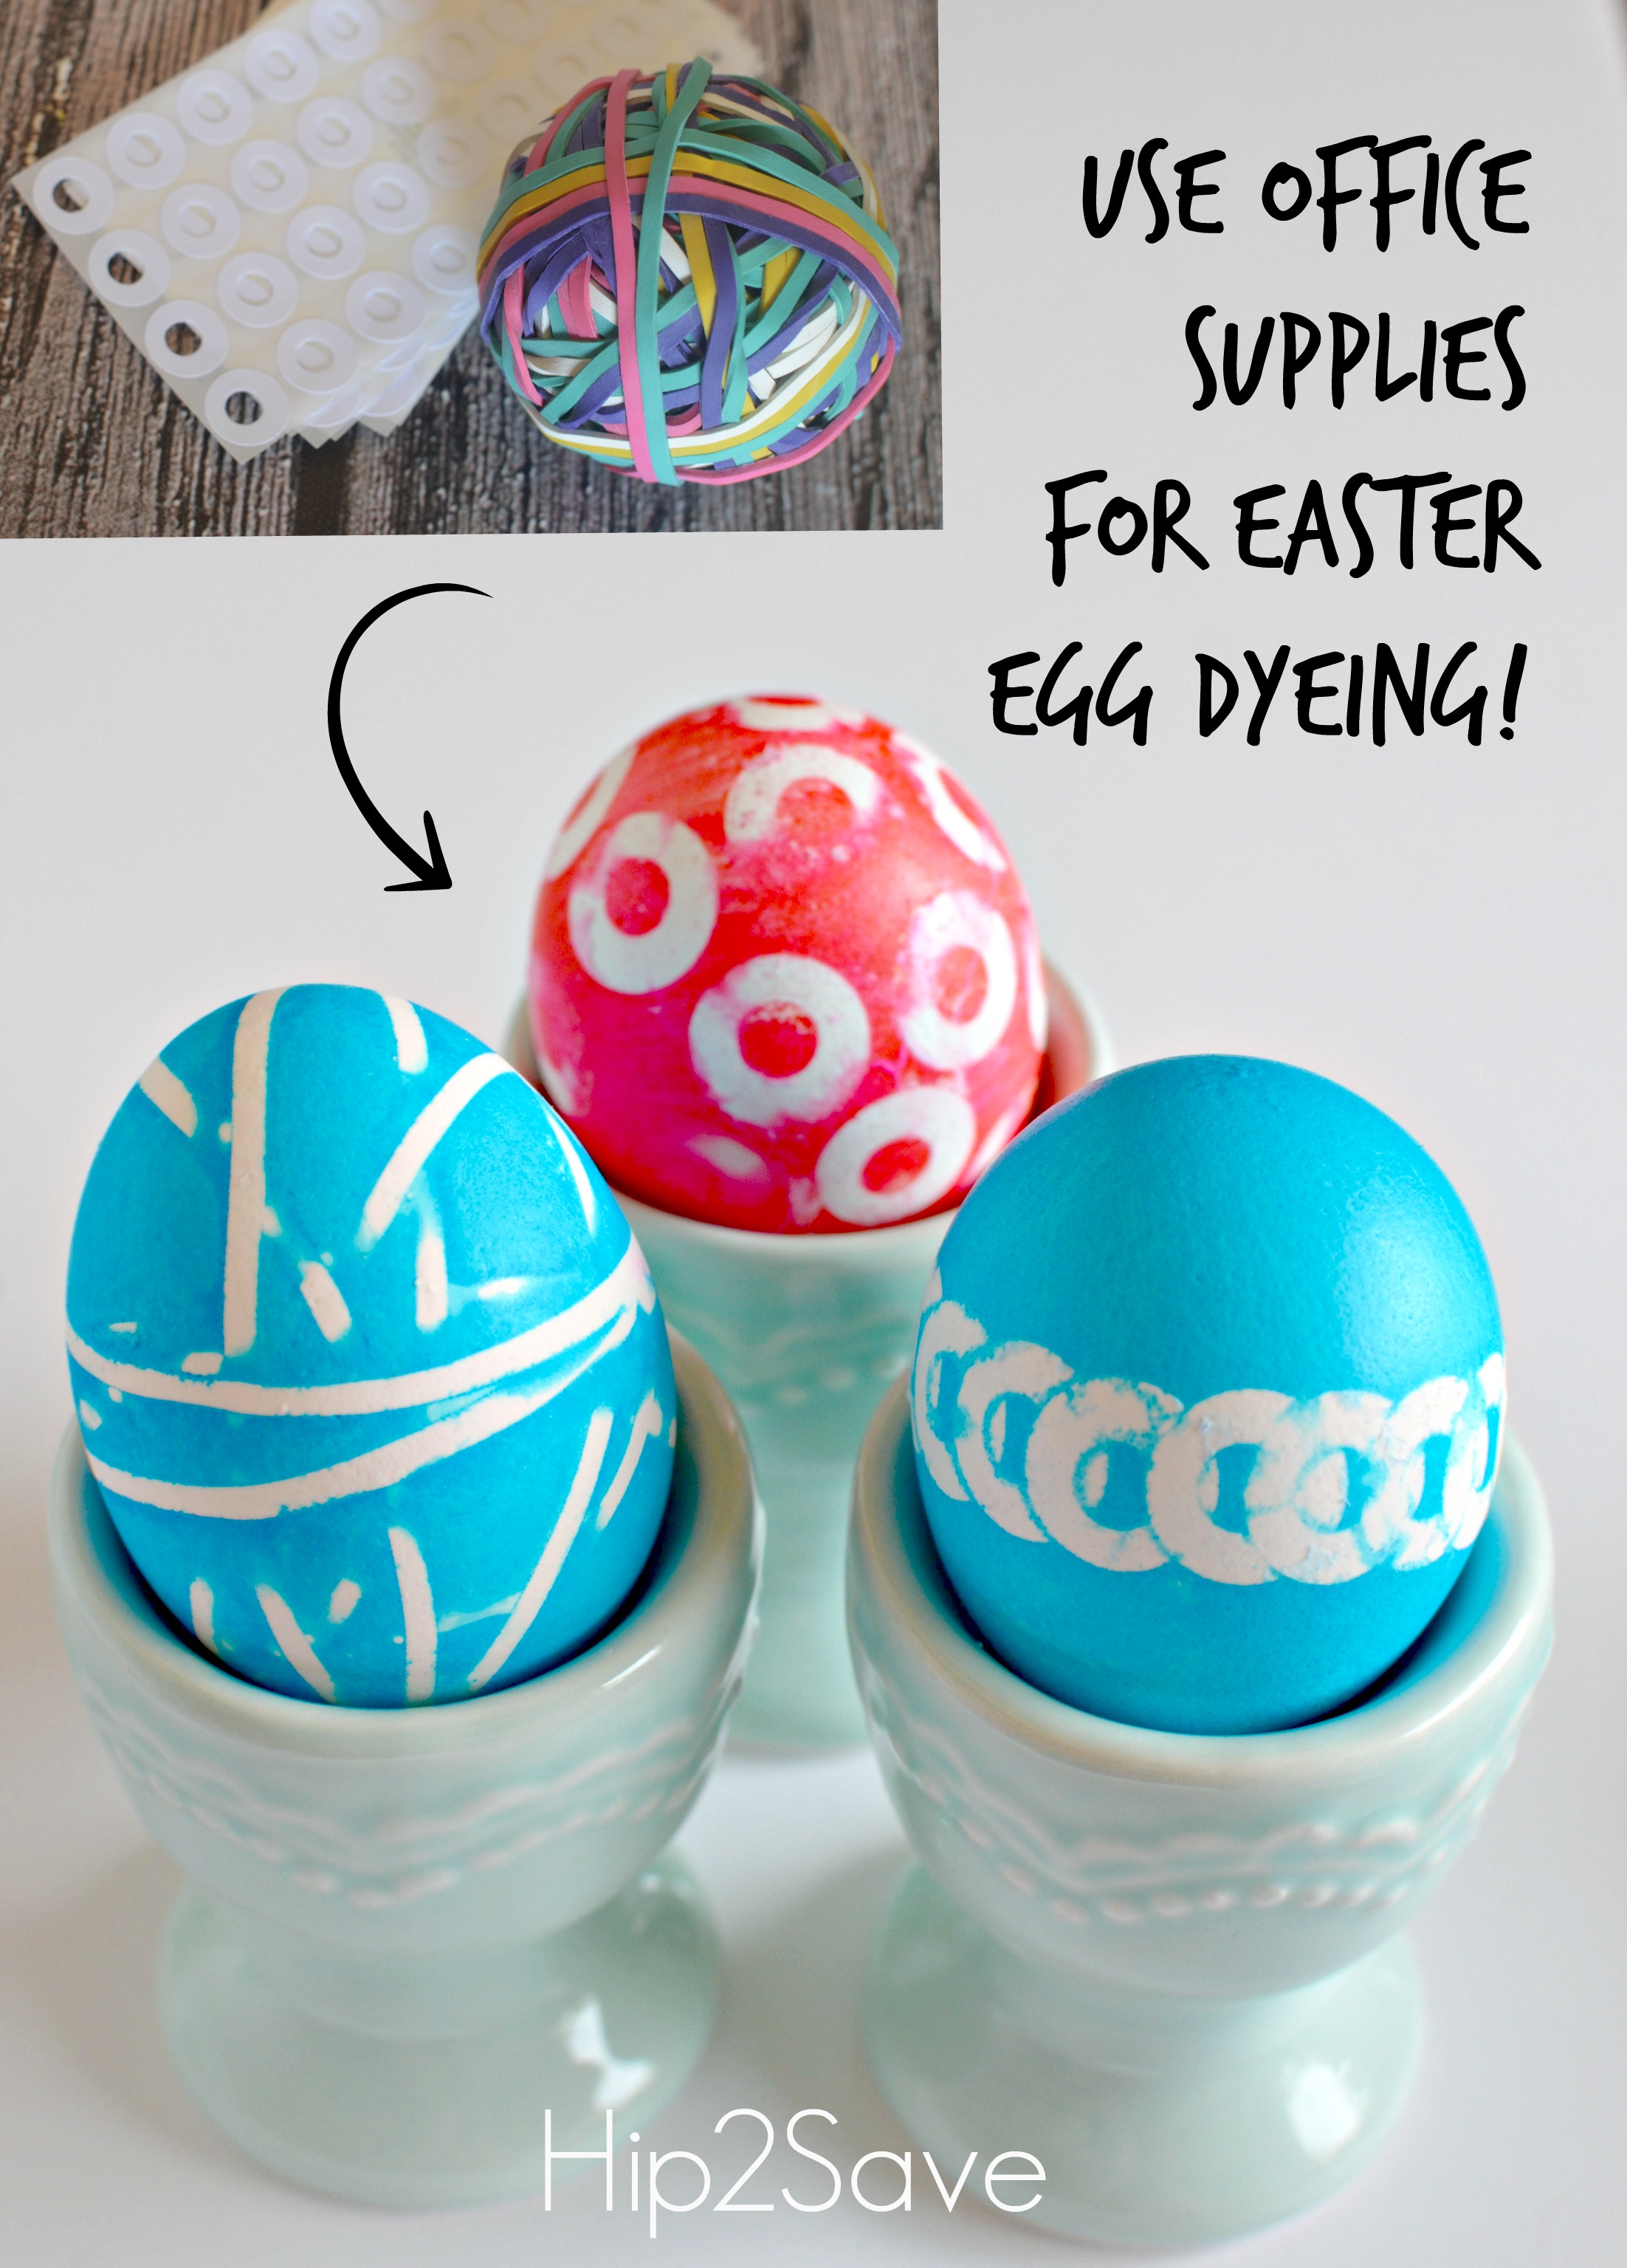
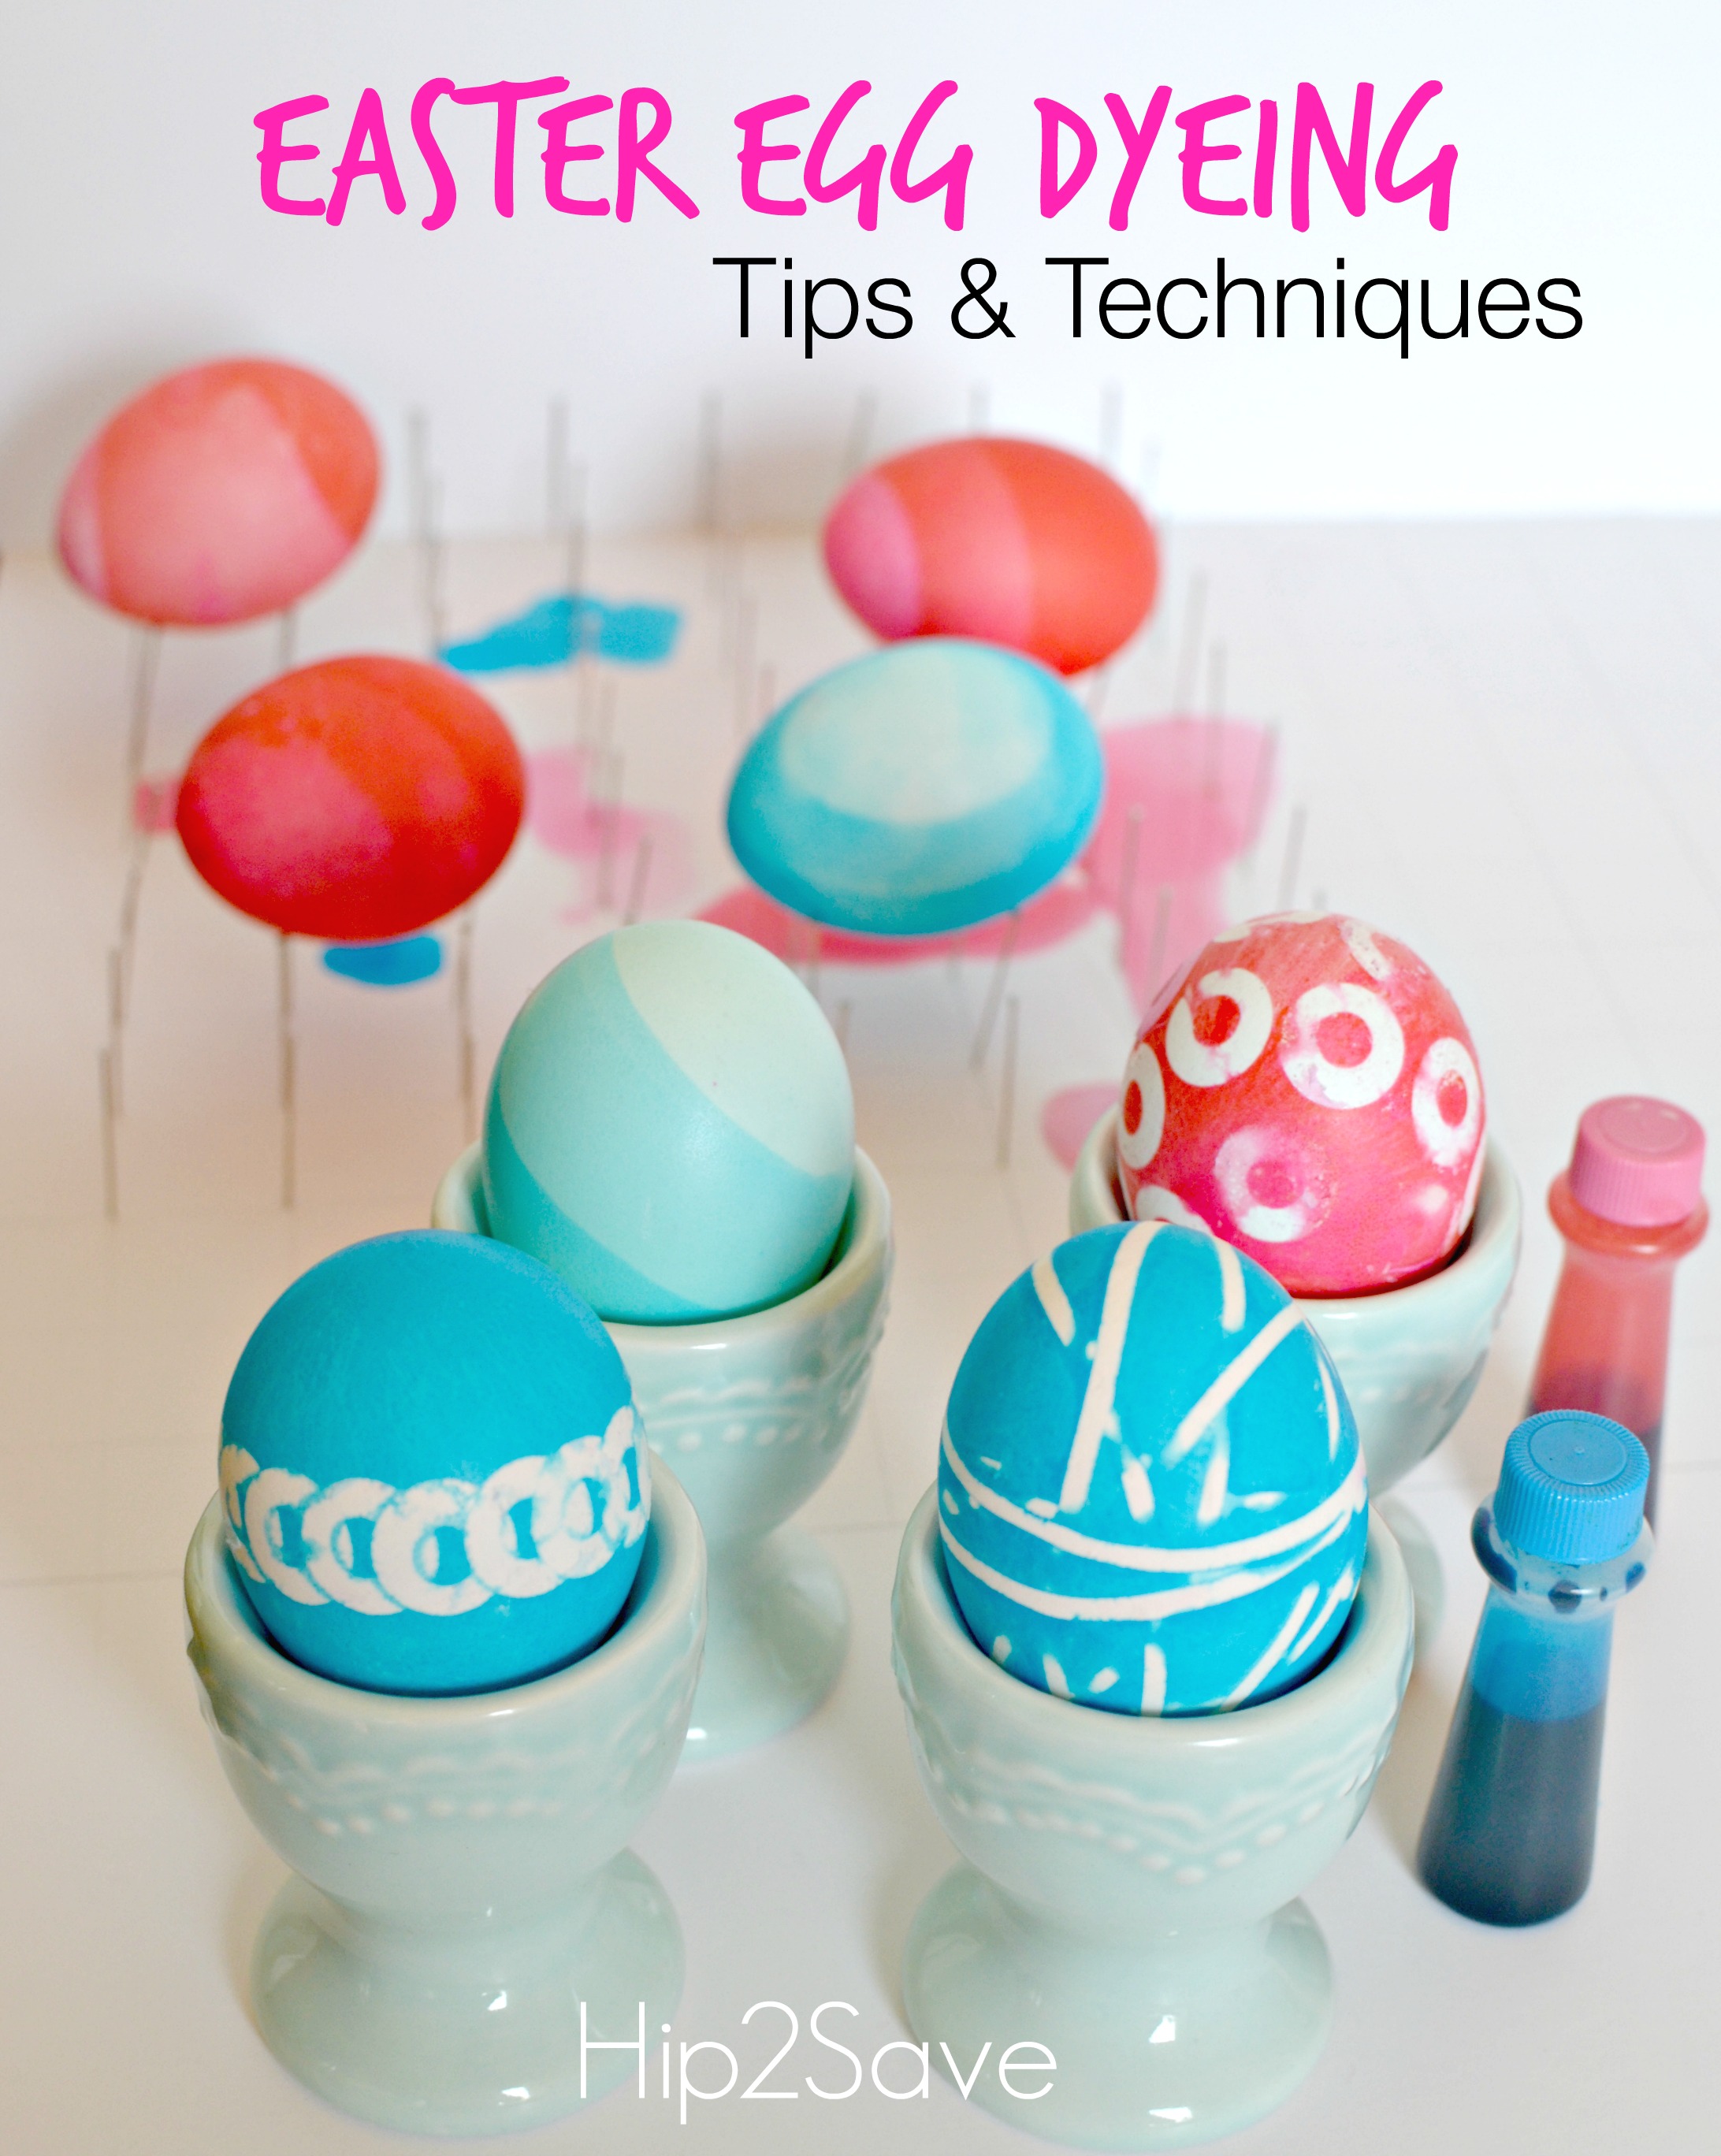
Mask eggs with stickers, tape, and rubber bands before dyeing. Look around the house for any small stickers and rubber bands you may already have on hand. Cutting painter’s tape with scrapbooking scissors and wrapping the egg is another fun masking technique. Below, I’ve used binder reinforcement stickers to create different patterns.
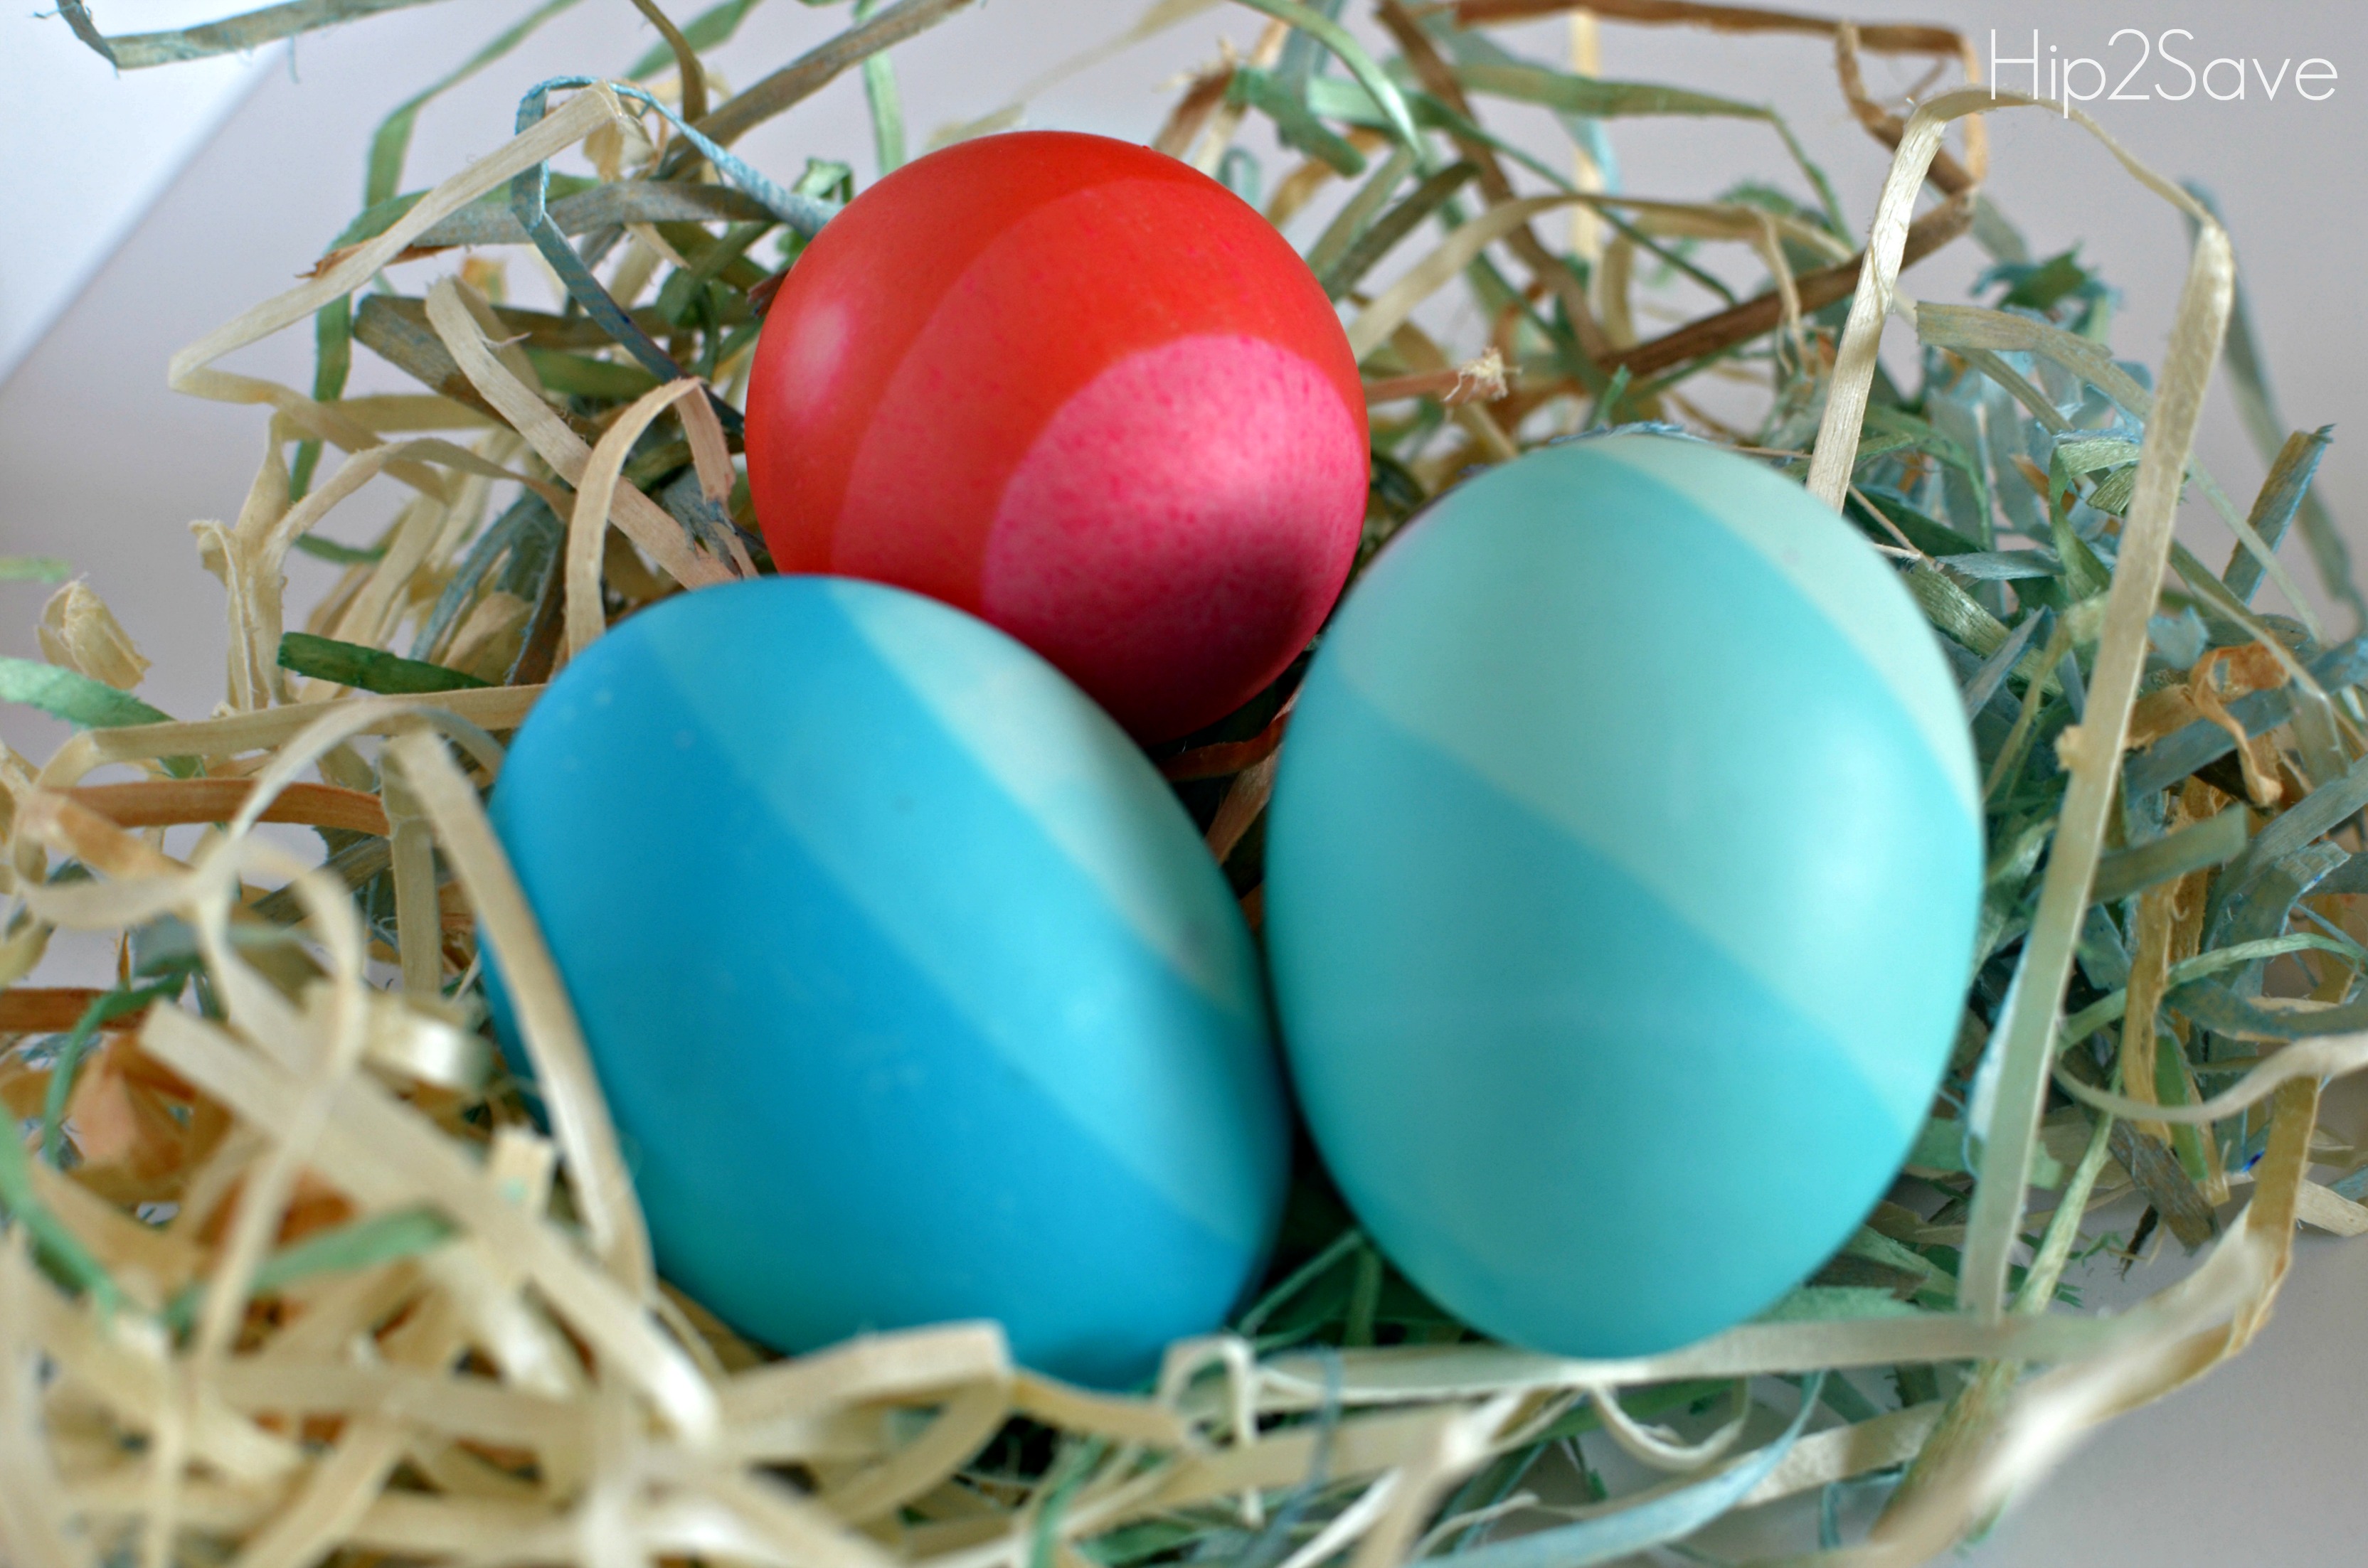
Ombre Dyed Easter Eggs– Create these pretty eggs by filling a small cup of dye so it covers only the bottom third of the egg. After 5 minutes add water until it hits a the top third of the egg. After 3 minutes, pour more water until it covers egg completely and after a few minutes you’ll have three shades of the same color.
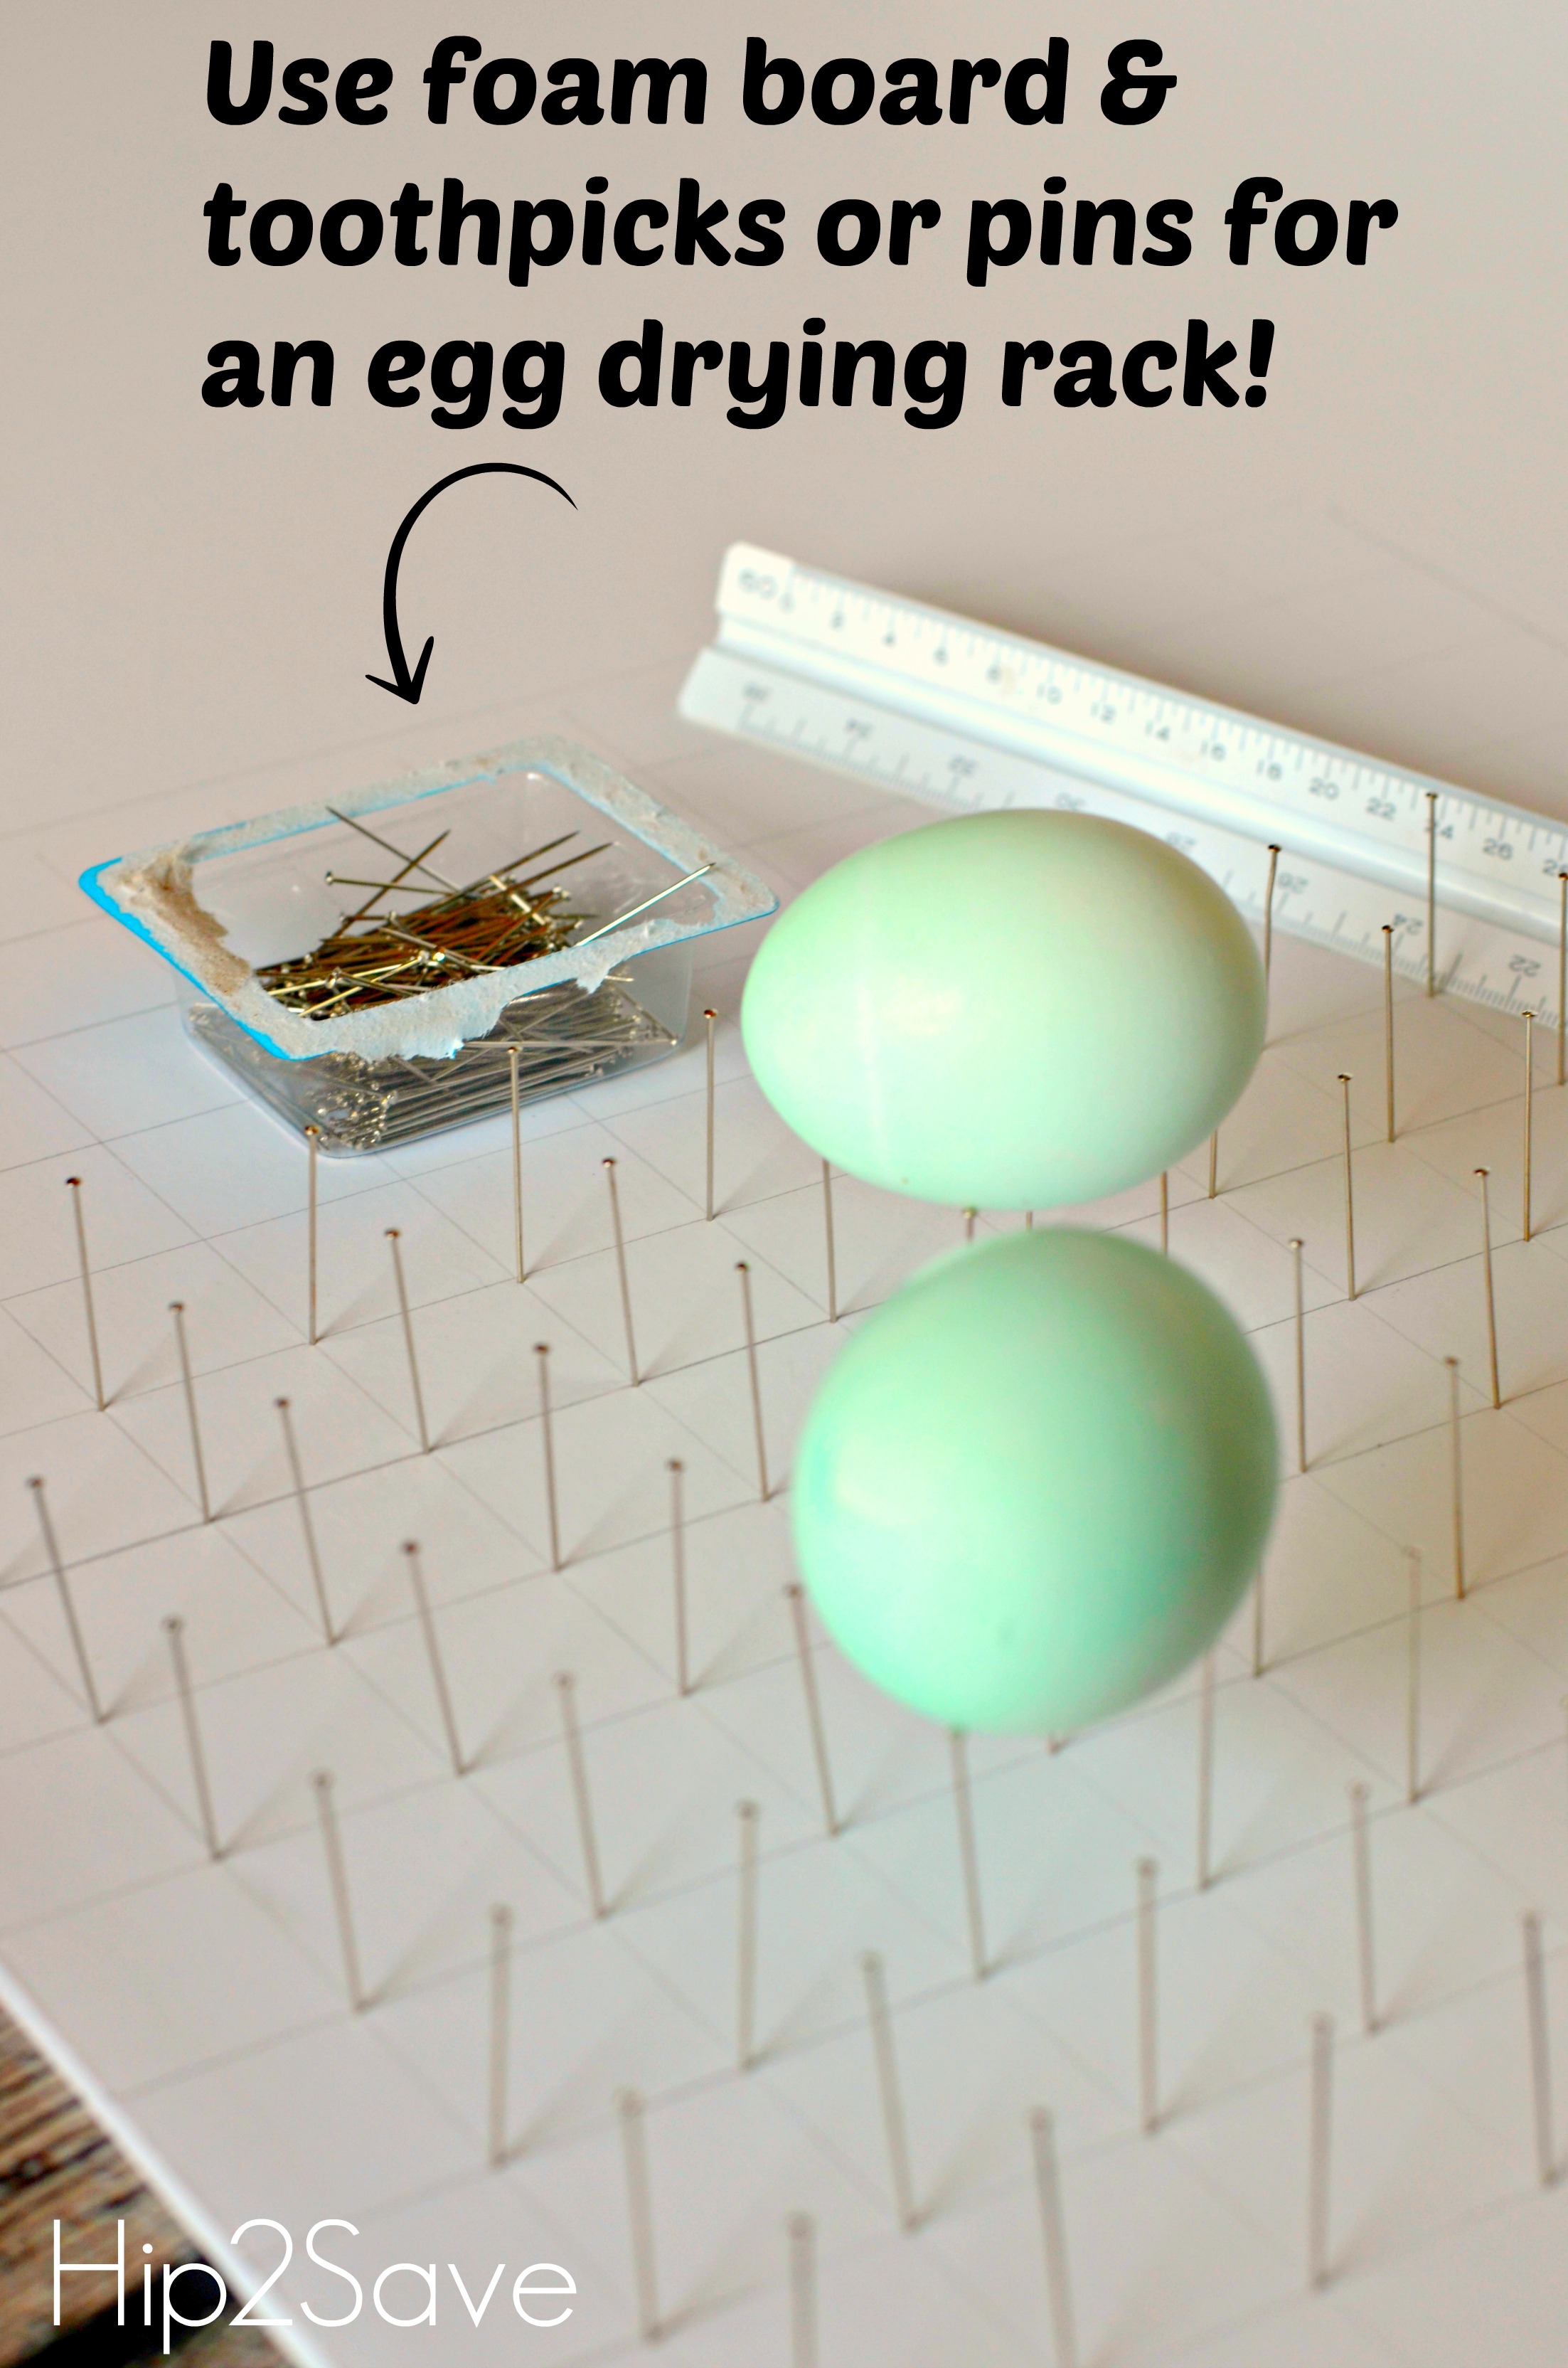
Make an easy drying rack for eggs to avoid the puddles or rings at the bottom of dyed eggs. Draw a one inch grid on a piece of foam board and stick pins or toothpicks in each corner. It supports the eggs for drying and can be re-used next year!
Easter egg dyeing tip with kids: For less mess, consider using a whisk, spaghetti server, or kitchen tongs for dipping eggs. You could also try using a large muffin pan instead of cups or bowls.

Last year I tried the Kool Aid method… Worked really well.. Super cheap and vibrant colors! Love the pin board for drying, great tip! Thanks 😊
Cool thanks for the tip 😊
Wow love the ombré colors . I have to try that. Awesome idea to make a rack with pins. I hate how the bottoms of the eggs turn a different color from sitting in the puddles . Thanks
🐣🐣Omg those ombré eggs are spectacular. Also, those turquoise eggs are so pretty. Such cute taste and great execution, Lina!🦄😻
If you use crayons on the eggs and then dye them it turns out really cool too.
Add two tablespoons of vegetable oil and stir really well before you put the egg in. Leave it for a few seconds and then dip it in another color. Stir well each time. It makes a swirly tye dye pattern.
We love using oil. It gives them a marble look. Each one turns out so unique.
That sounds lovely! 🌻🌻
In our family, only the Easter Bunny can do that kind of egg! Our kids don’t learn that secret technique until they are adults. I was always told as a child that the swirled colors came from the Easter Bunny using the flower petals that we had used in our nests to dye the eggs. The oil also makes them nice and shiny! I don’t stir in between colors and they look more like natural eggs with spots.
Do you add the vegetable oil to the dye to get the marbled look?
Yes. I let the kids dye their eggs first then leave the room while I “clean up”. But before I dump the dye I add the food coloring and dye a few more for the Easter Bunny to bring.
Those ombre eggs are so awesome! i bought an egg dye kit last time and it came with a crayon shape wax to draw designs on the egg. So I guess you can draw stuff on the egg with wax too – works just like drawing with crayons.
LOVE the ombre eggs! So doing that this year!
The dying rack is GENIUS!!