
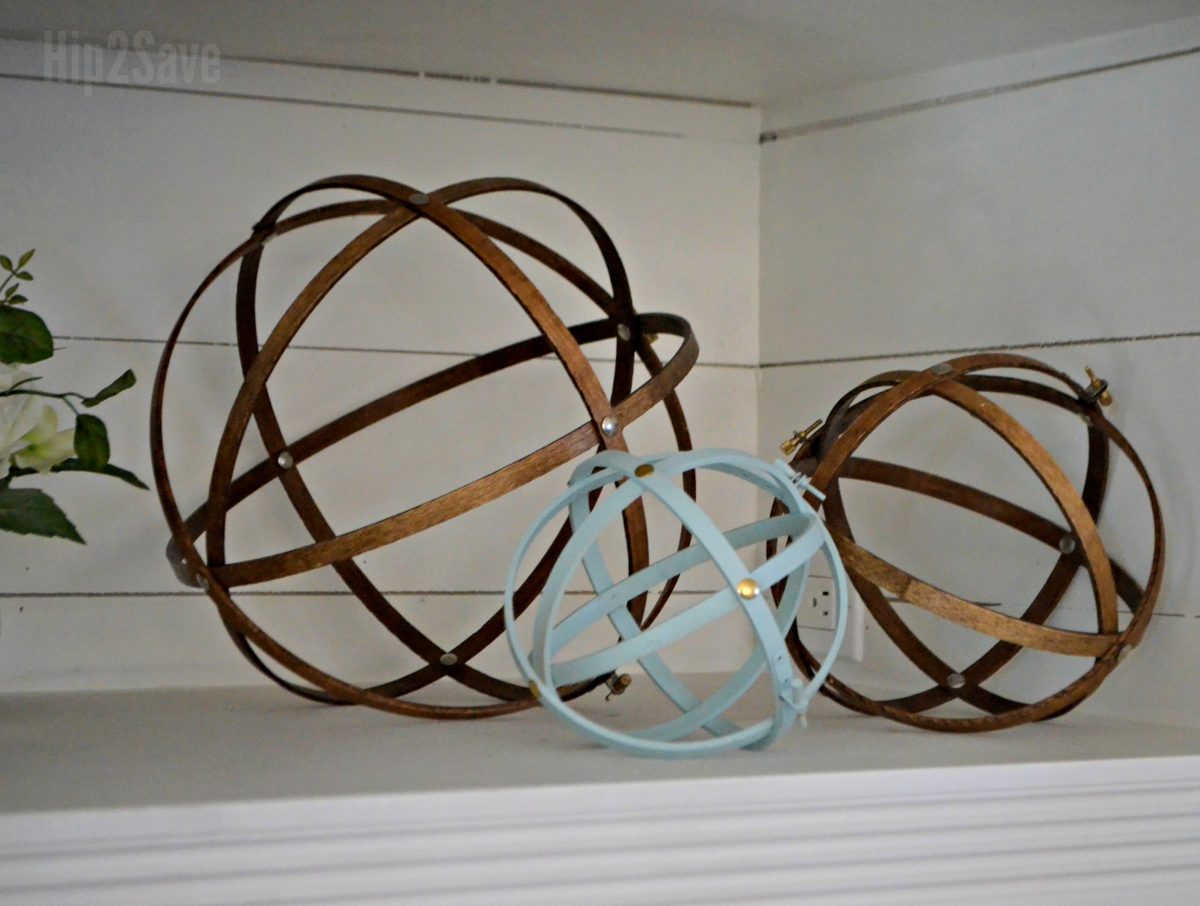
DIY Farmhouse Style Orbs Using Embroidery Hoops
Need an easy and inexpensive farmhouse craft idea?!
Check out these adorable DIY orbs using embroidery hoops. What a fun decorative accessory to add interest and texture to any area of your home, on the cheap!
The best part about this craft is that you can customize your orbs in any size, paint or stain color desired. Depending on what size embroidery hoops you buy, this project comes out to just several dollars per orb, while real orbs are sold in home accessory stores for MUCH more!
It turns out to be a pretty great decorating hack!
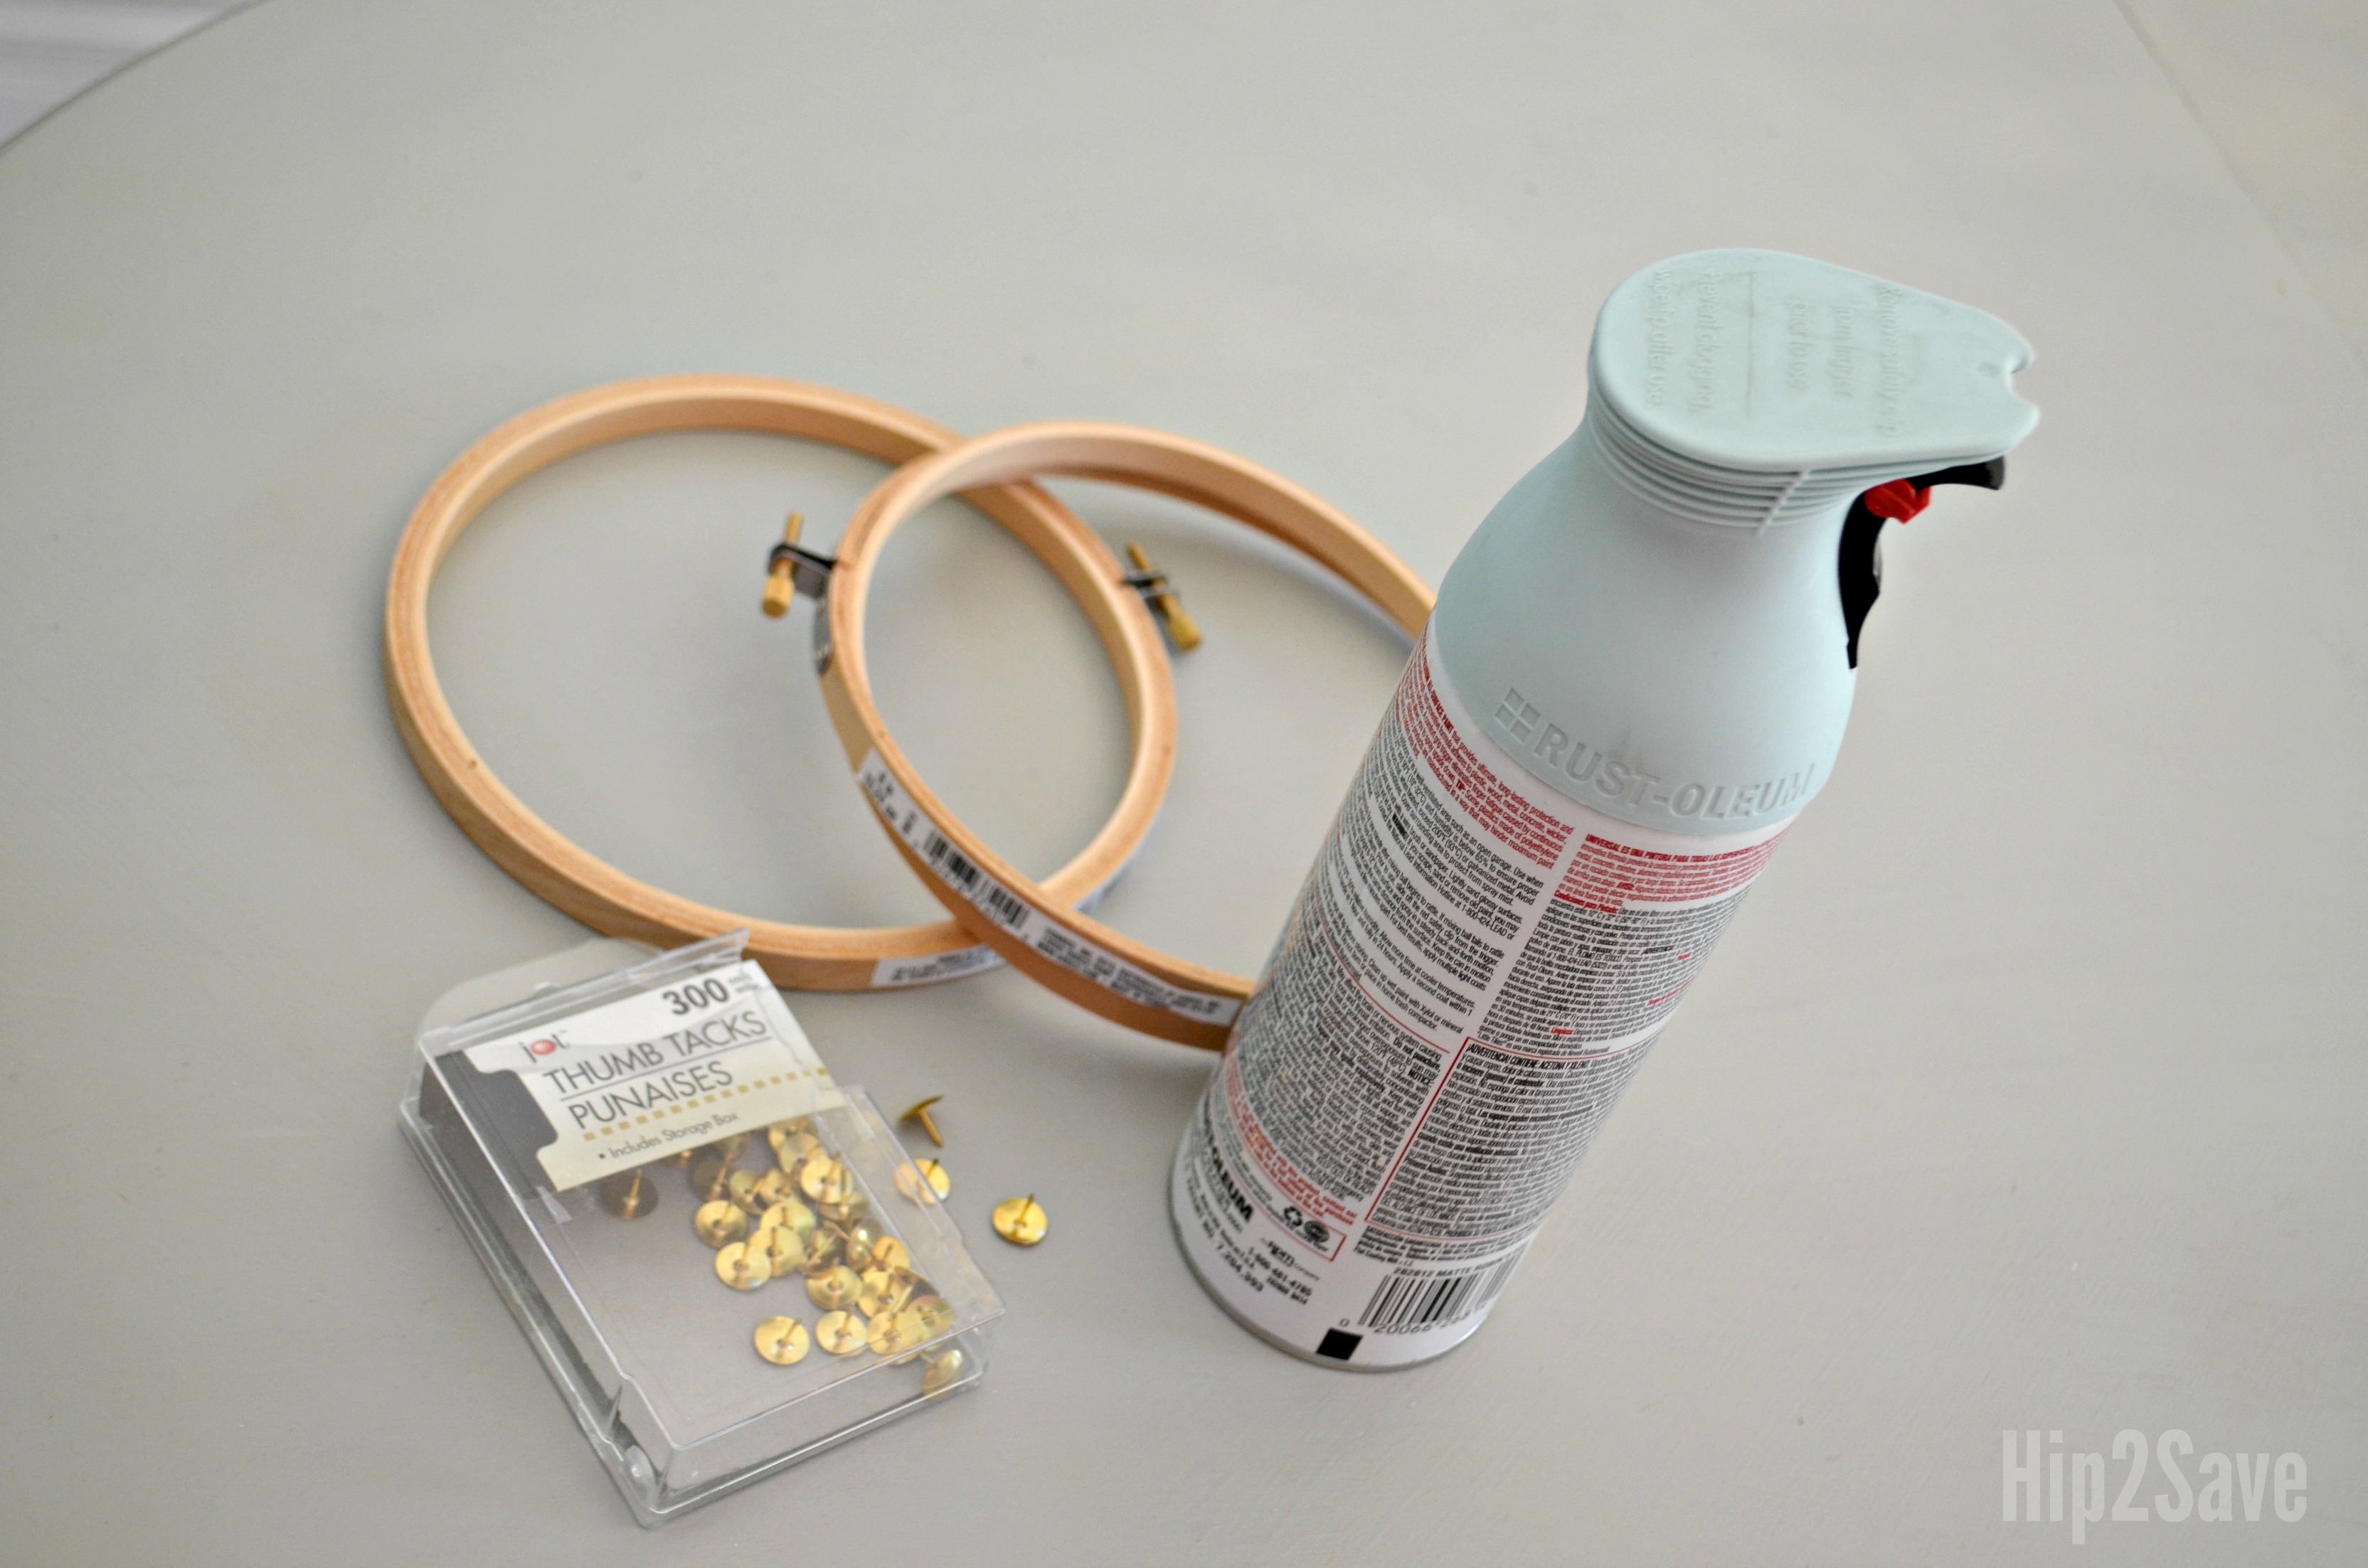
Supplies Needed For One Orb:
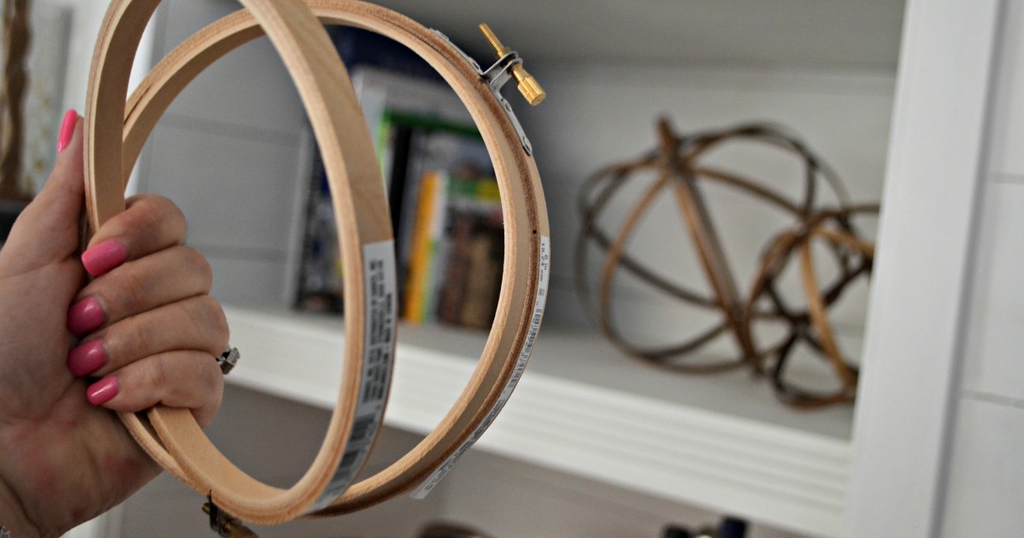
- 2 sets of 6-inch wood embroidery hoops (4 pieces in total)
Try Amazon.com , Michaels.com, or Walmart.com for Embroidery Hoops - thumb tacks *optional
- desired spray paint, craft paint, or wood stain
Directions:
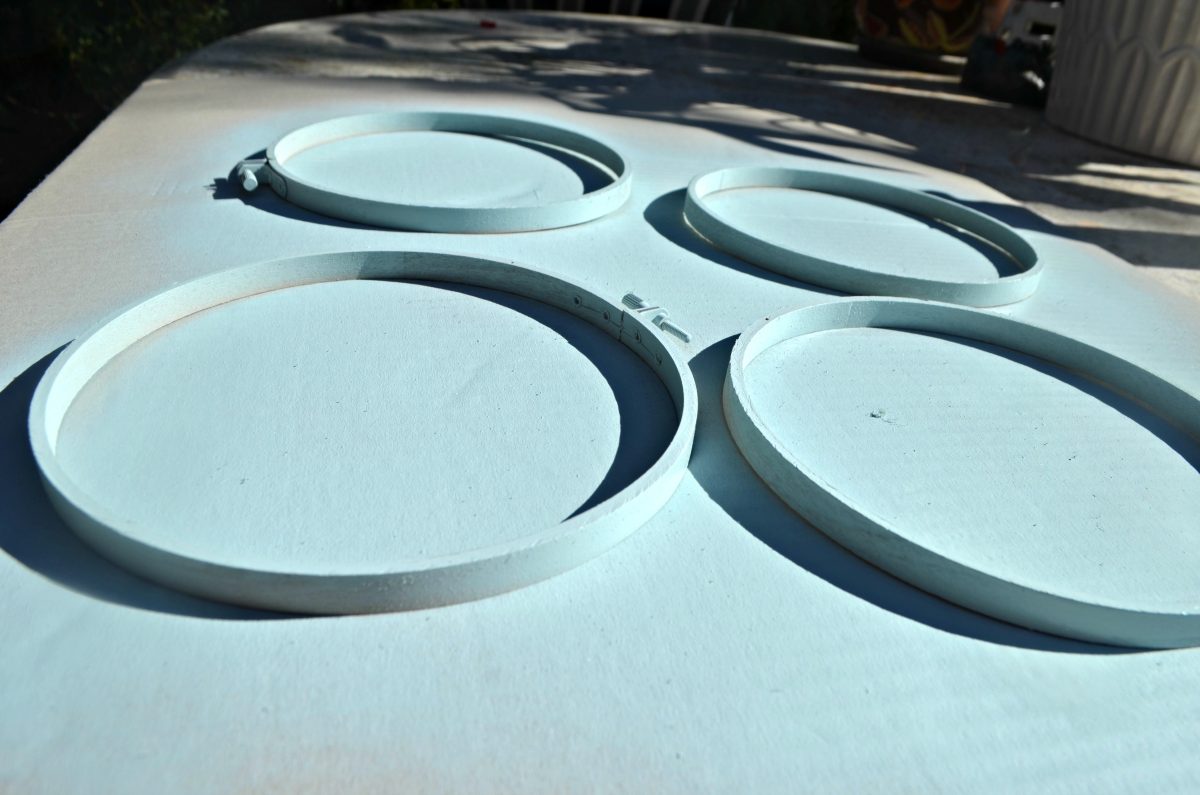
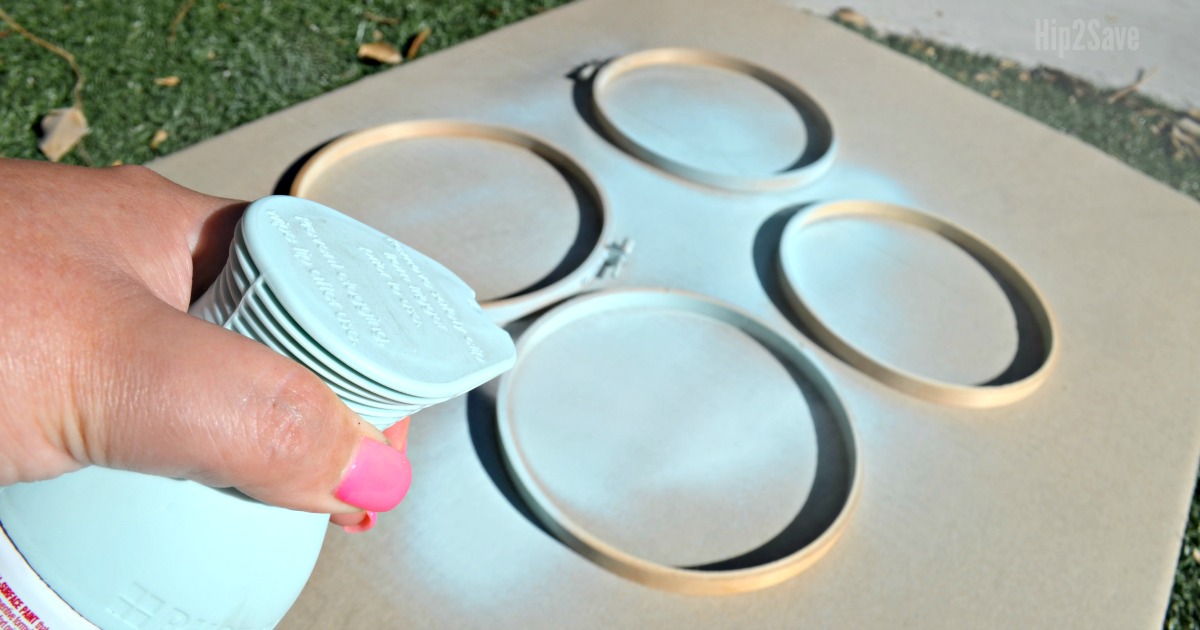
1.) Separate two sets of embroidery hoops and either paint, stain, or leave them as is if desired. You will have four separate pieces. (Pictured is Rustoleum brand spray paint in Robin’s Egg Blue.)
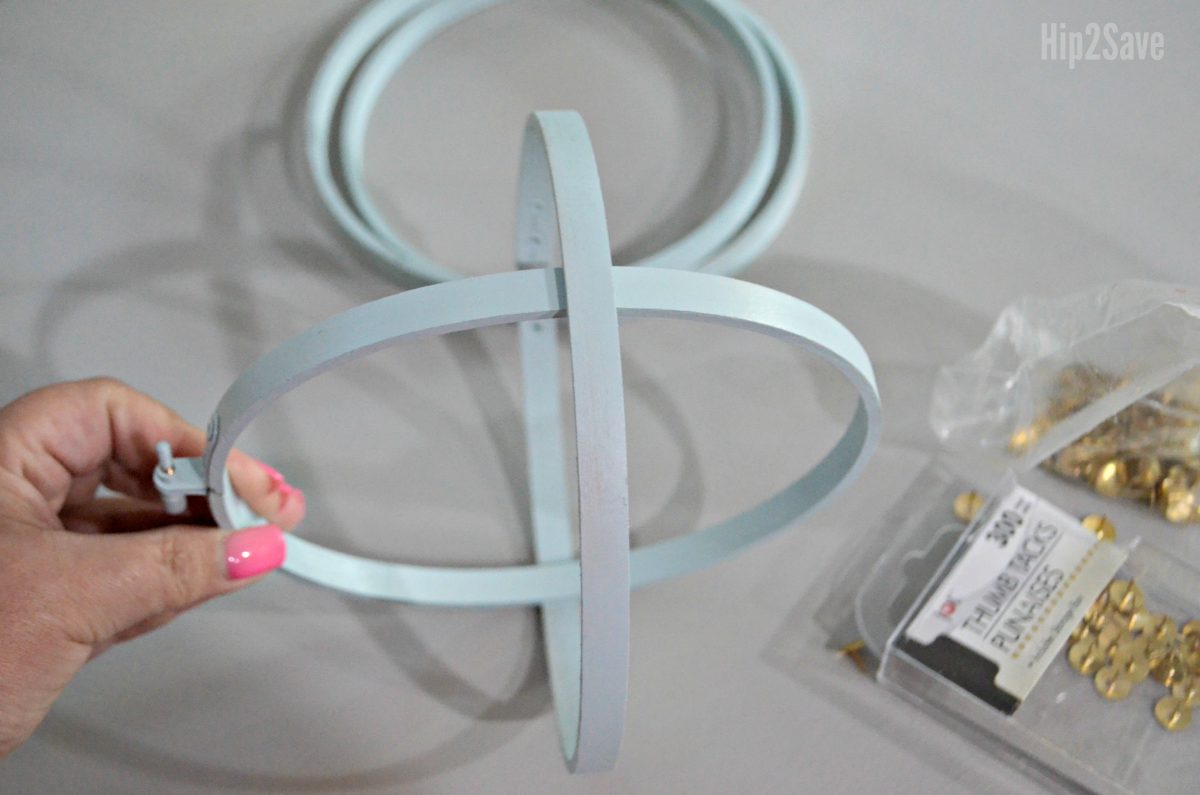
2.) After they are completely dry, grab the two hoops that have the metal locking mechanisms, and Intersect those two. Just put one inside the other.
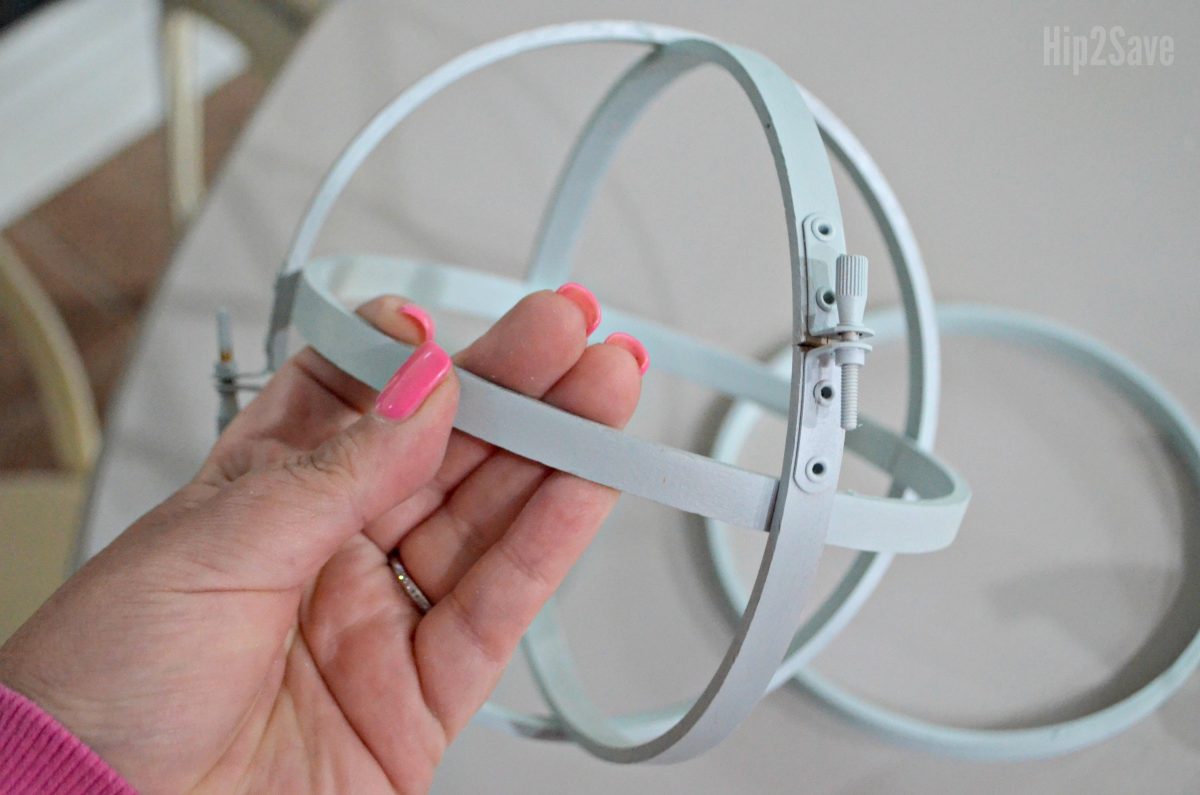
3.) Slide the other two hoops, one at a time, inside and move them around evenly so they form a sphere. Make sure they are going in the opposite direction as the first two hoops.
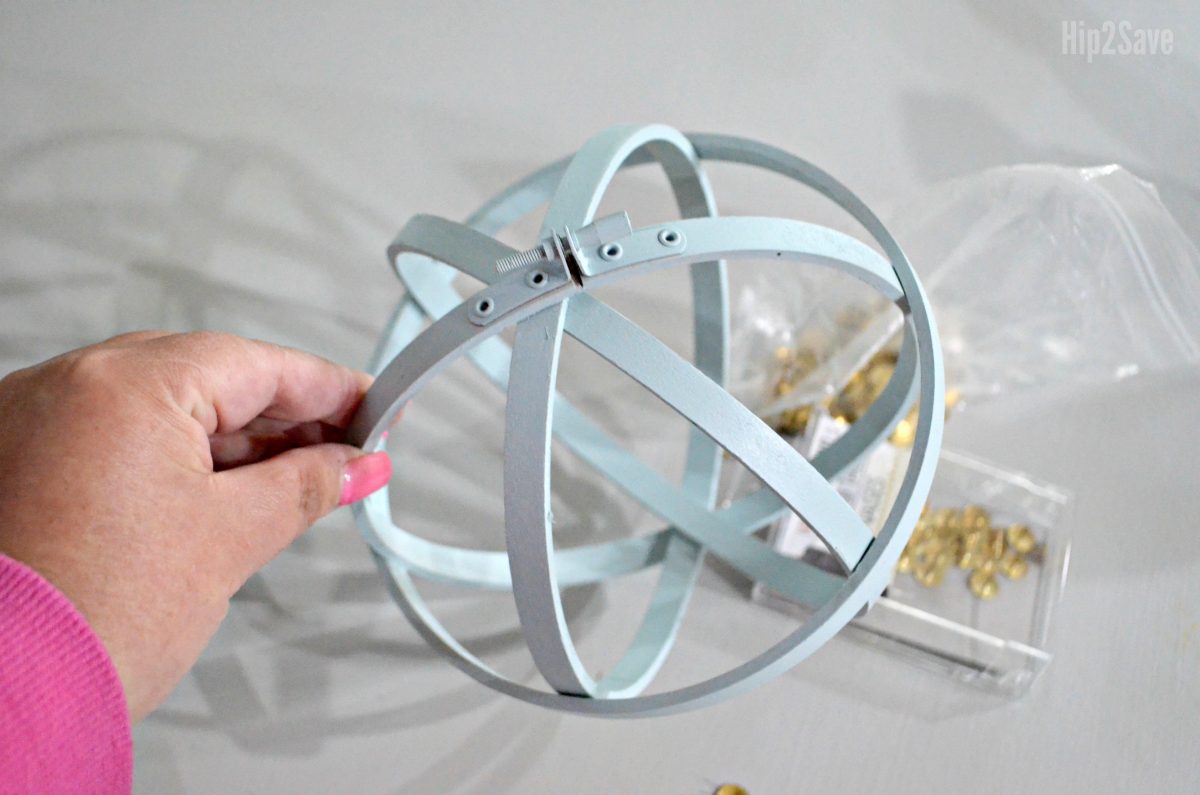
4.) Manipulate orb until you get it evenly spaced and arranged how you’d like it.
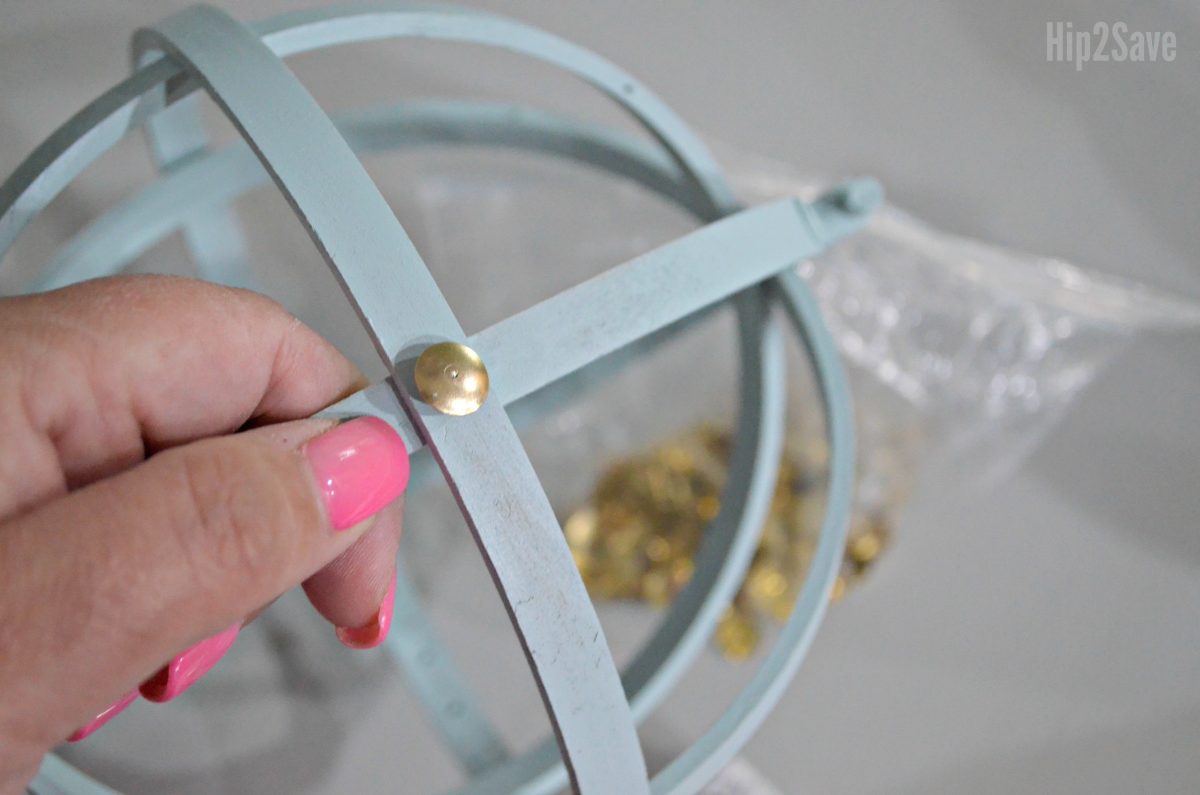
5.) Optional Step: Attach thumb tacks to each intersecting point. I like the look of the tacks, and I think it helps keep them in place, but this is up to you! You can also leave orb as is instead.
Hip Tip: It helps to use a set of pliers to push in stubborn pins that may not go in easily.
OH MY GOSH! I love these orbs, and they are so fun to make.
What a cute craft idea that’s also super easy to make. I added the little blue one next to these larger stained orbs I had previously made.
You could make these in any color or stain to fit in with your decor! I think a few of these would make a thoughtful gift idea, too.

Just style a few orbs together as a group or feature one in an arrangement with other accessories. So pretty!
Written by Lina for Hip2Save. Lina is a proud mom of 2 small kids who loves photography, all holidays, cooking, thrift store makeovers, bargain shopping, and DIY makeovers. Her goal is to create a beautiful life and stylish home on a dime! To see all of Lina’s DIY/Crafts created just for Hip2Save, click here.


These are so cute. Thanks for sharing the idea.
Thanks Kayla!
Cute! I’m missing step 4?
I saw that, too. Step 3, then 5! Wondering, too!
Sorry- couldn’t count today! fixed 🙂
No – I just numbered incorrectly – fixed and THANKS Ann 🙂
So cute
Thanks so much!
How cute!
Thanks Jenn!
Oooo, a sturdier way to make lighted Christmas lawn ornaments. Thanks for the idea and instructions!!!
Sure- That sounds like a fun plan 🙂
Lina im forever in awe of your creativity….
Pinterest
Thanks for your kind comment Liz! I appreciate it so much. 🙂
Great project!
Thanks so much!
I love these! Thanks for sharing the idea. I’ve been looking for something for my dining room and these are perfect!
Yay – enjoy!
I love this design. It looks so easy to make but so cute afterwards. I love it
Thanks! Yes super quick and easy 👍
I made some a couple of years ago. They turned out really cute. I had some hoops sitting around not earning their keep. Lol.
Awesome! Thanks for sharing 👍
These would be great with battery operated lights inside! And if you got a larger size with the lights inside they could make great pendant lights! You could customize them to match any room!
I agree. Fun ideas!
What a creative idea, great job!
Ah thanks!