
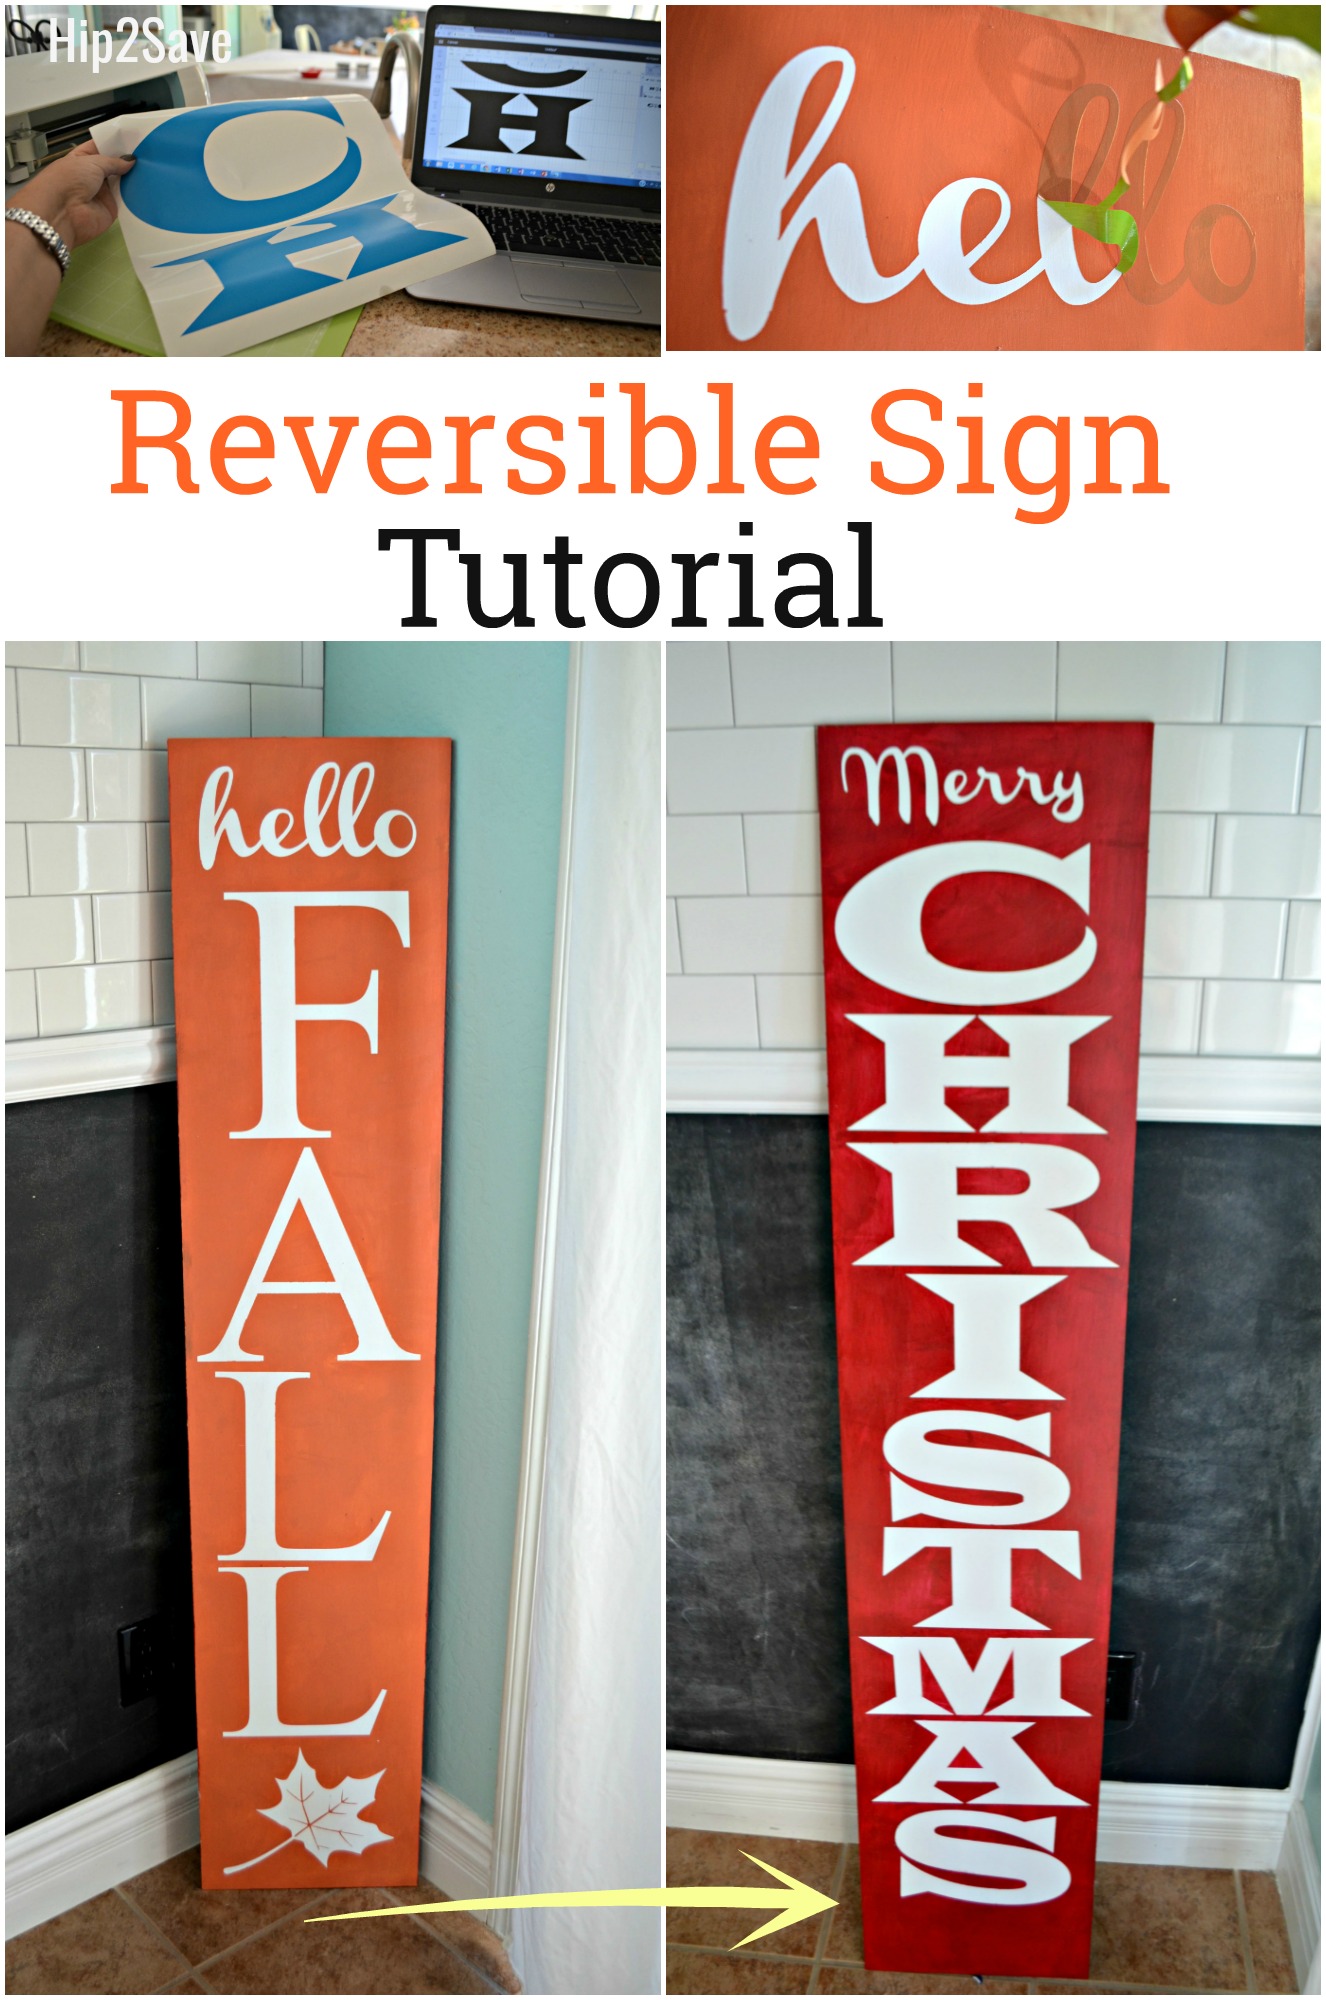
Reversible Wood Sign Craft (Fall and Christmas)
Celebrate fall (and Christmas too) with this fun DIY project!
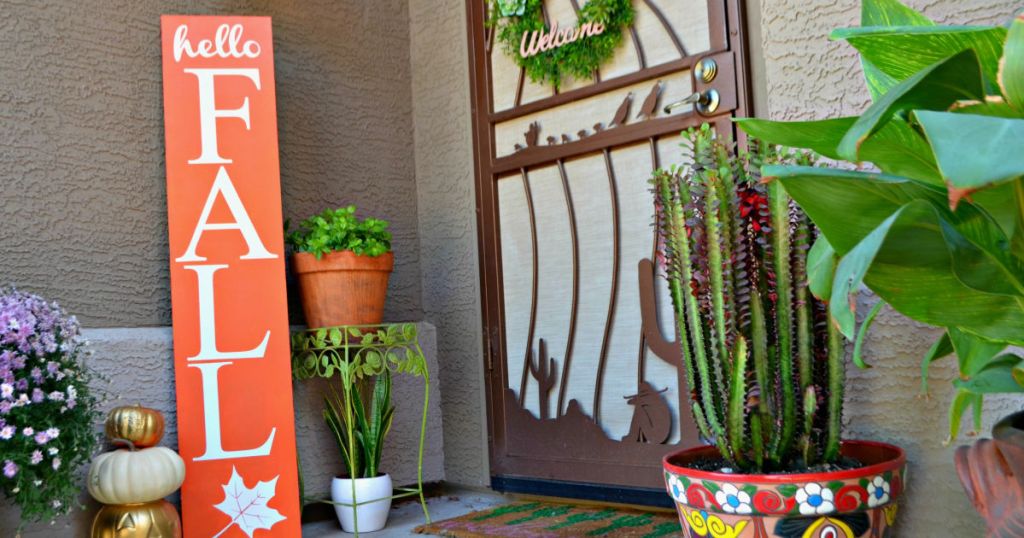
Here’s how you can make one sign to display on your porch for multiple holidays! I love the idea of getting double the use out of one piece of decor, and this is such a fun painting project too.
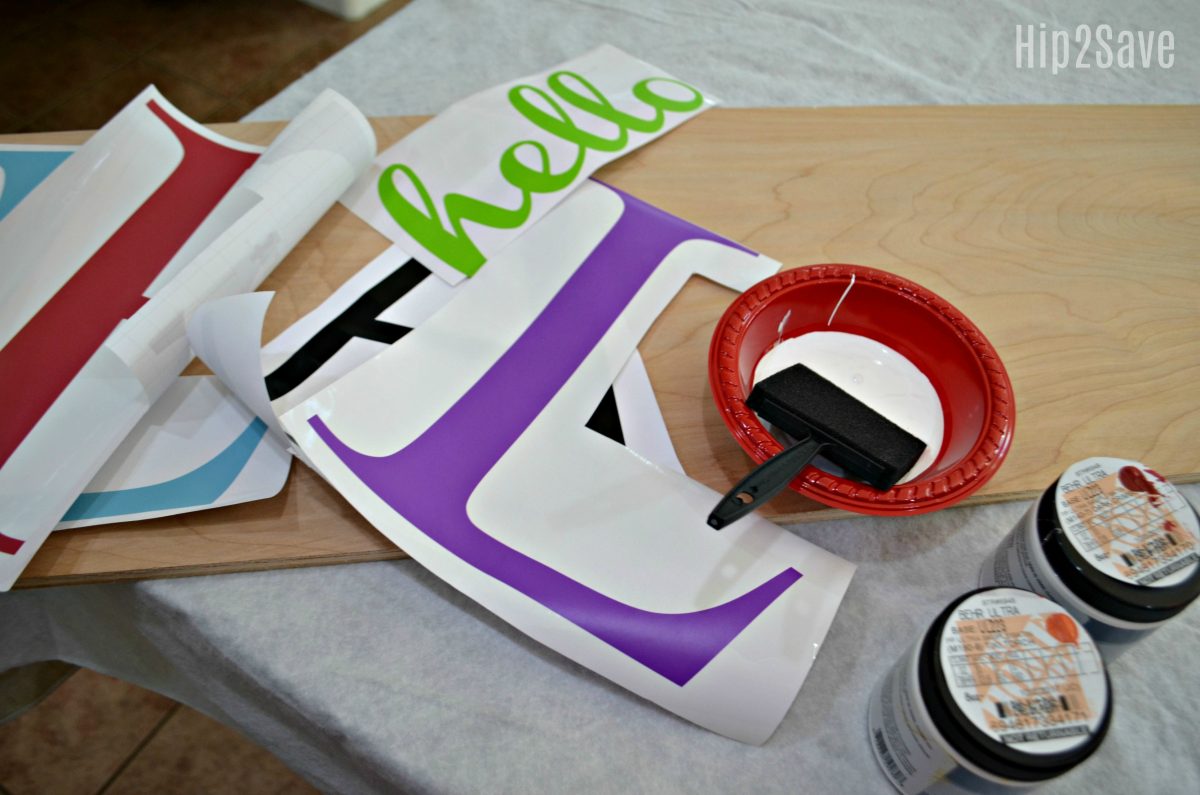
To get the result of white lettering, I painted a scrap piece of wood we had in the garage with white paint. Then I cut and applied vinyl letters and painted the whole sign again using a brightly-colored paint. After the vinyl is removed, you’ll have a festive sign with crisp, beautiful lettering!
Reversible Painted Wood Sign
Supplies Needed:
- Tall Piece of Wood (mine is 5ft x 1ft)
- Adhesive Vinyl
- Transfer Tape
- Vinyl Cutting Machine (such as a Cricut)
- White, Red, & Orange Paint
- Paint brushes, sponges, or a small roller
- Polycrylic Clear Coat (to protect your sign afterwards)
Directions:
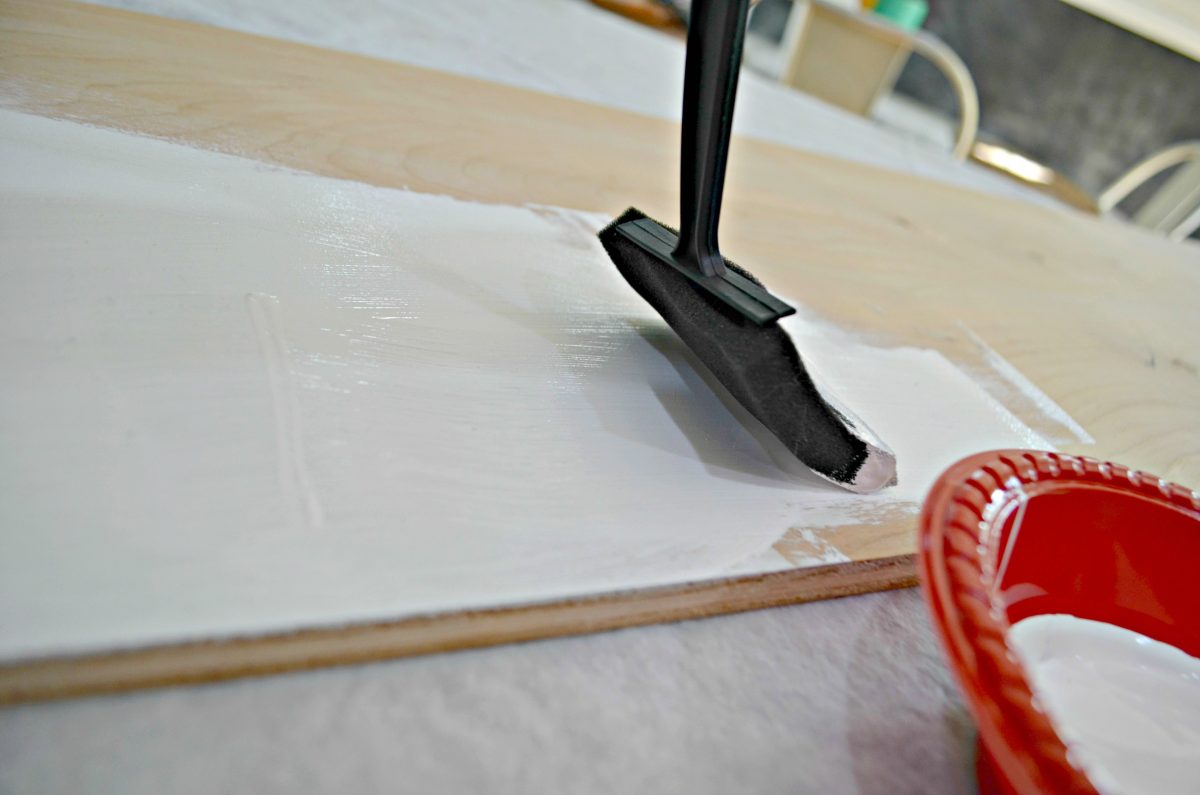
1. Paint both sides of wood in white. Let dry completely.

2. Cut all letters using a vinyl cutter, and weed out vinyl surrounding each letter.
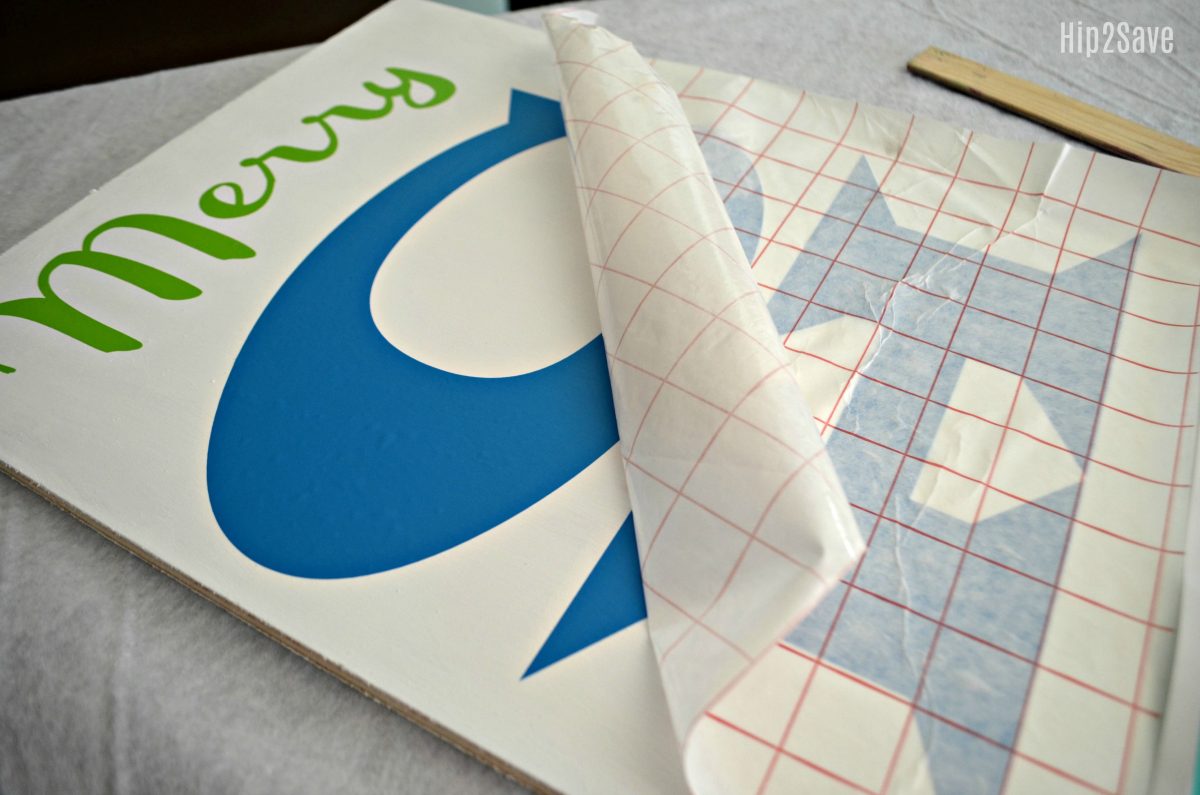
3. Use transfer tape to apply vinyl onto the wood sign.
Make sure to smooth out any bubbles or wrinkles well to avoid bleed-through of paint on the sign. Tip: I used a ruler and level to make sure I was applying letters straight. Your phone with a level app can work in a pinch!
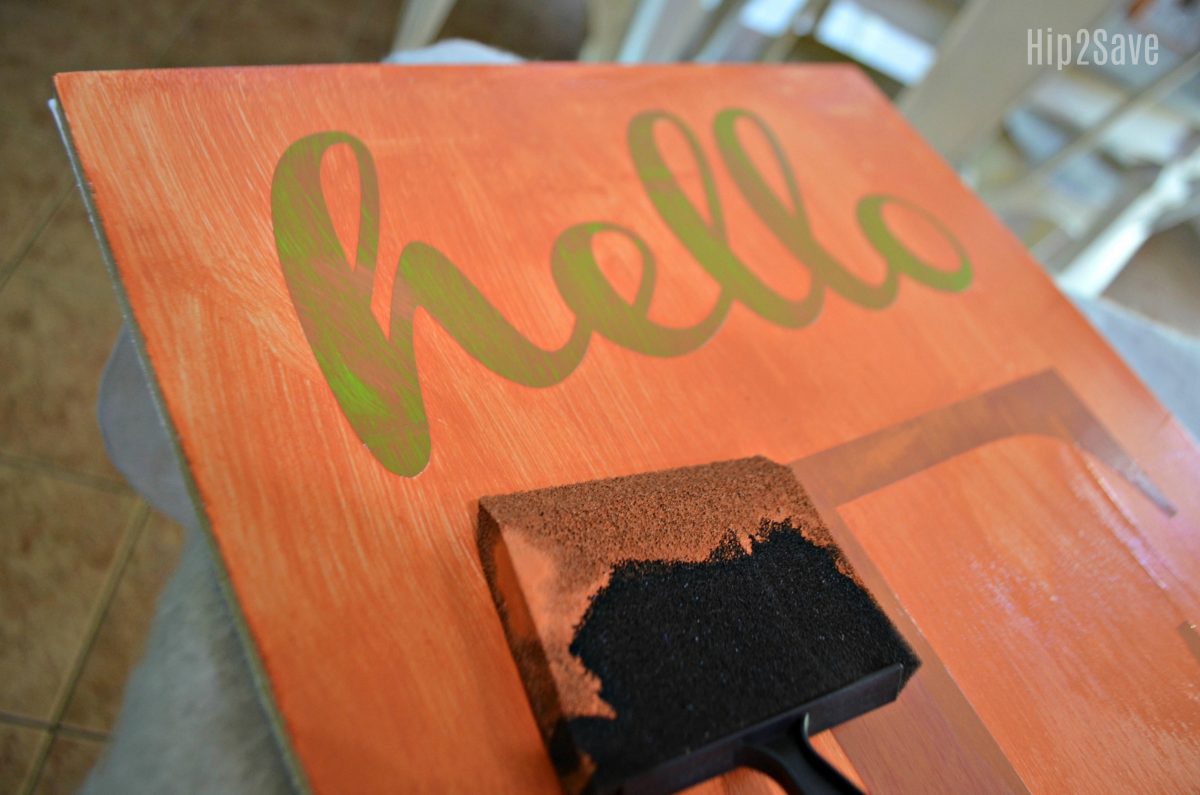
4. Paint the sign all over with the desired color on each side. This may require a couple of coats of paint.
On my sign, the fall side is painted with a color called Tiki Torch and the other Christmas side is called Dark Crimson, both by Behr.
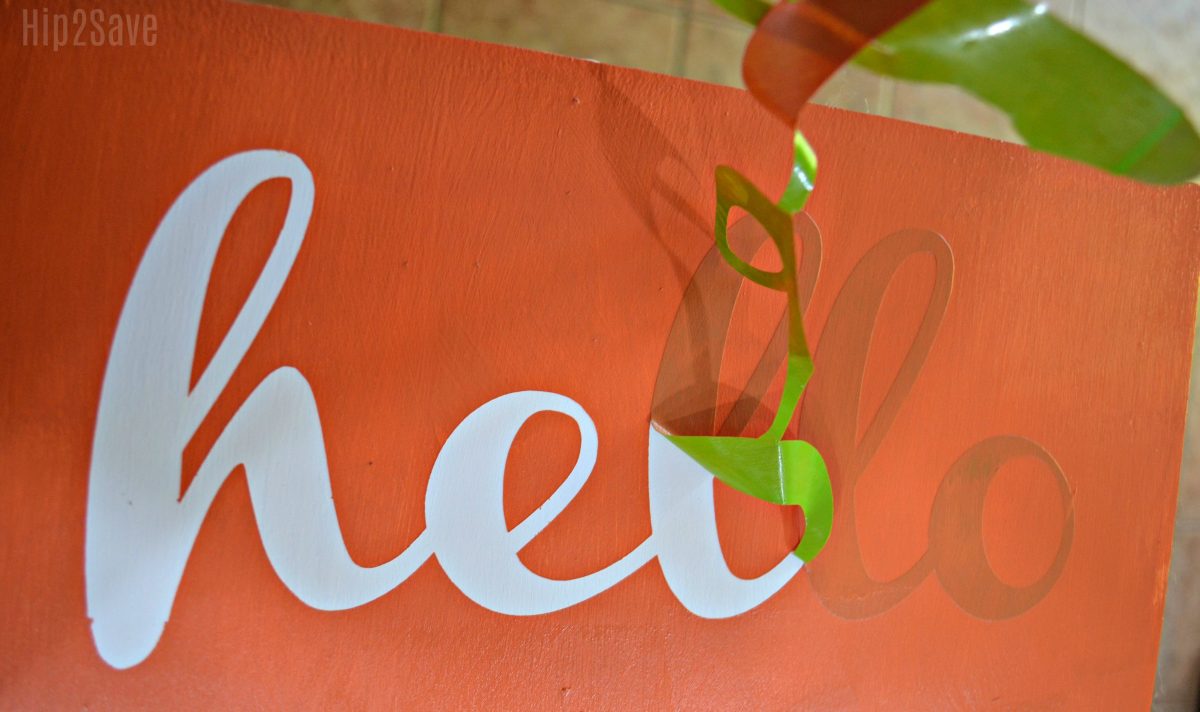
5. When dry, remove the vinyl.
This is such a fun step! You might also want to consider applying a polycrylic clear topcoat to protect the paint.
Hip tip for making this reversible wooden sign craft:
If there happens to be any bleeding, no biggie! Carefully use a razor blade to scrape off the top layer of paint, or just touch it up with a small paintbrush.

I love the result! It’s such a fun focal point for any room or your front porch!
There are probably many different ways to make a sign like this and I’m sharing just one way using vinyl. If you don’t have a Cricut, maybe you could get a similar look using large letter stencils.
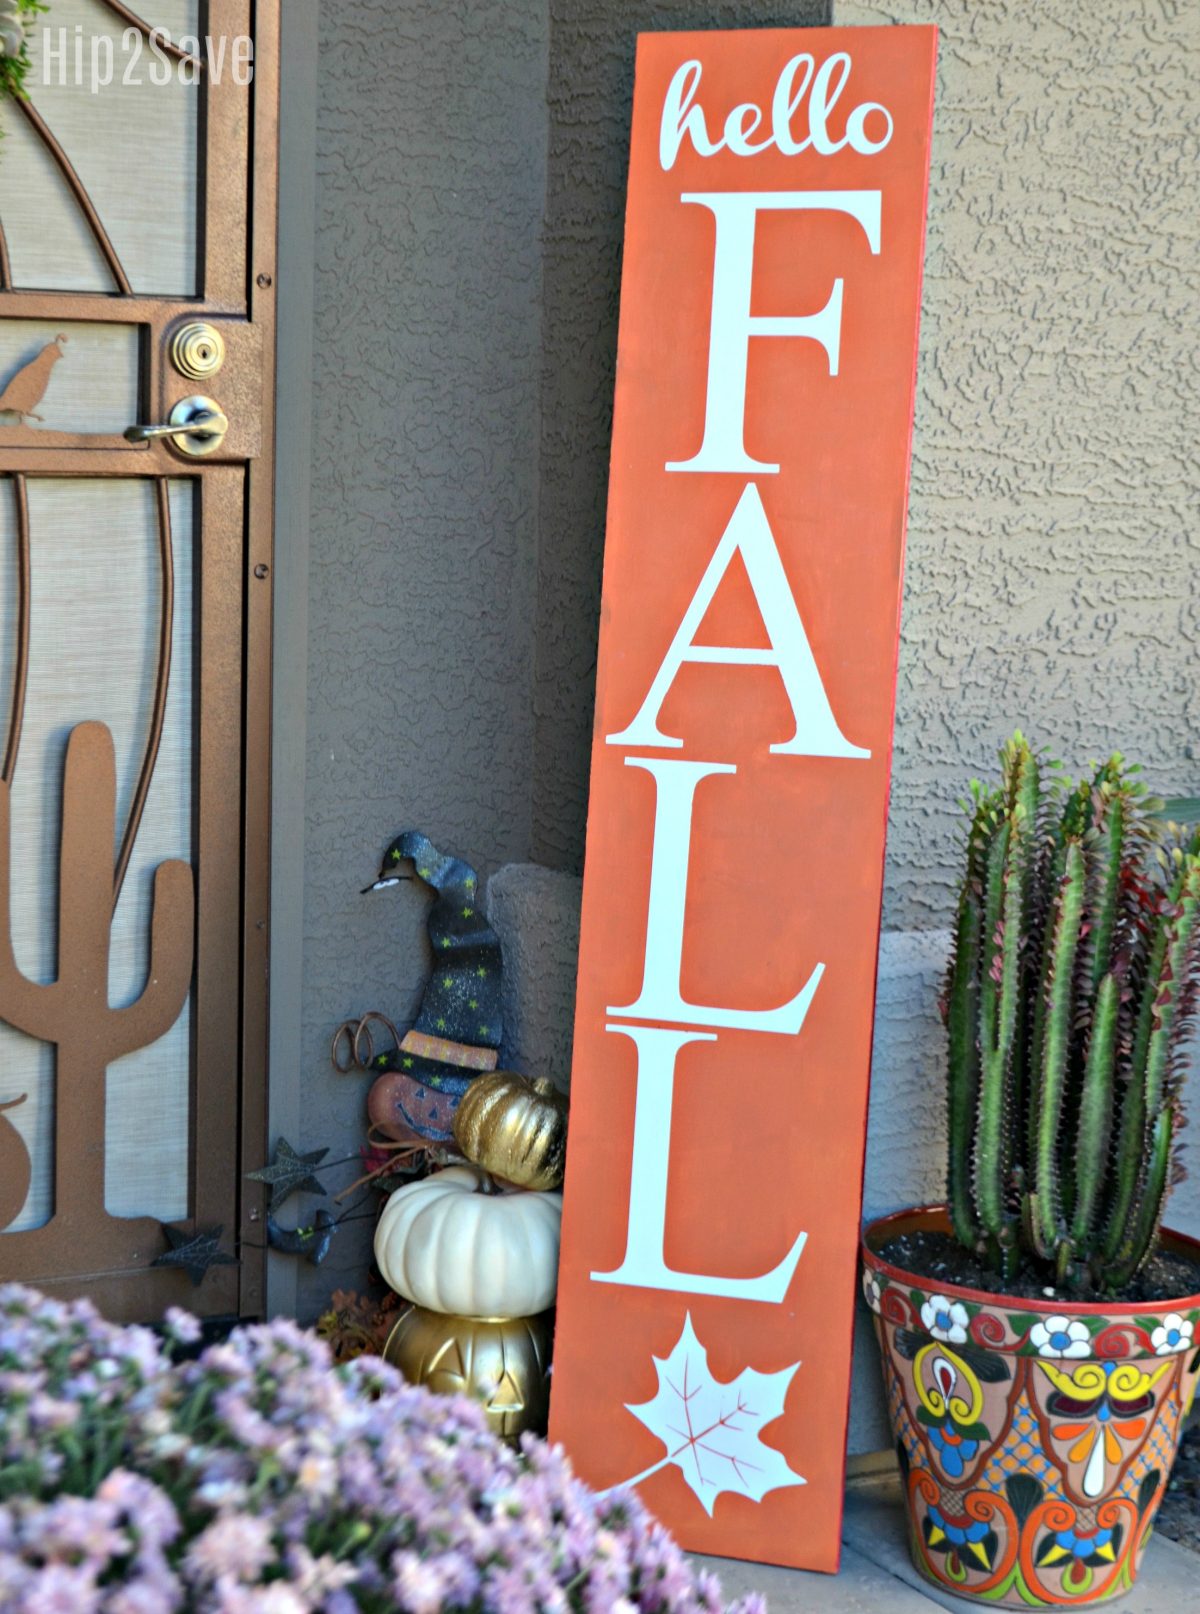
Also, feel free to adjust the sign size. It was pretty ambitious and a little more time-consuming to make a sign this large at five feet, but at the same time – it was so worth the result! I look forward to displaying this for years to come.
I enjoyed using my Cricut for this project because I could customize the fonts and sizes easily. Here are the specific names of fonts used in this sign:
Merry= Channel font
Christmas= Wide Latin font
hello= Channel font
FALL= Cambria
Use your Cricut to make these Rae Dunn-inspired labels for your pantry!

I made this last year! Mine say happy fall y’all on one side and marry Christmas on the other. Super cute and easy to make. I have seen them go for around $45
Thanks for sharing Jackie! So fun to display.
I will have to show this to my daughter… I have a Cricut but she knows how to use it much better… I made a similar sign but used a set of stencils I bought from Walmart for $3.88… I just did our last name horizontally like these signs and plan to paint something for Christmas on the other side…
Oh that’s cute too! Thanks for sharing Michelle!
I love this! I wish I had the time to be more crafty.
Thanks! 😀
I agree! Hey Lina, you want to raffle yours off to one of us…hehe.
LoL! thanks Lucy! Oh man it’d be hard to part with 😂
Maybe make one and raffle off for charity…
Love this!
Thanks!
Love this! ❤️
There is also a stencil film that you can cut and apply then paint your letters. It would be used in the reverse of how you did your project. It is a little cheaper than using vinyl. A 12×6 roll sells for around $8 on Amazon. Your project came out so nice, & adds so much to your front porch! Thanks for all the diy projects!
Oh nice! Thanks for sharing. And Thanks!!
For crafts like this, I use the cheap shelf liner from Dollar Tree instead of vinyl — MUCH cheaper this way!!
Great idea! Thanks
Thank you! I did the same painting concept for my cornhole or bags boards. I used masking tape for the stripes (and over the hole) and my cutter for the designs. I also used spray paint (which made the process pretty simple), applying with a few coats. I can send a photo to Lina’s e-mail (so she can post), if you would like to take a look.
Anyone have a Cricut? I would $ to have someone make the stencils for this!
Hi, Stacy. I have a Cricut. What medium do you want the letters in and what would the specifications be? If I made a stencil you would then use the stencil letters, paint in the stencil and remove the stencil before the paint dries. For vinyl letters, you should be able to set them directly on painted wood via transfer tape by rubbing them on using a credit card or similar plastic tool. Depending on the size of the sign I may have to cut the letters individually. It looks like line cut happy and merry in one vinyl cutting and the rest of the letters separately based on their size.
I have the same question as Stacy. Does anyone have a Cricut and would take on a small project for me. I am more than willing to pay for your time and the use of your machine and materials. These machines are quite expensive and I do not think I really need to purchase one at this time.
Check etsy. People sell the cut vinyl on there.
Hi, Jane. What exactly are you trying to make? I recently got a Cricut so I might be able to help so long as it is not too complicated.
Also, for this project you could paint and then adhere the single color vinyl using mod podge or just use stencil vinyl to make a stencil for your project and paint the letters.
Or you can just contact paper. Much cheaper!!!
Oh nice idea – I’d like to try that!
Awesome..thx!
Do you know the paint brand for the same color?
From the post —-“On my sign, the fall side is painted with a color called Tiki Torch and the other Christmas side is called Dark Crimson, both by Behr.”
Thanks!
So, how do you cut out the letters with contact paper? I don’t own circuit.
I think she meant using contact paper in the cutting machine instead of vinyl.
Do you know the size of each letter and the word size?
Fall letters are 11×8 inches
Christmas are 6×10 –super wide
Where do you get wood panels? Home Depot/Lowes?
Correct. We had a scrap piece left over from another project but you can have any piece cut to size.
You can also use Freezer Paper for stencils too! On wood and fabric. There was a tutorial somewhere on making them reusable for wood signs. If I remember right you cut your stencil with the paper side of the freezer paper down/on the sticky of your mat, so you will be painting on the shiny side of the freezer paper. Then you spray a couple coats of easy tac on the paper side. Attach it to your wood and paint. I have also ironed the freezer paper onto my wood to create a seal and painted it that way too.
Oh neat thanks for sharing those tips!
H2S I just love all your easy craft tutorials that you put on your site!!! They are always so cleaver! I love couponing/deal hunting but everytime you post the DIY/crafts it is an awesome change up. All the stuff you ladies do is always so fun and family friendly I appreciate it so much!!! Thank you!
That’s the nicest comment- thanks for reading! We all appreciate it.
Very clever going to have to borrow that idea this year
Excellent!
LOL I’m going to a “make it take it” in home sign party at my sisters next weekend. i’m getting a fall/christmas one for $30.
Sounds fun’