
Make Easy Decoupage Easter Eggs With JUST Two Materials!
Love DIY Easter decor? Make easy decoupage Easter eggs that can be used to create a holiday centerpiece!

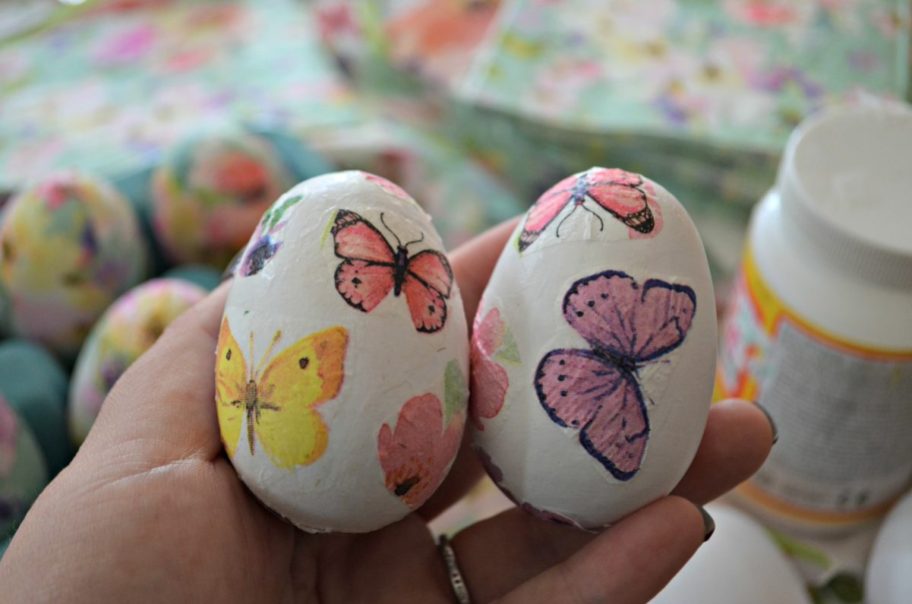
These brilliant decoupage Easter eggs made using Mod Podge and paper napkins will even have the Easter Bunny doing a double-take. It’s such a creative and beautiful way to embellish Easter eggs. I went with a pretty floral pattern that’s perfect for spring, but feel free to pick a pattern that inspires you!
Ready to make decoupage Easter eggs? Don’t forget to check stores like Dollar Tree first for pretty paper napkins!

There are so many beautiful spring napkin patterns perfect for this Easter craft, from florals to bold solid colors, making it easy to create stunning decoupage designs beyond simple dyes or paint.
I made these paper Easter eggs years ago using napkins from a store called Tuesday Morning, and I still use them in my Easter decor every year. They’ve held up wonderfully! 🐣🌸


DIY Decoupage Easter Eggs
PrintSupplies Needed
- Real Eggs or Wooden Craft Eggs
- Paper Napkins in Desired Patterns (mine were found in-store at Tuesday Morning)
- Decoupage such as Mod Podge
- Craft Paintbrush
- Scissors
Directions
1
Separate the bottom layer of your napkin and cut the patterned portion into smaller strips.
2
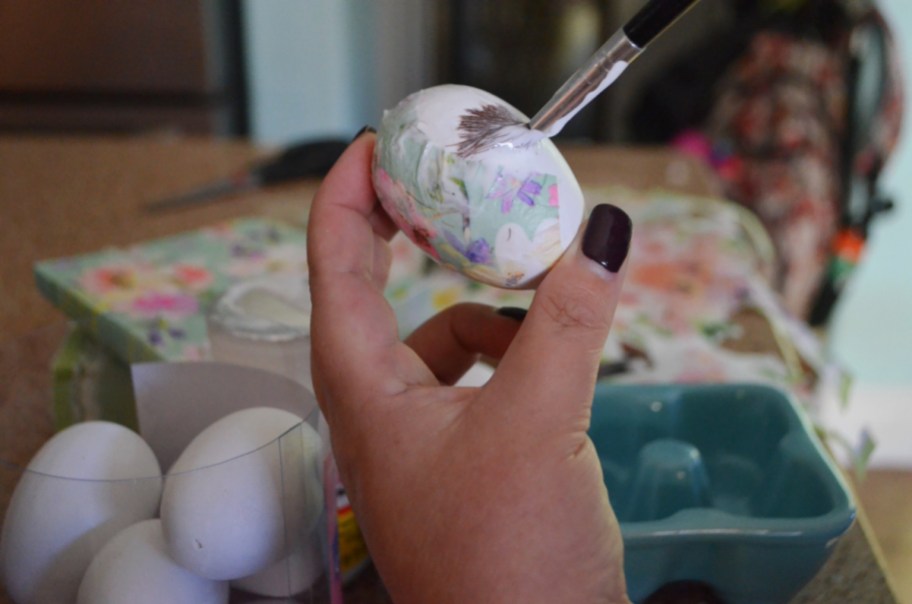
Apply Mod Podge to the egg using a paintbrush. Place a strip of paper and use your fingers to flatten and apply paper to the egg. You can also cut out certain details of the napkin to decoupage on your egg for a different design. I did this with some butterflies from the napkins I found!
3
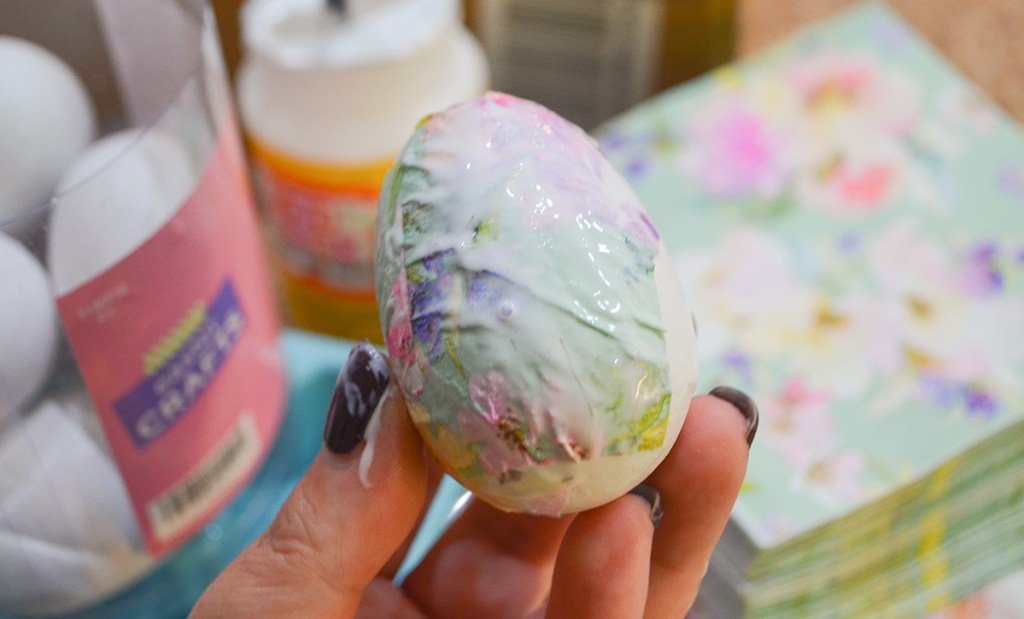
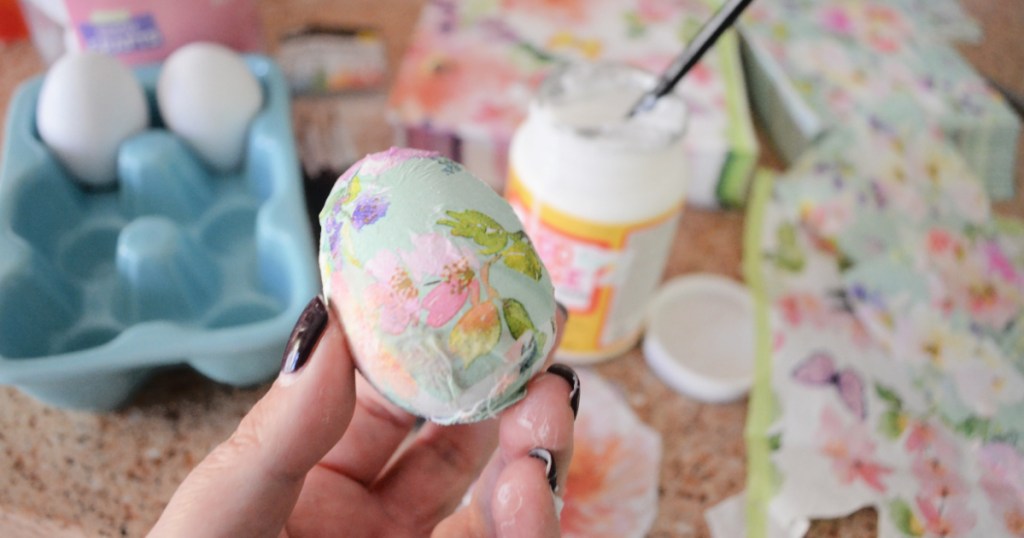
Keep pasting strips of paper around the egg until covered. Brush on a layer or two of Mod Podge to seal your work. After a while, you’ll be skipping the brush and just using your fingers! Go for it and have fun. 😄
4
Let dry completely and display for spring!

Hip tips for making decoupage Easter eggs:
- This DIY project can be completed with real eggs, or consider grabbing some wooden craft eggs from Amazon.
- If using real eggs, use a pin to poke holes in both ends of the eggs. Then blow air to expel the inside of the eggs.
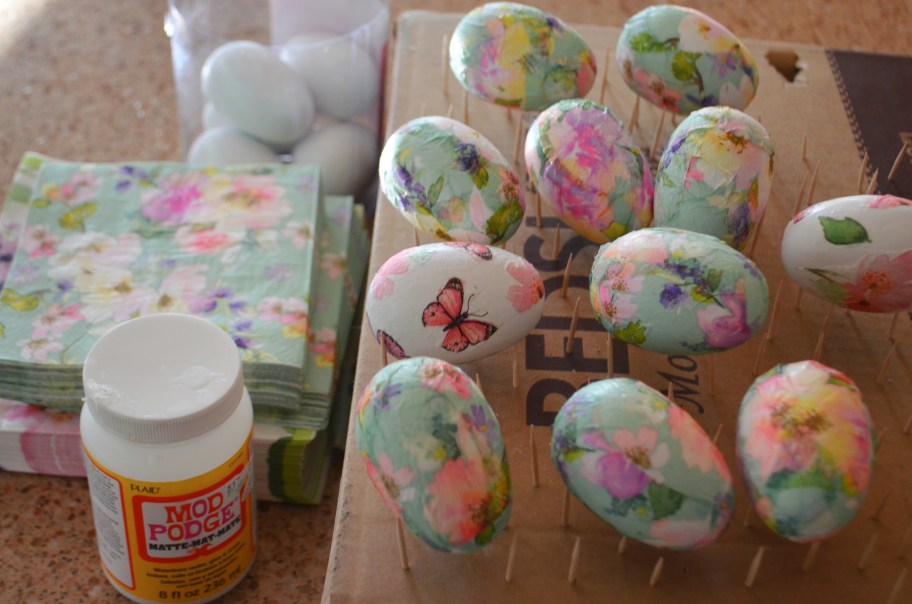
- I created an easy DIY drying rack for my decoupage Easter eggs using a small empty cardboard box and toothpicks! It worked great, and it is a perfect way to protect eggs from getting messed up when you’re dying, painting, or decoupaging them.
- Tissue paper could work for this, too! You can use pastels, florals, patterns, or brights depending on your desired results. Just be careful with the application since tissue paper is thinner than napkins.
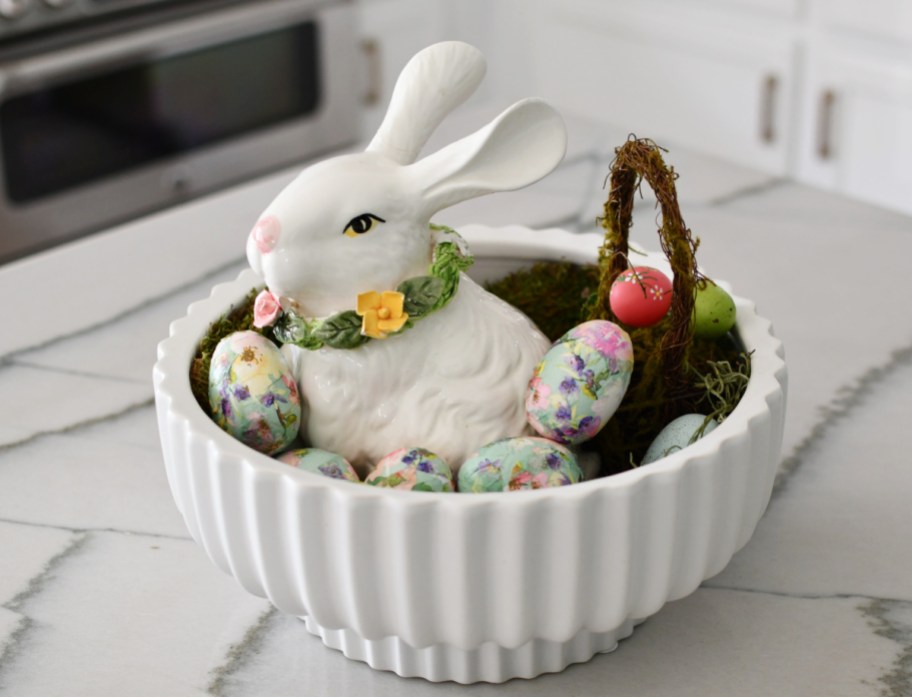
Love my cute centerpiece? I just put it together using an inexpensive Walmart planter and my decoupage Easter eggs!
To create this look, I just filled it with some faux moss and then added a ceramic bunny and lastly, my DIY decoupage Easter eggs.
Easy decoupage ideas are my favorite, and this one is a must-try!
I love how bright the colors are on these paper Easter eggs, and they truly don’t have to be perfect. After the Mod Podge dries, your eggs will look amazing! Put some of your decoupage Easter eggs in a decorative bowl, or include them on your Easter table as a terrific DIY craft idea.
Learn how to create edible DIY Easter baskets using Dollar Tree supplies!


These are amazing. I have a bunch that I got in East Germany (think they are Russian) when the wall was still up and we could go over there and go shopping. Kind of like the Russian Dolls that stack in each other (got those too). They last a long time.
Oh how fun, Pat! So nice that you still have them and they have held up so well! Thanks for sharing! 🤗 😍
Lina you are so creative! Love your ideas and style!
Oh yay thank you so much Gigi! That totally made my day <3
could this be done on plastic eggs?
That may work! You might try using lighter colors or white plastic eggs versus neon colored ones, in case you’d see the color under the pattern of the napkin. 🤗 Happy crafting!
I made these years ago using plastic eggs! Worked great but also rolled in sparkles or glitter while still wet. They’re beautiful displayed in my crocheted bowl!!
Awesome! So glad to hear this worked great on plastic eggs, Joyce! 💖✨