
DIY Dollar Tree Skull Candlesticks Halloween Decor
If you love frugal DIY Halloween decor, listen up!
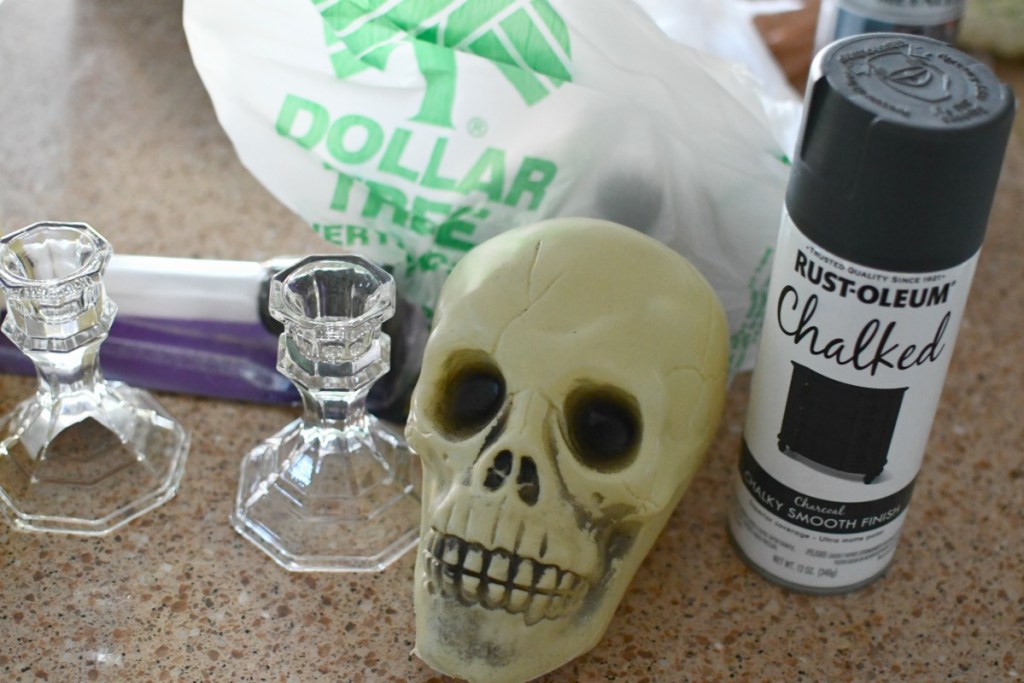
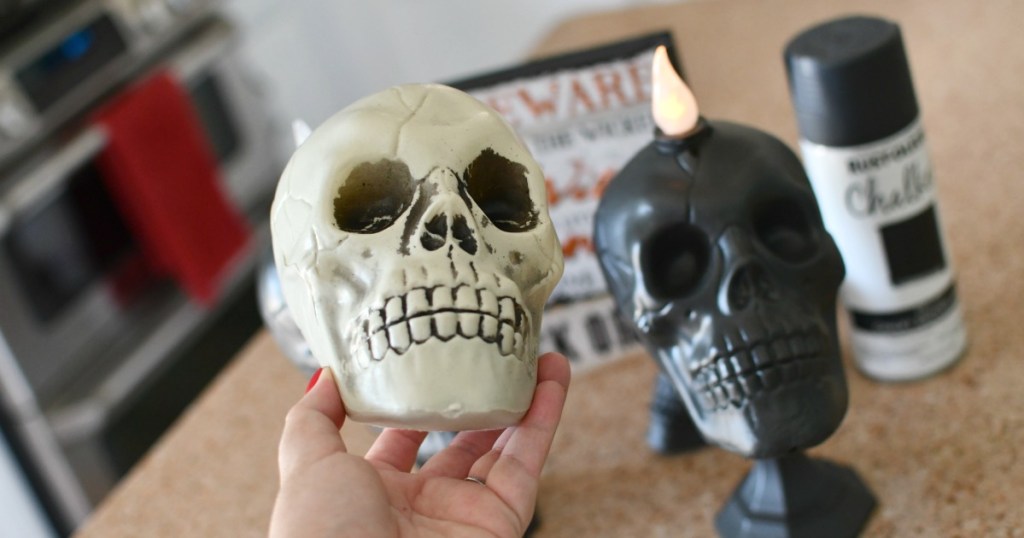
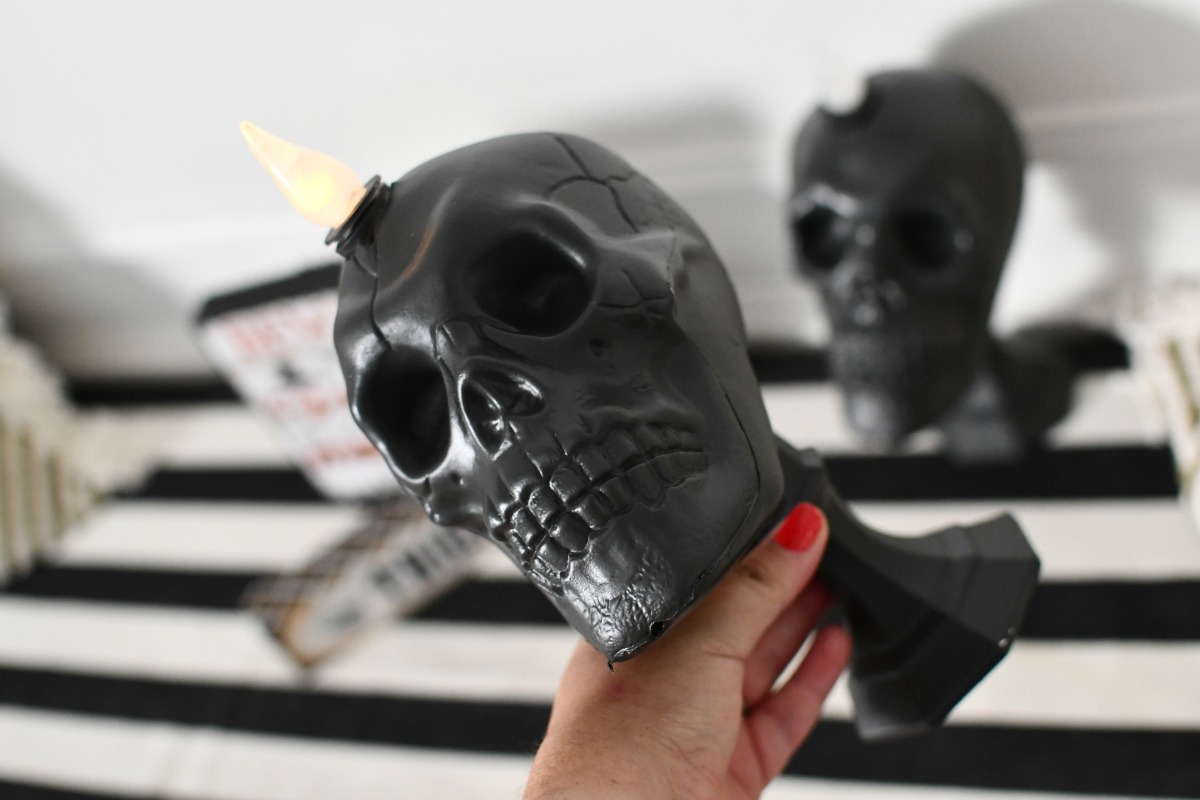
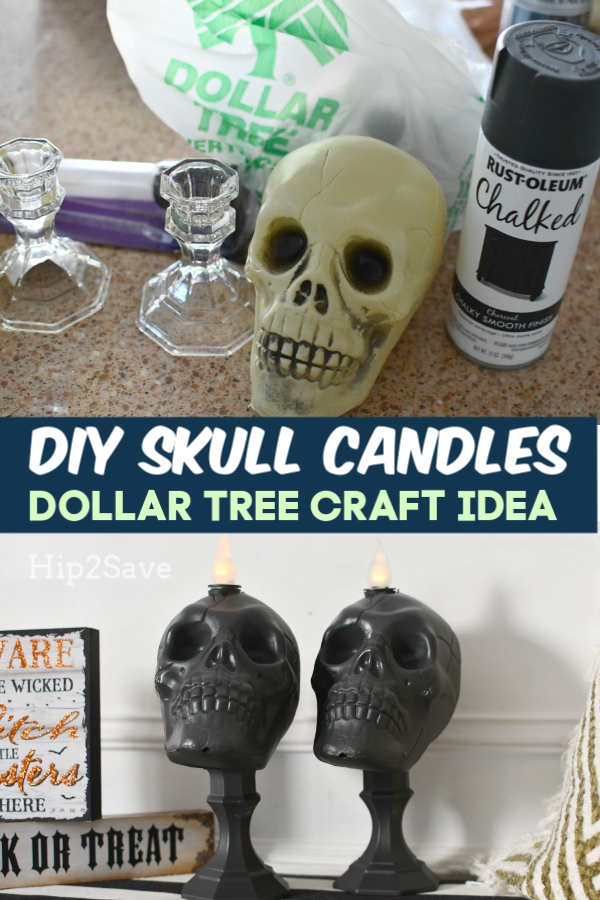
I’m sharing how to make these festive skull embellished candle sticks that are perfect to display in your home for Halloween. The best part – most supplies can be found at Dollar Tree, which is awesome if you’re looking to craft while staying on a budget!
Easy Supplies + Easy Process= Winning!
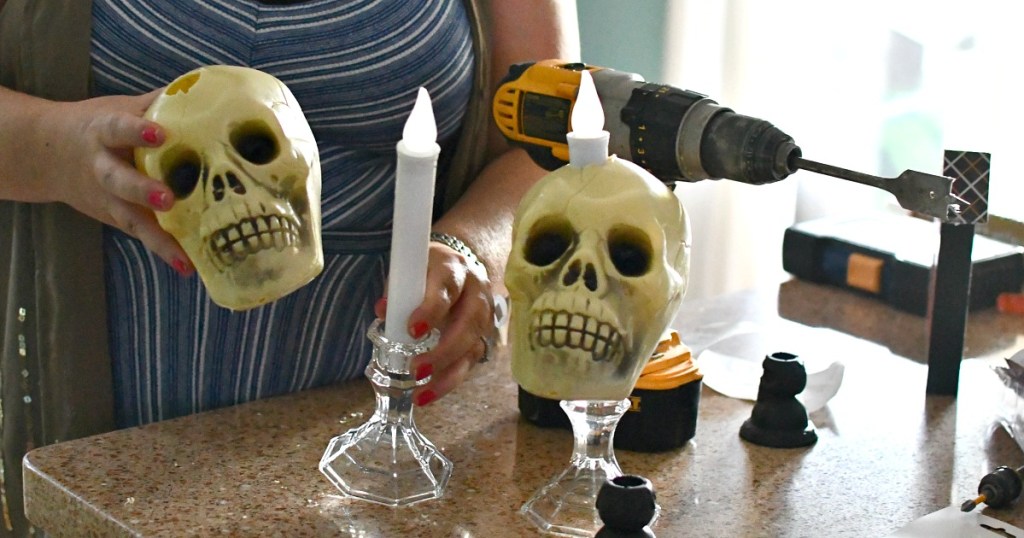
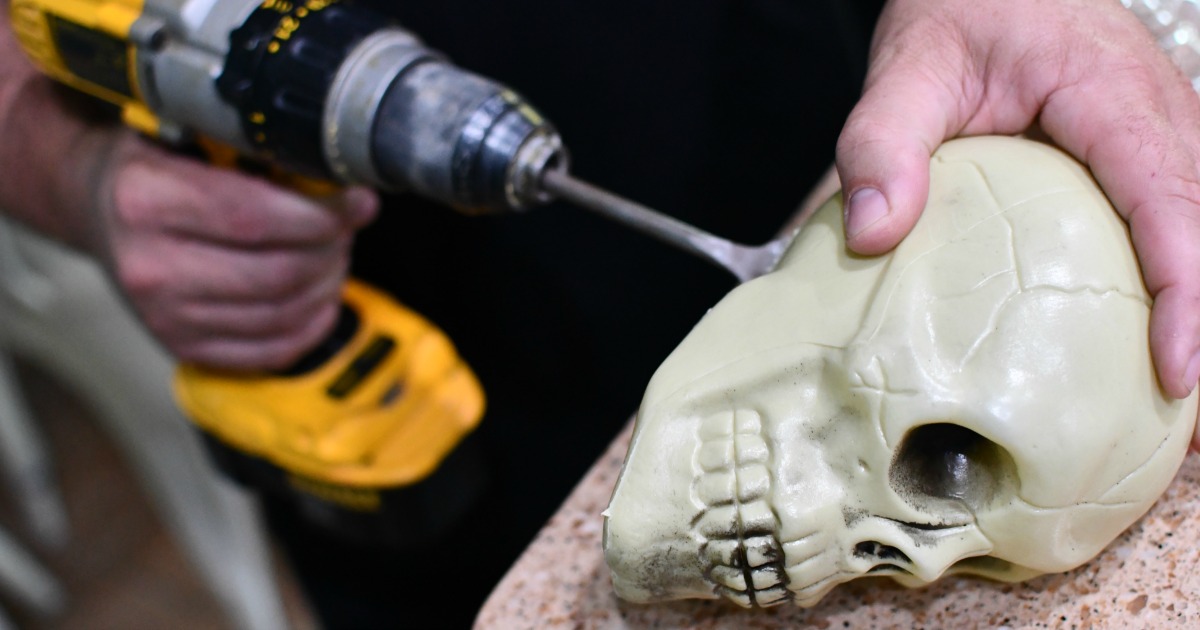
Basically, we are just cutting or drilling a circle at the top and bottom of these plastic skulls, and then putting them over the candles. Then you’ll glue it together, and finally spray paint them, so all three parts look like one piece.
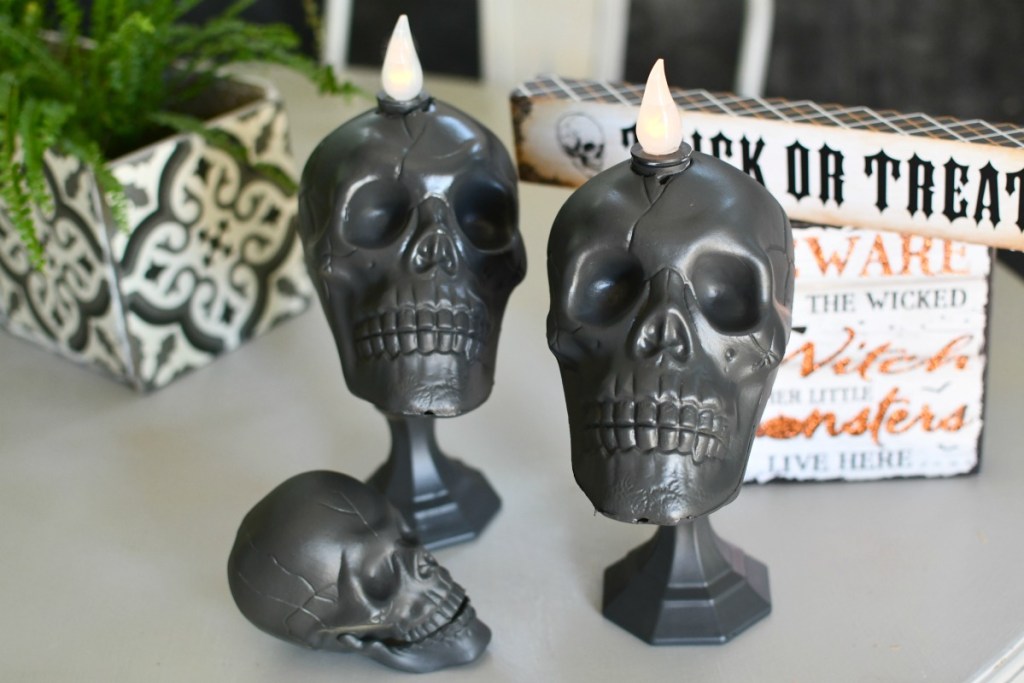
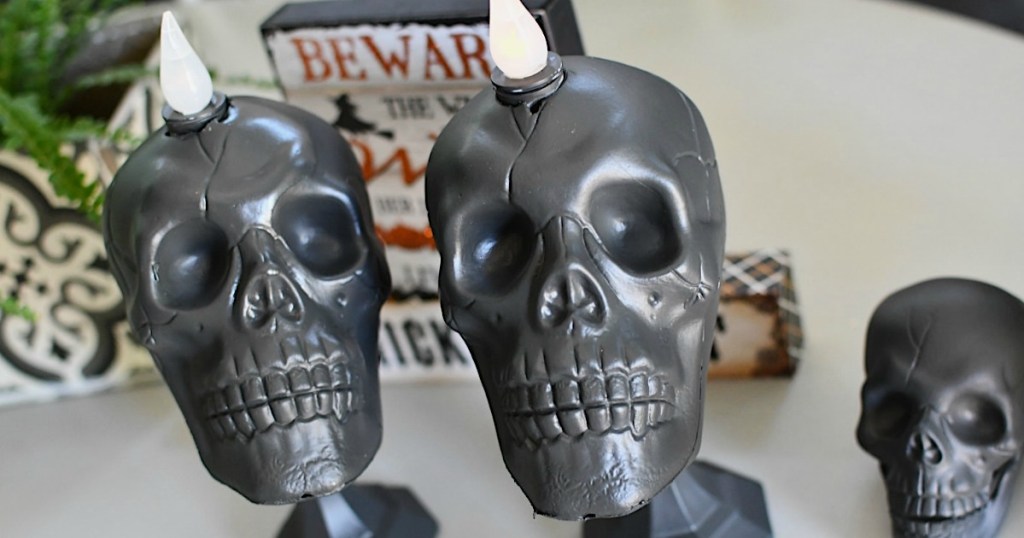
Once done, you’ll be able to use these as part of a Halloween display either on a shelf or maybe on a tablescape with your other Halloween items. Also make sure to check out Dollar Tree for other cute Halloween decor like these adorable wood signs, pictured above.

Hip Tips:
- Grab these battery-operated LED candles from Dollar Tree as they rock and are just $1 each! I was trying to figure out a way to use faux candles instead of real ones, and Dollar Tree has the perfect ones, that turn on and off by just turning the top of the “wick”. This craft will still allow you to turn the candle off/on and change the batteries from the top as well.
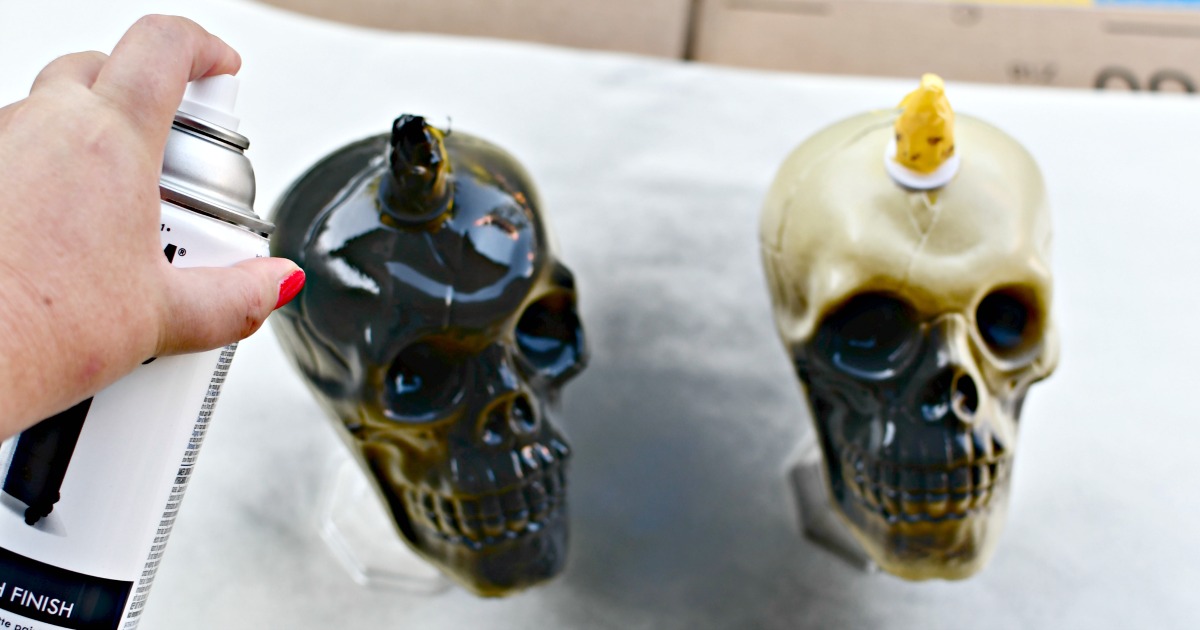
- Do a couple of light coats using spray paint! I love the pretty flat texture this Rustoleum Chalked spray paint has, and it just took a couple quick coats of paint to fully cover.
- Use a drill or exacto knife to cut your circle shaped holes at the top and bottom of skull. I used a paddle shaped drill bit, but the plastic is thin enough to carefully cut using a knife.
DIY Dollar Tree Skull Halloween Candlesticks
PrintSupplies Needed
- plastic skull
- candleholder
- spray paint
- exacto knife or drill and paddle bit
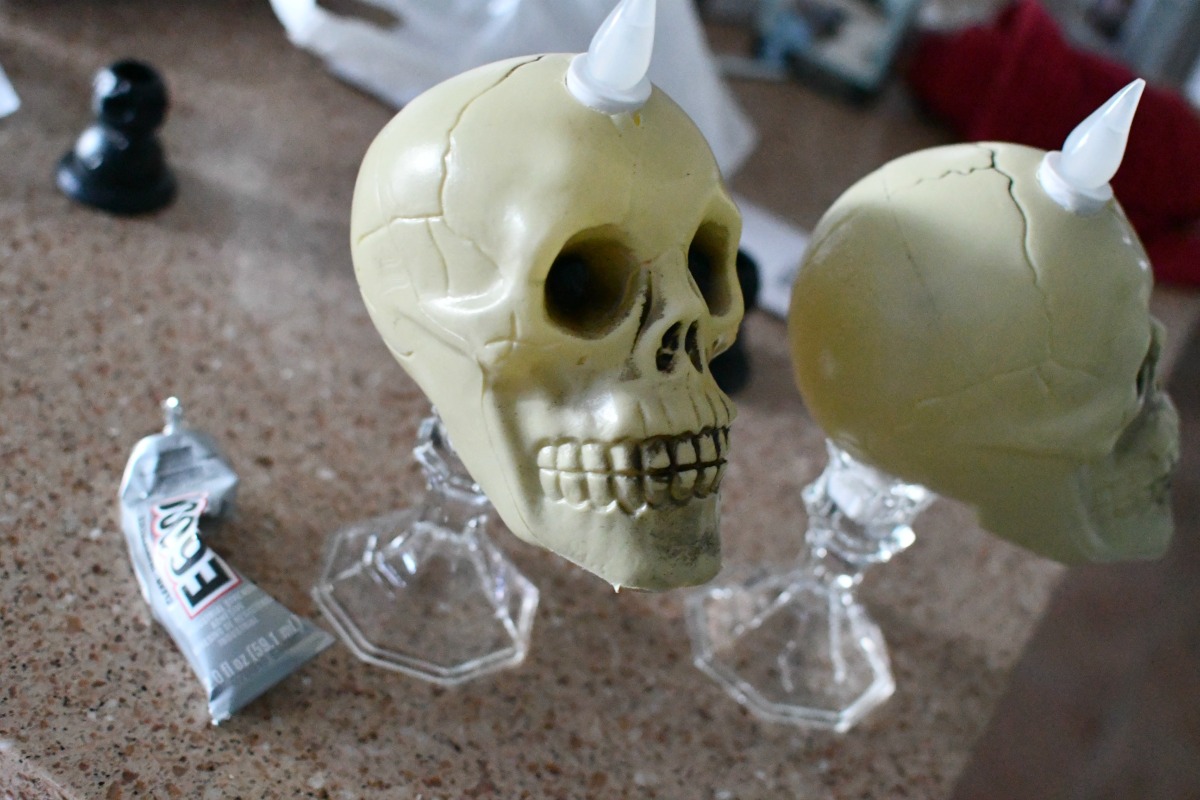
- strong adhesive (such as E6000)
- battery operated candlestick
- AA batteries for the candle
Directions
1
Trace and cut a circle as big as the width of the candlestick on the top and bottom of plastic skull. Either use a drill or exacto knife, to cut the top and bottom circle, so that you’ll be able to fit skull over the candlestick.
2
Place batteries inside candlestick and make sure it works. Glue the bottom of the candle into the candle holder using a strong adhesive. Slip the skull over the candle and glue it down to the candle holder.
3
Tape off the tip of the candle, and spray paint the entire skull and candlestick holder. Let dry completely.
4
Display with Halloween decor and twist the tip of the candlestick to turn it on and off.

No bones about it, this is such a cute craft idea!
I love how using spray paint can make this whole look come together and I’m looking forward to creating a spooky area with these candles for Halloween!
Check out these 5 Halloween ideas you probably have all the supplies for!

Love this! Very unique!
Thanks Lori!!
It would be super cute is you took white crayon and put drips around the light part!
Oh I like that! Fun idea – thanks Brittany!
Or Red crayon and make it look like blood is oozing from the top
I mean melt red crayon at the top
Yes love that idea too! Ha fun!
Very cute. This works well for buying the skulls new or redoing last year’s for a different look! Also, I love the “Chalked Paint”. I’ve used it on tons of stuff.
Thanks! Yes i’m obsessed with that texture! –
What a terrific idea! If you are set on using a drill, try a Forstner bit…I think you’ll have a cleaner finish.