
Love Joanna Gaines? Love Watching Fixer Upper? Love Shiplap Walls?

Love HGTV and everything Joanna Gaines related?
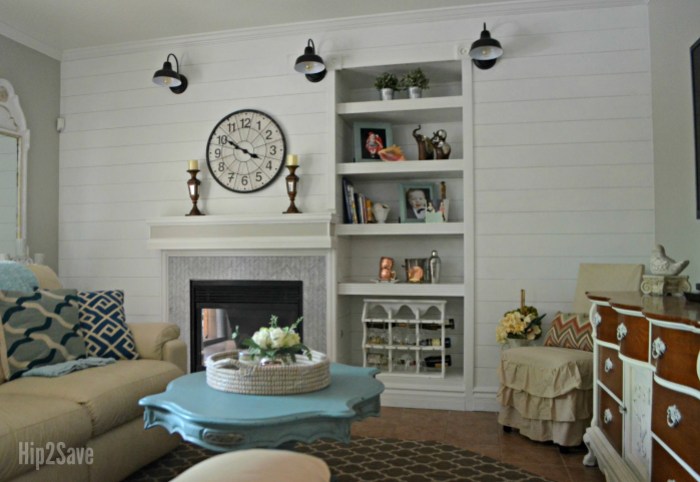
After admiring the beautiful shiplap planked walls featured in the TV show Fixer Upper, my husband and I were inspired to embellish a couple walls in our home to see if we could get a similar farmhouse look. I LOVE the character and texture wood planked walls can add to a space and I’ve been wanting to design my own!
You can buy the traditional shiplap tongue and groove boards, but those can be pretty pricey and would have equaled a couple hundred dollars per wall in our home.
Another less expensive method to get a similar look is to cut down large pieces of plywood into smaller planks and then nail them to the wall. Using this tip we accomplished the look of faux shiplap ourselves for around $50 or less in wood material per wall.
Installation is actually a lot less difficult than you’d think too.
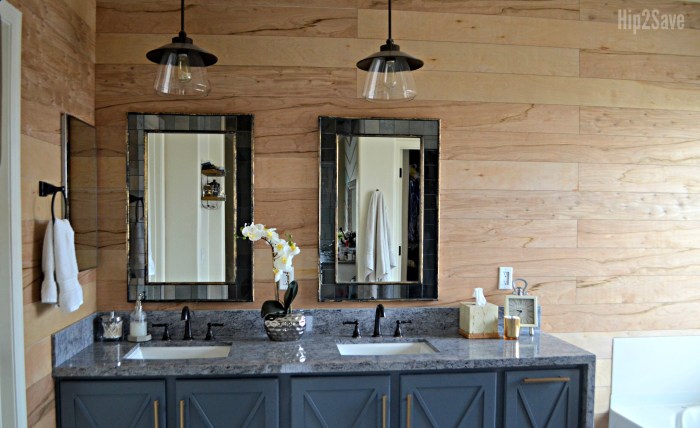
If you enjoy home improvement projects like we do, then this would be an excellent weekend DIY to consider! Above is a photo of our family room wall after we painted the plywood planks white, and below is a photo of our bathroom after we added the wood faux shiplap strips – before painting. I haven’t gotten to that paint step yet, and we may even leave it natural or stain it.
Here are some helpful faux shiplap tips we learned along the way.
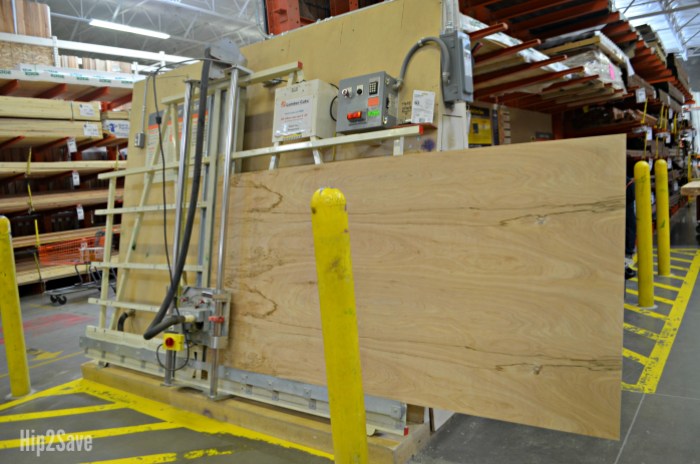
1.) Purchase large 4ft. x 8ft. sheets of plywood and cut them down into planks according to the sizes you want.
We purchased 1/8 inch thick large sheets of birch plywood that were priced around $10 each, and had them cut down into planks about 6 inches wide at Home Depot. (The lengths, we cut down ourselves at home using a table saw.) The store charged a nominal fee after a certain number of cuts – about $10 total for them to cut our project.
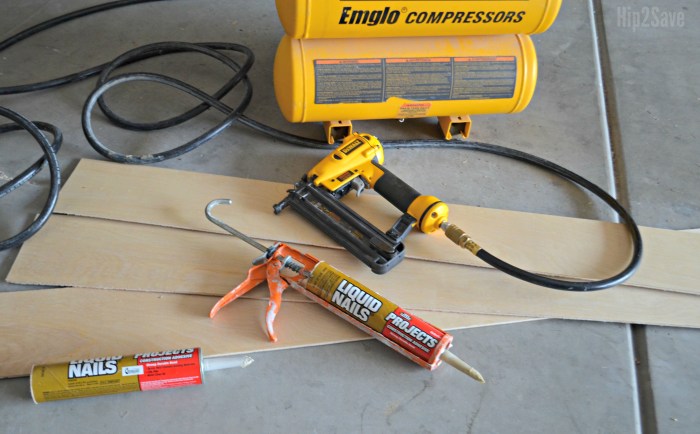
2.) Glue and then nail wood to the wall using a nail gun.
Use a construction adhesive, such as Liquid Nails with a caulking gun to first glue wood to the wall, then nail it in place so the glue can set. If you don’t have a nail gun with compressor consider renting or borrowing one because the project goes so much faster with it.
Note: It helps to mark out where the studs are in the wall prior to starting so that you can try to hit the studs when nailing, but it’s not necessary to hit a stud every time. We would nail about every 8-10 inches on every board.
Some prefer to fill each nail hole with wood filler before painting, but we didn’t mind the tiny holes, and skipped it. We realize that’s personal preference.
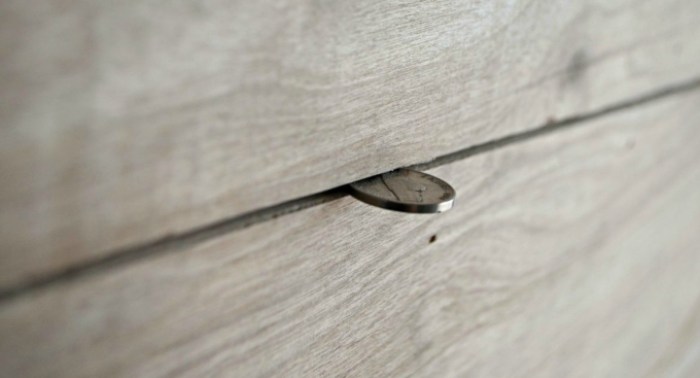
3.) Use a coin as a spacer in between boards for even spacing.
You can buy tile spacers, but we found using a couple nickels per board works well instead!
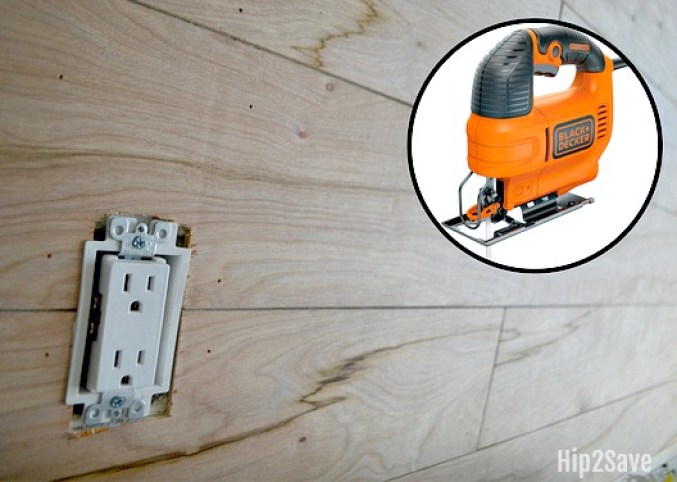
4.) If your wall has an electrical outlet, use a jigsaw to cut out space for it.
Measure where your outlet would be on the wood board and use a pencil to mark it. Make your cuts using a jigsaw. Note: You’ll have some forgiveness because of the plastic cover plate, so don’t stress trying to make it perfect.
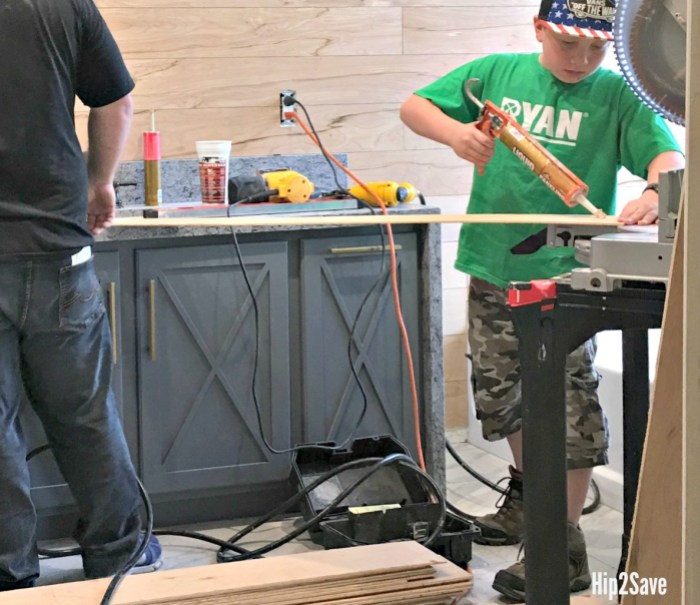
5.) Make it a family project!
My job was to sand any rough edges on the wood. My son applied the liquid nails to each plank, and handed the wood to my husband who would then nail it to the wall. Teamwork!
Written by Lina for Hip2Save. Lina is a proud mom of 2 kids who loves photography, all holidays, cooking, thrift store makeovers, bargain shopping, and DIY makeovers. Her goal is to create a beautiful life and stylish home on a dime! To see all of Lina’s DIY/Crafts created just for Hip2Save, click here.


Comments 0