
This Peel and Stick Reclaimed Wood Wall Is Beautiful and Easy to Install!

Love the look of planked wood walls?
Adding decorative wood details to your home is a beautiful way to add interest and style to your walls. Even just adding reclaimed wood planks to one accent wall can change the entire space so much!

Check out our Stikwood accent wall!
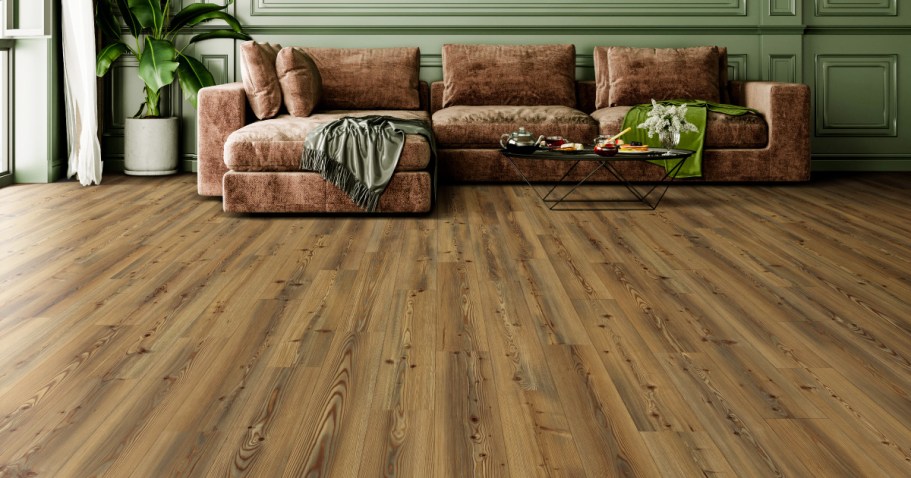
Today I’m sharing how you can easily install real wood planks without even touching a paintbrush, wood filler, or nail gun! We recently transformed a small wall in our downstairs powder room using Stikwood peel and stick planks in reclaimed weathered wood white, and we LOVE how it turned out! The white-washed paint is SO PRETTY and looks even neater in person.


The after is stunning! I’m so happy with the results of using Stikwood planks. I feel like this room went from cute and plain to WOW! And because this is real wood, the texture and color of the wood contain plenty of beautiful knotted details.

Here’s what makes these Stikwood planks special:
- They are essentially big wood stickers for your wall that are easy to peel and stick!
- These planks are made from REAL reclaimed pine wood and feature natural character marks like nail holes, knot holes, color variations, and a deeply textured surface.
- The planks come in varying lengths from 1-4 feet (although you can also purchase all 4-foot lengths for a specific design).
- Stikwood planks can be used indoors on walls, ceilings, doors, furniture, and more.

Tips to install Stikwood peel and strip wood planks.
This small wall took us about four hours, and that was with us stopping to take photos along the way.
Measuring and cutting the pieces for the sides, top, and bottom takes the most time and patience. The middle pieces go super-fast by simply peeling back the adhesive and pressing them in place on the wall.

The fact that there was no hardware store, paint, or stain involved (or even nail holes to fill) is definitely AMAZING! The planks came delivered in a couple of boxes, and I was ready to go! I followed instructions for installation (found at Stikwood.com).

How do I cut the Stikwood planks?
You can use a variety of different techniques to make cuts to this wood. One option calls for a sharp utility knife to score the plank a few times. Then you can bend it to break apart. You could also use a hand saw or power saw to make cuts. Since we have power saws, my husband made most of the cuts with his compound miter saw.

Hip Tips:
- Consider using a j roller tool to roll over planks after you stick them to the wall. This additional pressure to the plank will ensure that it will stick well. We have textured walls, and we had no problems with this product sticking.
- For best results, prep walls before starting. Make sure to wipe down walls well, and let them dry before starting this project so they’ll be free of dust and particles.
- Start in the middle of the wall. Most ceilings and floors aren’t exactly level and straight, as was the case for us. Using a level tool and a pencil, we first made a level line in the middle of the wall, and used that when placing the first plank. This will ensure your planks will be installed level!
- Stagger the joints. You can come up with a specific pattern, or just wing it as we did. All I did was make sure the joints were staggered by alternating different lengths of planks.

I’m in love with this little bathroom now!
It has so much style and rustic character, especially for this small space. I would definitely consider doing another wall in my house using Stikwood products, as it was easy to work with and we love the results.
I would encourage you to rethink home wall installation with Stikwood’s reclaimed wood walls. Browse through the large variety of wood plank collections and find the perfect fit for your home.

Interested in adding Stikwood to your home?!
Use code HIP2STIKWOOD to get 15% off your purchase at Stikwood.com!


Comments 0