
Paint Like a Pro: 6 DIY Painting Tips For Beginners
Thinking of painting your home?
One of the most impactful ways to update and change your living space is to paint your home’s interior. And doing this yourself can save you a ton of money in labor costs. With a little patience and a can-do spirit, it’s completely possible to DIY a space using only paint!
Paint like a pro with these 6 DIY painting tips for beginners! 🙌

We have painted just about every room in our home over the years, so here are a few tips we’ve learned along the way that’ll help you paint like a pro!
1. Invest in basic painting supplies.

Here are some helpful supplies I recommend:
- at least one 12-inch paint roller frame
- a couple of paint roller covers that fit over the frame
- a paint roller tray the same length or larger than the roller
- a smaller angled paintbrush for clean corners
- a 3-inch flat paintbrush for all the places you’ve taped off
2. Take the time to prep the space.

Clean and dry your walls well. Remove any electrical outlet plates, light switch covers, etc. Take care to protect and cover the flooring and furniture, too.
Use painter’s tape to tape off the ceiling, baseboards, and any moldings. I prefer to use the Frog Tape brand because it seals when it gets wet with paint, leaving a crisp line.
Hip Tip: Prepping can sometimes be quite time-consuming, so I like to get it out of the way the night before, if possible. That way you can wake up and get right to painting!
3. Choose a paint and primer in one.

No need to prime and then paint, if you’re just changing the wall color! Save time (if you have some wiggle room in your budget) by choosing paint and primer in one. A quick look in our garage shows we’re fans of Behr Premium Plus Ultra – around $29.98 at Home Depot.
4. Buy a paint extension pole (your shoulders and back will thank you).

A paint extension pole screws into a basic paint roller and allows you to stand up and roll out an average-sized wall without a ladder and without bending. If you’re painting a large room and/or a ceiling, this tool is a must. I don’t think we could have done without it!
5. Purchase a pour and store gallon paint can lid and drip catcher.

This will help avoid messes! You can re-use these items, and they’ll help to minimize drips and to keep the paint can clean. You can get a silicone paint can lid similar to the one shown above for $2.97 from Home Depot, along with a drip catcher base for just 99¢.
6. Clean paint brushes, rollers, and pan right away.

By the time you’ve finished painting, I know it’s tempting to just toss all the supplies in the sink or garage and walk away. However, cleaning your supplies immediately after finishing up a project will help to ensure they can be used again in the future.
I recommend washing paint brushes with warm water and dish soap. After the brushes are dry, I use a Painter’s comb to comb out the bristles of the brush.
Want some before/after inspiration?

I love the difference color can make!
When we bought our home, the walls in our kitchen were painted a very dark green. I lightened it up using a Behr paint color called Cool Jazz. The after is so much more inviting and bright! 😍
Eventually, we also had our cabinets painted, and that makes a nice difference, too. The rooms don’t even look the same!
Pack like a pro with these 23 moving tips to keep your sanity (and stuff) intact!

We have a push broom that has a head that can screw off. We used that pole as the extender for our roller.
So smart! Thanks for sharing!
My husband swears by the mini disposable touch up rollers. They are great for when you discover you sorta missed a spot or two and don’t want to go through the whole process of washing paint supplies up. They are also great to have on hand for when you do need to do wall touch ups later on down the road.
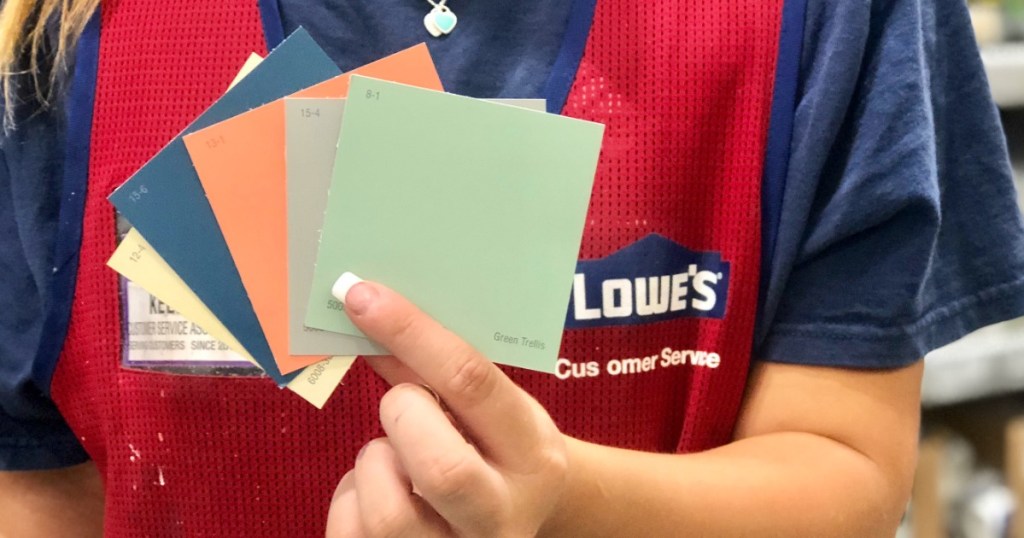
Another great tip is to pick up SureSwatch Paintable Clear Film. Essentially they are clear peel and stick stickers. Paint on the sticker instead of the wall when you want to consider a new paint color, then you can peel it off and check it out at different sections of the room that might get different amounts of light.
https://www.homedepot.com/p/SureSwatch-9-in-x-12-in-Paintable-Clear-Film-3-Pack-10002/204957579?MERCH=REC-_-pipsem-_-311370472-_-204957579-_-N
Coming from a paint person here…. invest in a great quality brush and good rollers appropriate for the type of paint you’re using. Go to a small paint store and find a knowledgeable paint associate. We will give you what you need, no extra stuff you don’t need, save you money where we can and make the job easier. It might cost more upfront but if you buy quail try stuff it lasts longer and makes the job easier and quicker and most things can be reused.
Thanks for your tips , I appreciate it. I am thinking of painting a side table, what’s your suggestion? Is chalk paint the best for furnitures?
If you’re on a budget, like I always am 😄, Home Depot has a paint kit for $10-15 that comes with the paint pan with liner, 2 rollers, and a brush…everything but the paint. That’s what I always use because just the brush alone can cost upwards of $10
Thanks for adding that! I’ve seen those before 👍
If you’re through painting for the day, but still have more to do the next day, don’t clean your rollers/brushes. Just throw them in a plastic bag or wrap them in plastic wrap or aluminum foil, then pop them in the freezer. The paint will thaw out in a few minutes the next day, and you’ll be good to start painting again.
Yes I love that tip! Thanks!
In all honesty, I put my paint roller, whole thing, and my paint brushes, even if I am using foam rollers, in a plastic bag, and twist the sack around the brushes, and I can come back the very next day and paint without doing anything to the brushes or rollers….No need to Freeze them!
I love to paint so I do have a lot of experience with this! Not a professional by no means, but I try to make it as easy as I can but still look great!😊