
Here’s How to Easily Make Your Own Cake Pops at Home!
Do you love cake pops as a yummy treat or dessert?
Here’s how to make cake pops at home that your family will enjoy! The best part is you can customize them for any occasion or holiday by using different colors and sprinkles, all while using your own favorite cake and frosting combos!
My daughter likes the birthday cake flavor cake pops at Starbucks which are kinda pricey, so these are a yummy and frugal alternative using an inexpensive box of cake mix!
Bring your patience and read my tips to conquer the cake pop!
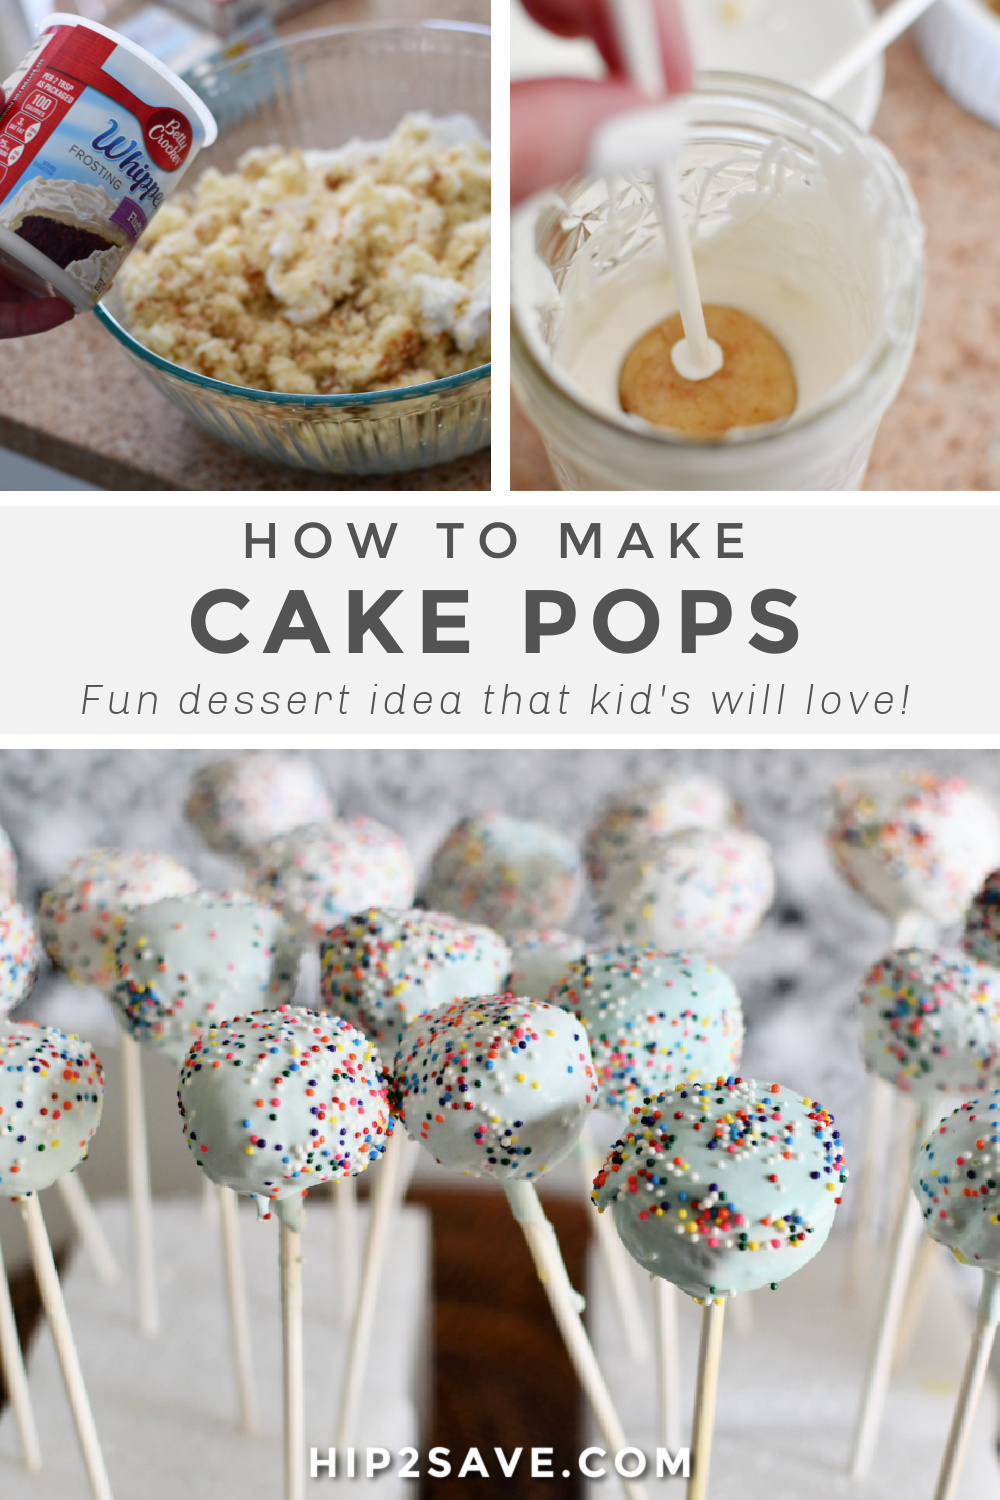
To be honest, I had never made cake pops before and had some fails when testing out this project. Mostly my cake pop kept falling off the stick when dipping them in the candy melts! 😂 My smart teammate Ashley suggested freezing the cake pops first, and that totally worked! Once they were frozen, I found them so much easier to dip and decorate.
Other than that, I am so happy I tried these. Now I feel much more confident about making these fun treats in the future!
There are 3 major steps involved in building cake pops.
Making the cake and frosting, crumbling those together and rolling the mixture into cake balls, and then using cake pop sticks to dip them in candy melts or melted chocolate chips to decorate.
To keep things simple, I started off by making a cake from a white boxed cake mix and white frosting. You could make a homemade cake and frosting instead if you prefer. This could also be an opportunity to use leftover cake, or to buy one already made at the store if you don’t want to bake one.
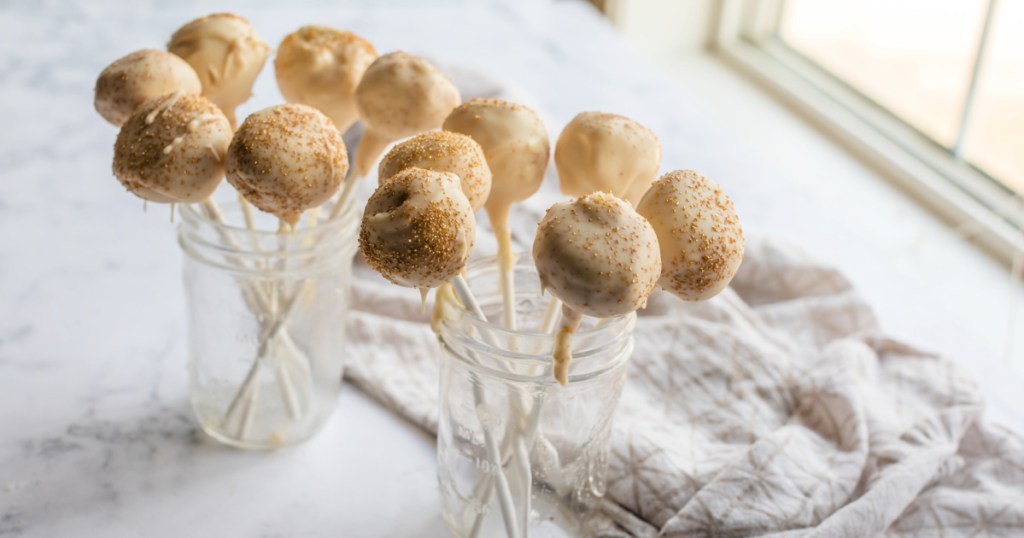
You can switch up the cake and frosting flavors too! I think chocolate would be awesome and I also want to try red velvet and cream cheese frosting cake pops in the future- YUM!

My best tips for how to make cake pops:
-
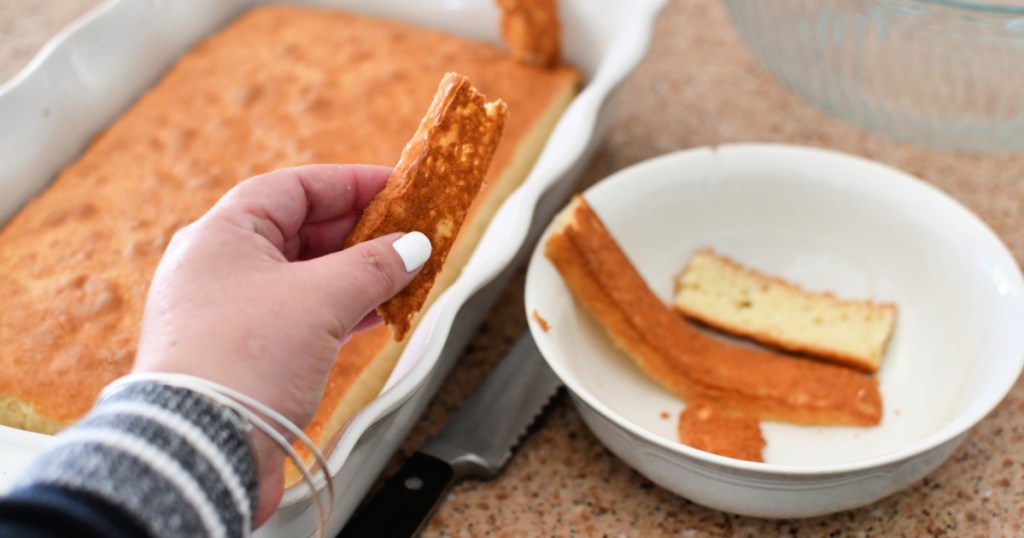
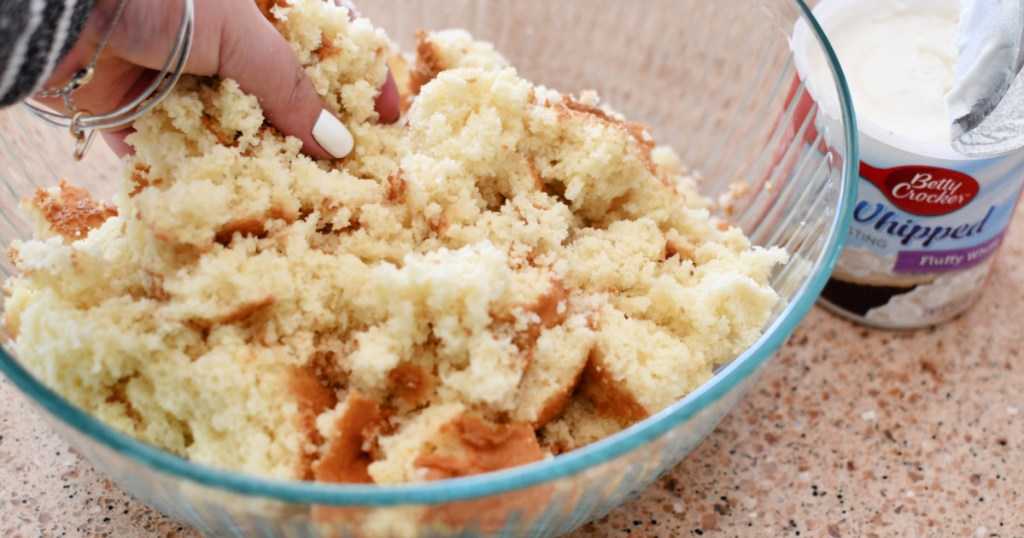
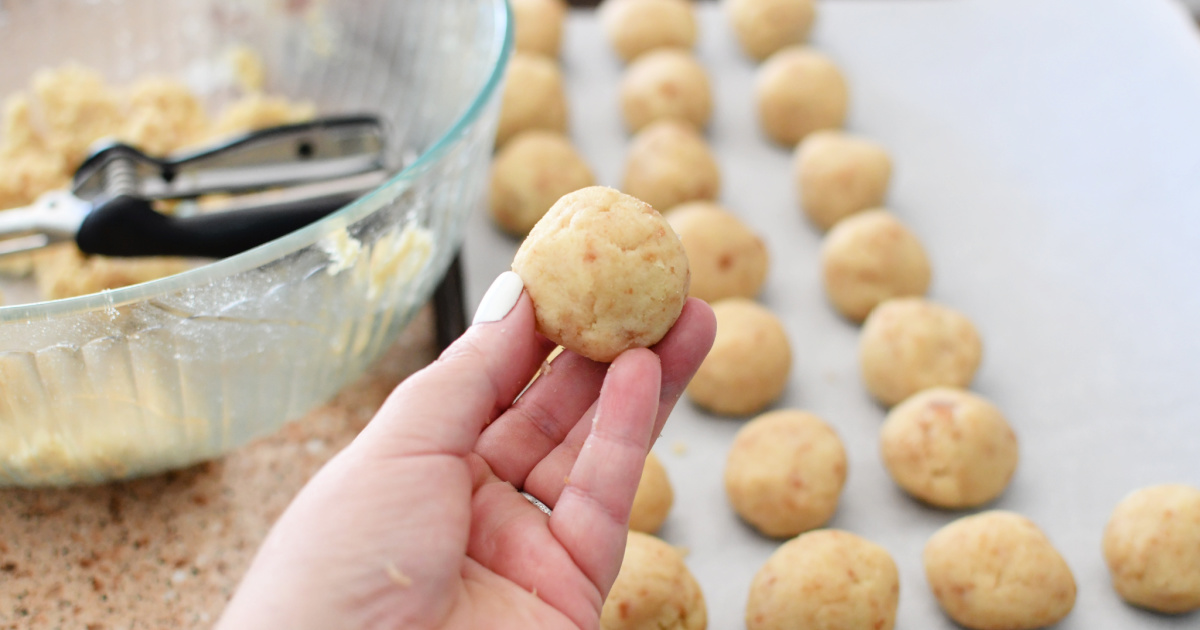
- Cut the dryer outer edges of the cake off before crumbling the cake in the bowl. This will ensure that you are using the moist part of the cake. The easiest way to crumble the cake is using clean hands.
-
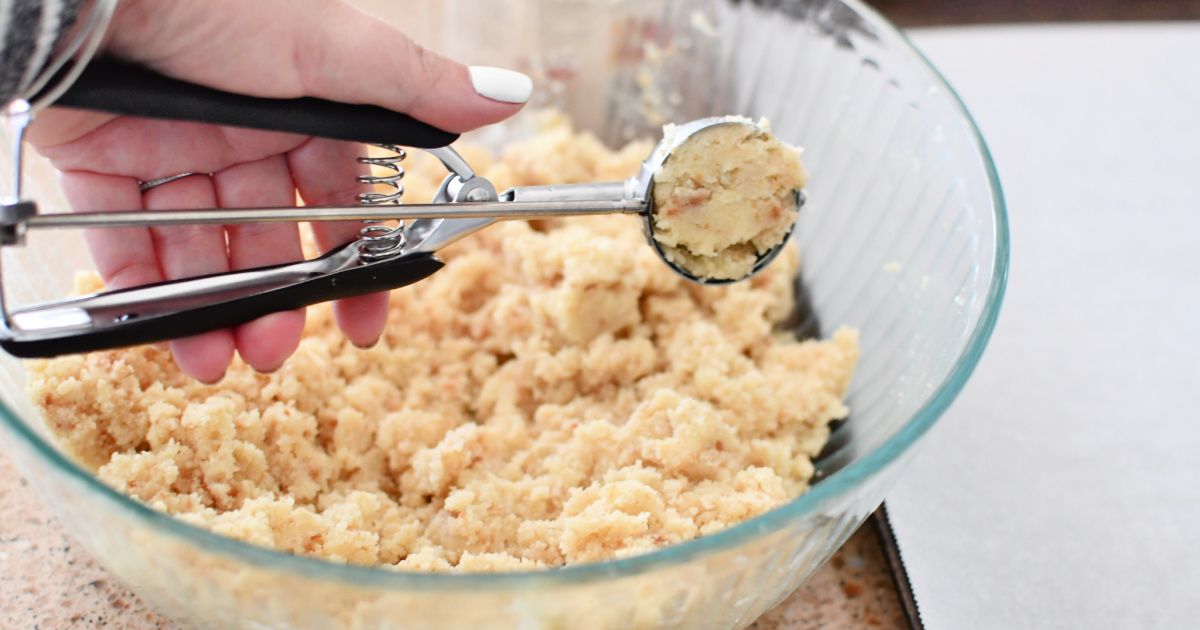
- To roll even-sized cake balls, I used a 1.5 tablespoon OXO cookie scoop. If you have one of these, I highly recommend using it. On a side note, this tool also comes in handy for rolling meatballs!
-
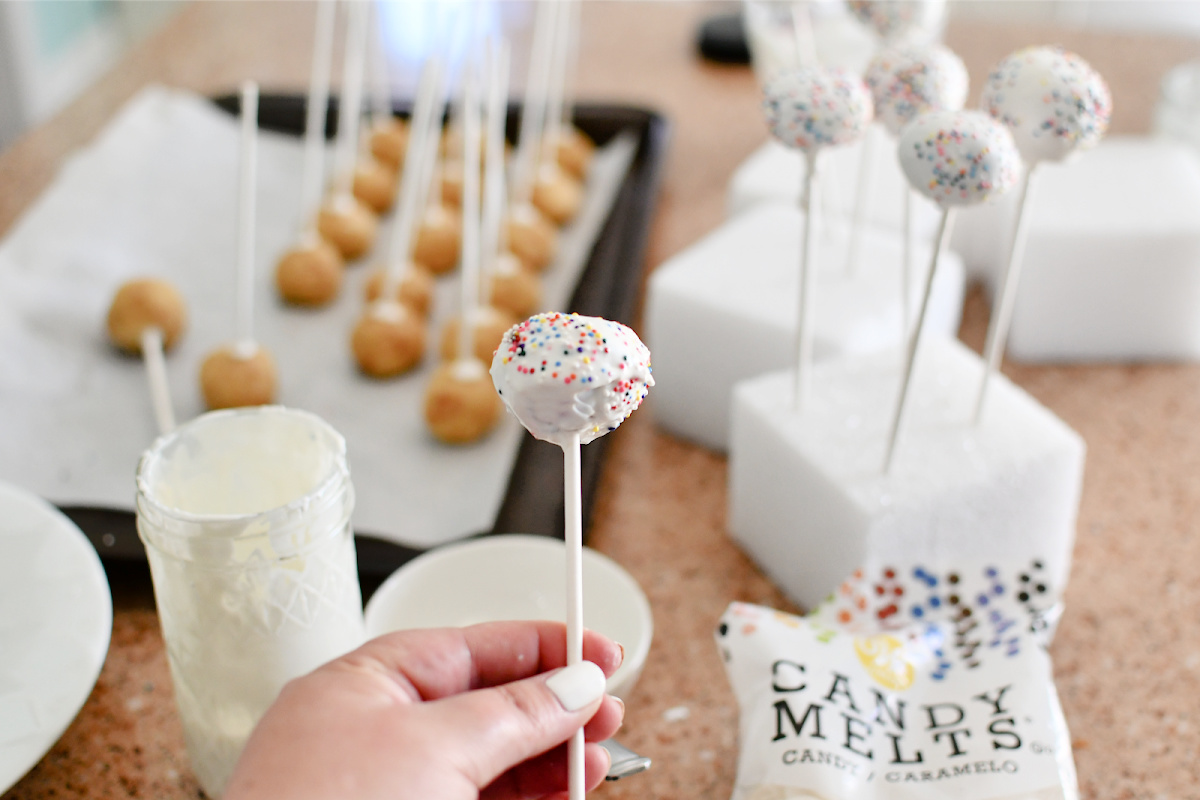
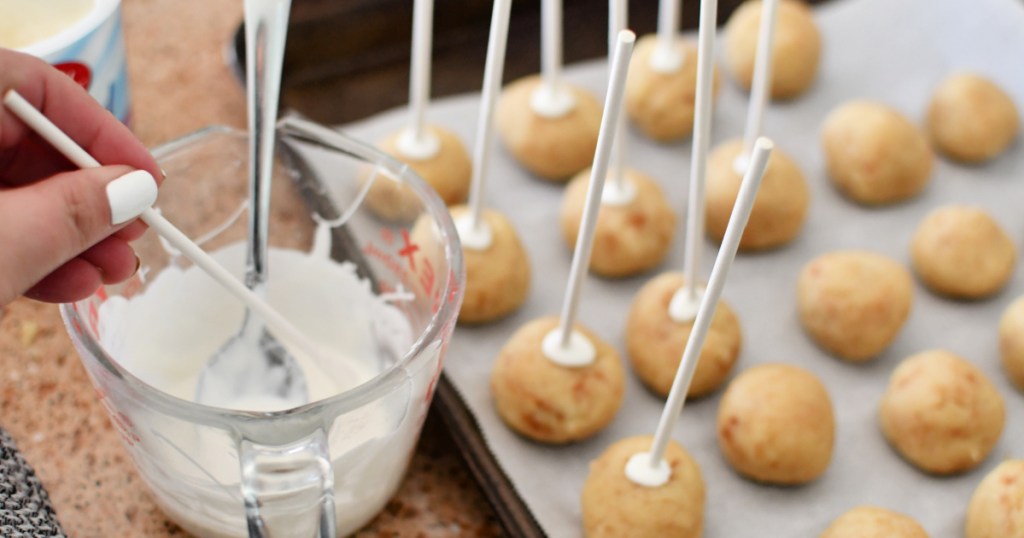
- To avoid the ball from falling off the stick, make sure to dip the cake pop stick in the candy melts first, insert it halfway into the cake ball, and then freeze. Otherwise, they may fall off the stick when dipping in the candy melts to coat. I had some fails and then stuck the cake balls with sticks in my freezer, and it worked much better!
-
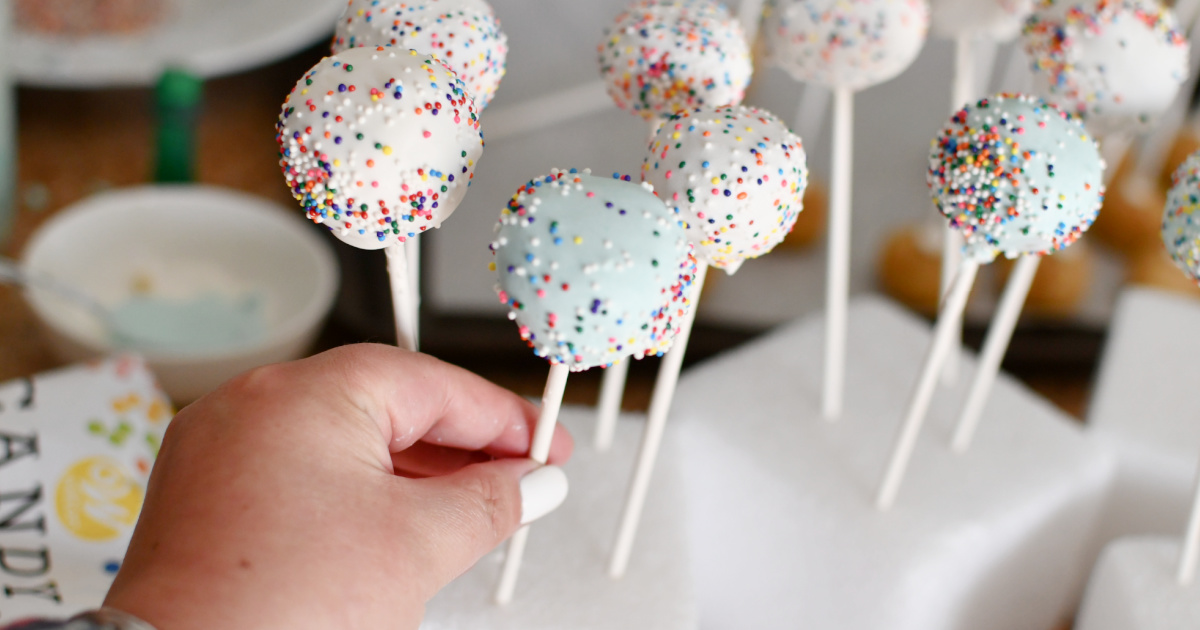
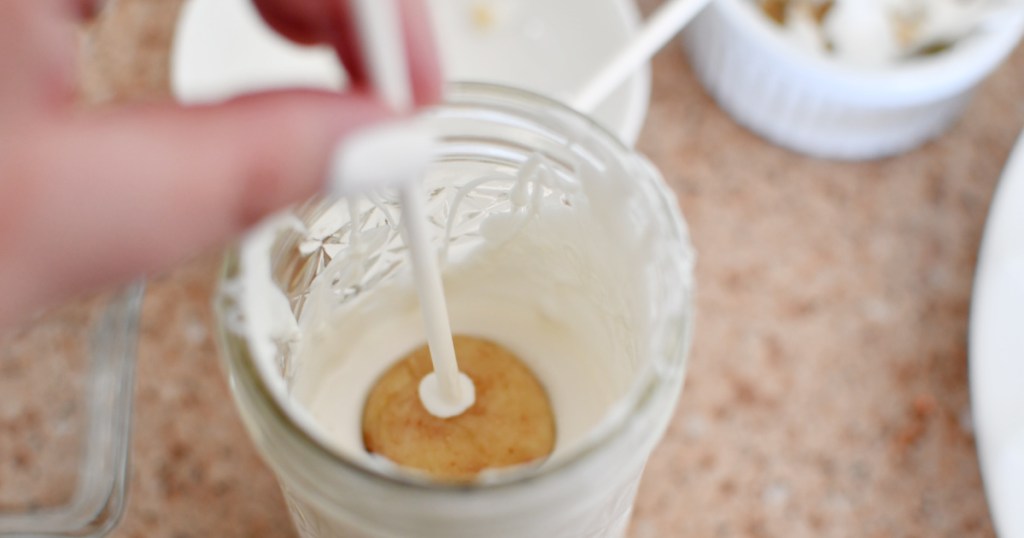
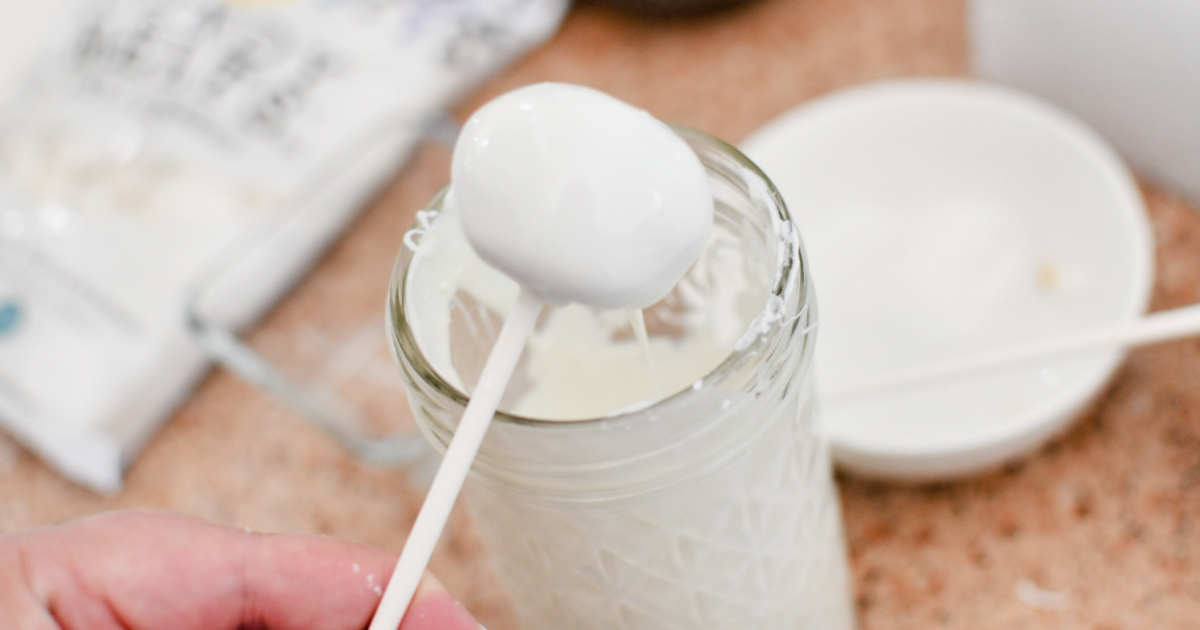
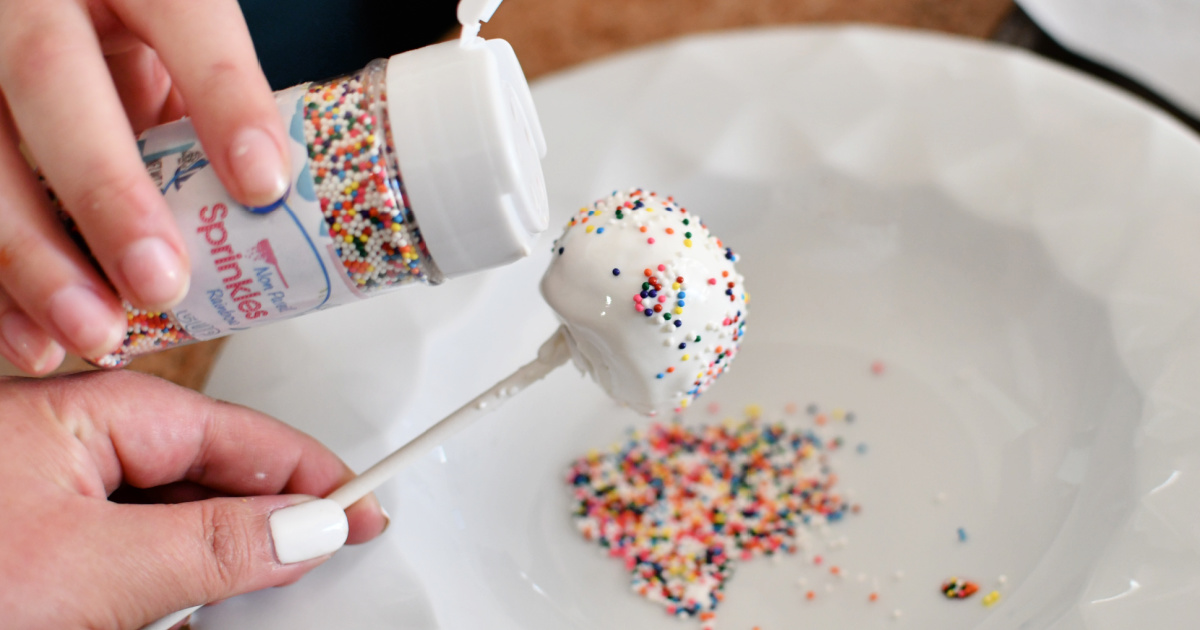
- When dipping the cake pop in the candy melts, dip straight down, and back up. Don’t twist or pull, as they fall out easily. Then just lightly tap the excess candy off.
-
- Use a tall skinny jar or cup to dip into the candy melts. You will want a deep container so they can dunk all the way in one motion
-
- Adding a little vegetable oil to the candy melts when microwaving helps them melt nice and thin and smooth. If the candy melts start getting too thick, go ahead and stick them back in the microwave to melt again.
-
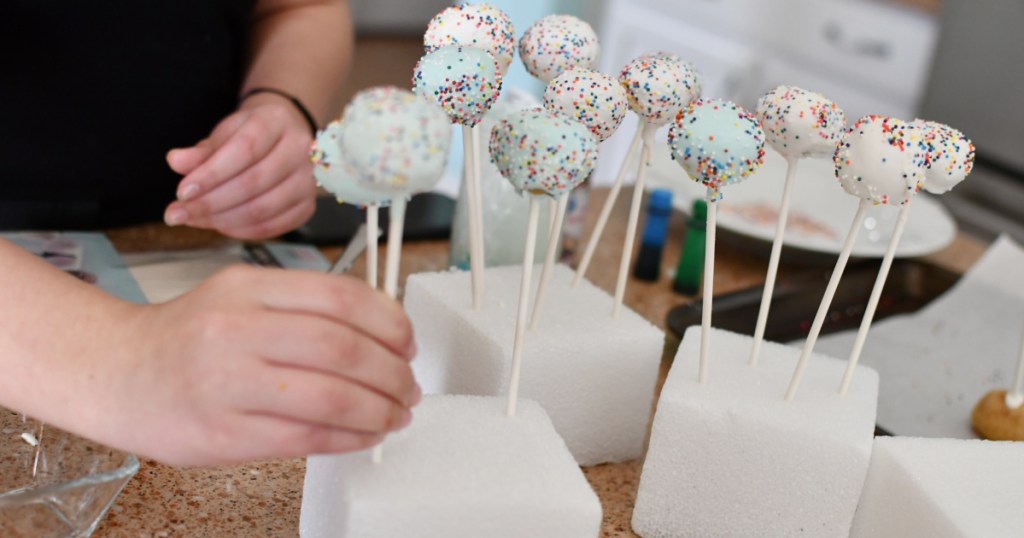
- You’ll need something to keep the dipped cake pop upright while it completely dries. I picked up some floral foam from the dollar store that worked nicely.
-
- How do I store cake pops after decorating? After they are dry, you can store them in a container with lid in the fridge for 5-7 days. The candy dries pretty firm, so they actually stay nice. Another idea is to individually wrap them in tiny cellophane bags like these.
Cake Pops (Using Boxed Cake Mix)
yield: 30 SERVINGS
prep time: 30 MINUTES
cook time: 30 MINUTES
total time: 60 MINUTES
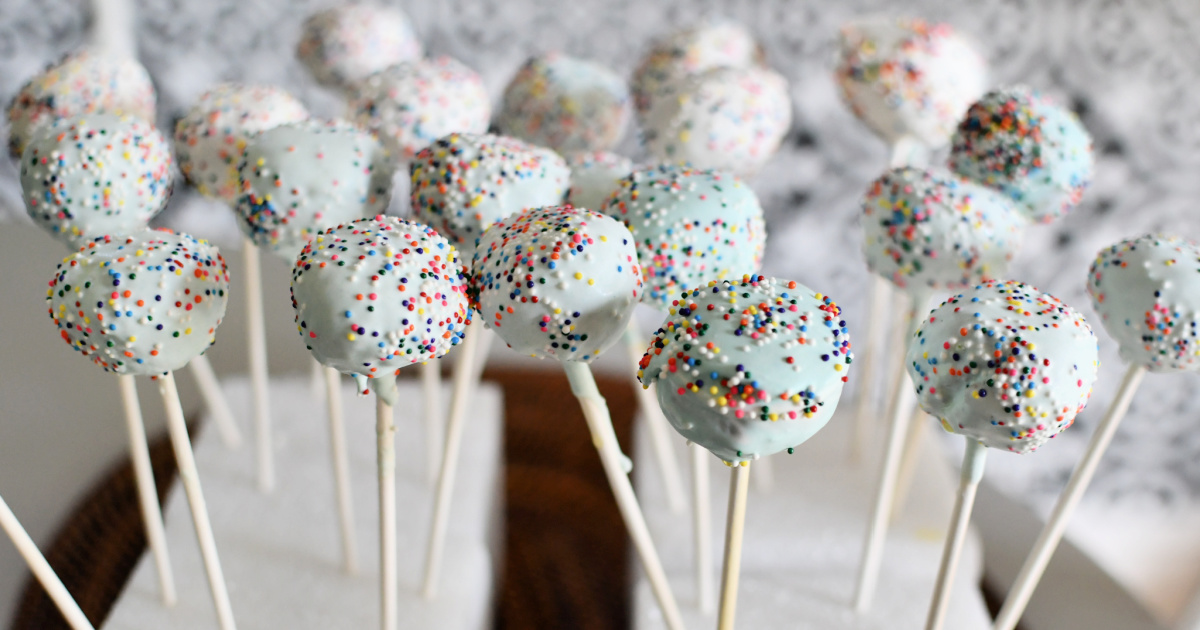
Cake balls dipped in candy melts and decorated with sprinkles.
Ingredients
Directions
1
Make the boxed cake in a 9x13 pan according to package ingredients and directions. Let it cool.
2
Cut the browned edges of the cake off. Crumble the rest in a large mixing bowl using your hands.
3
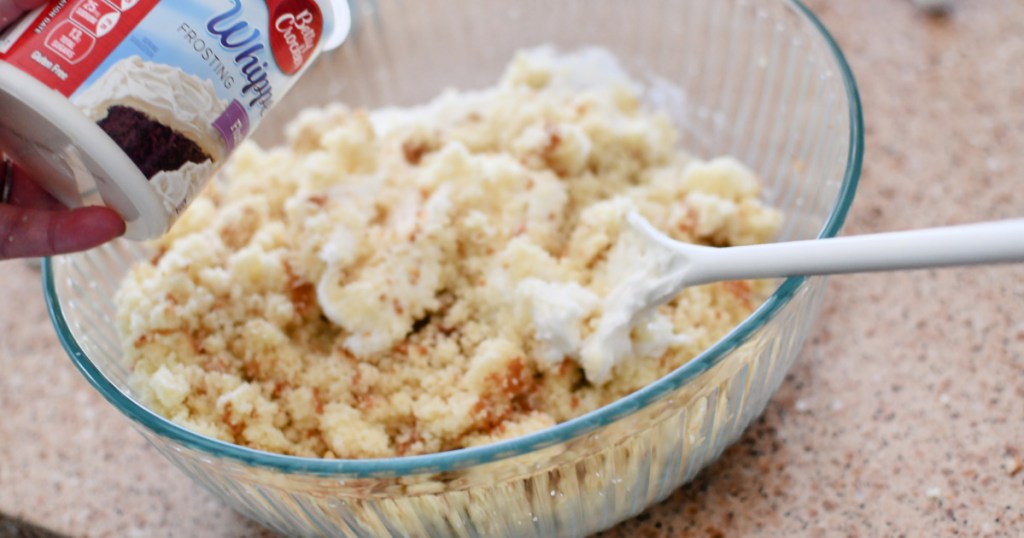
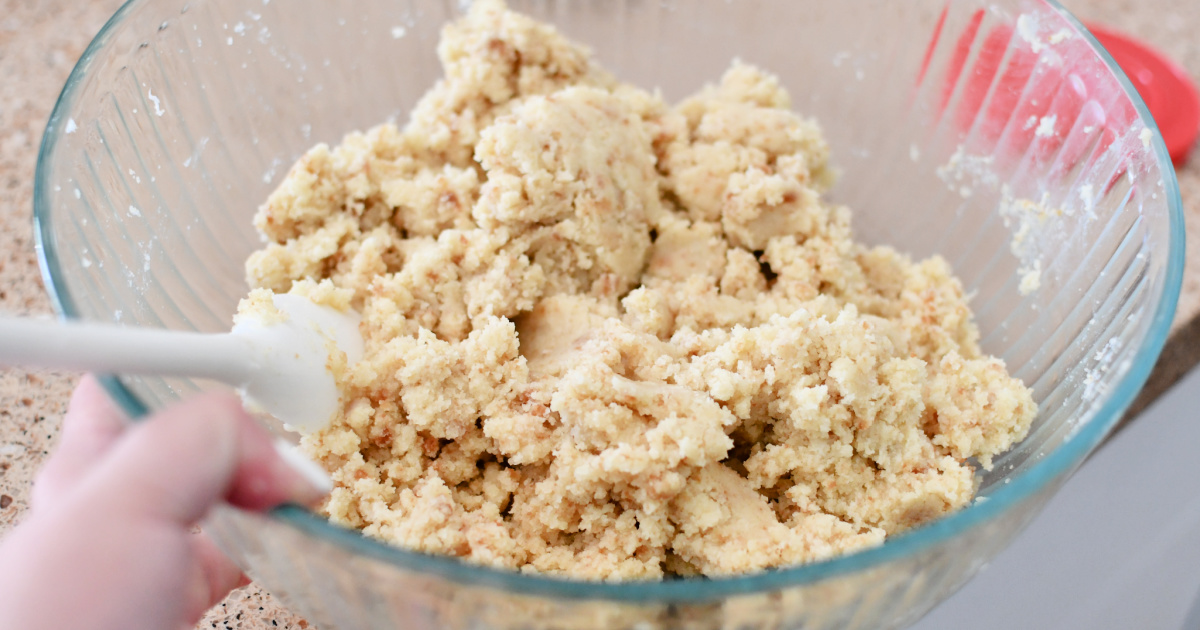
Add half of the container of frosting and continue mixing.
4
Roll cake balls using a cookie scoop or something similar to scoop up cake, and then use hands to roll into balls. Place on a parchment paper-lined cookie sheet pan.
5
Melt about 1/4 cup of the candy melts in the microwave for 30 seconds at a time in a small microwaveable container until melted, stirring between each time.
6
Dip the sticks into the melted mixture, and insert halfway through the cake pop. Repeat that process for each of them.
7
Place them in the freezer for 2 hours.
8
Place the rest of the candy melts in a microwave-safe container with 1/4 teaspoon of vegetable oil (which helps melt it smoother). Melt in the microwave for 30 seconds at a time, stirring between each round. You can also use food coloring to mix in and tint white candy melts as I did here with some of them.
9
Pour the mixture into a tall, narrow cup or jar.
10
Dip each cake pop straight down and up into the candy melts. Lightly tap off the excess.
11
Add sprinkles, and place in floral foam to prop up and let dry. Enjoy!

This dessert recipe is fun and frugal!
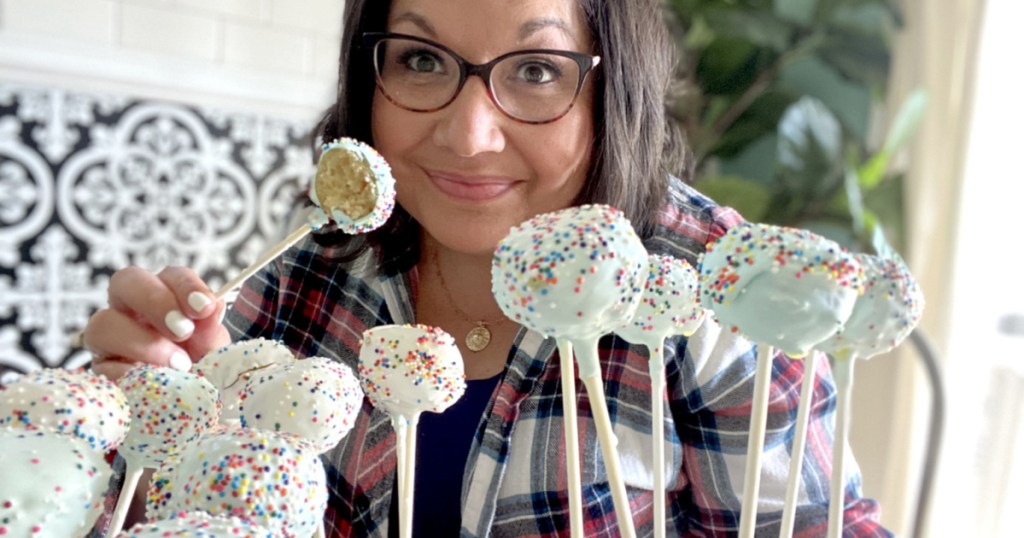
Using the white cake and white frosting with sprinkles created a delicious cake pop! It reminded me of those coated Circus Cookies actually. I decorated these with my daughter and it was extra fun to have a helper during that process.
If you’re in a rush, cake pops may not be the quickest project, but they sure are cute and taste amazing!
Check out what my teammate Jenna had to say after making this recipe:
“This recipe was as much fun as the edible cookie dough and is officially a household favorite! We often get cake pops from our local Starbucks and it’s basically the kids’ favorite treat of all time! These are easy to make and soooooo much cheaper than SB! It probably cost around $6 for the whole recipe, and it made a TON of cake pops! And just think of all the flavor possibilities!
I love the tip to put the melted candy wafers into a jar, that was awesome and made it so easy to coat the cake pops! The cookie scoop was definitely a great suggestion! Putting the melted candy onto the stick then into the cake pop? Brilliant!! This worked out so well and they held together beautifully!”

Red velvet with cream cheese are the absolute best! I only make them at Christmas because I have no self control lol! Using white or green candy coating is perfect for the season. These would be cute for Valentine’s too!
Lol same here. I need a recipe for 1 cake pop. 😂
I would be right there with you!! I love red velvet! Would you mind sharing your recipe with me? I’m thinking Christmas in July could use some red velvet cake pops 🤤🤤😂
I have some of the special pans that make the round cake balls. Don’t have to do the steps of crumbling the cake, mixing in frosting, rolling into balls, etc. They can also make donut holes, brownie balls, cornbread balls, & just about anything! The pans are pretty reasonable too. Kids sure love things in ball form too lol 😁
browniesmomma, this is so smart. I will be looking for these pans as they could make this project a lot more doable. Great post and good advice, H2S. Always learning something new on here.
Great timing! Our daughter wants to make Minecraft cake pops for her brother’s 11th birthday next week 🙂
Oh that sounds fun! Enjoy!